background image

Содержание KUIC15NRXS2

Страница 1: ...ur website at www kitchenaid com In Canada for assistance installation and service call 1 800 807 6777 or visit our website at www KitchenAid ca MACHINE A GLA _ONS Au Canada pour assistance installation ou service composez le 1 800 807 6777 ou visitez notre site Web www KitchenAid ca Table of Contents Table des matieres 2 W10340960A ...

Страница 2: ...E DES MATIERES SleCURITle DE LA MACHINE A GLAQONS 15 INSTRUCTIONS D INSTALLATION 15 Deballage de la machine glagons 15 Exigences d emplacement 16 Specifications _lectriques 16 Specifications de I alimentation en eau 16 Nivellement 17 Raccordement la canalisation d eau 17 Raccordement au drain de vidange 18 Porte de la machine glagons 19 Sons normaux 21 UTILISATION DE LA MACHINE _ GLAQONS 21 Foncti...

Страница 3: ... so can result in back or other injury Removing Packaging Materials Remove tape and glue from your ice maker before using To remove any remaining tape or glue from the exterior of the ice maker rub the area briskly with your thumb Tape or glue residue can also be easily removed by rubbing a small amount of liquid dish soap over the adhesive with your fingers Wipe with warm water and dry Do not use...

Страница 4: ...nd ordinances If a mating wall receptacle is not available it is the personal responsibility of the customer to have a properly grounded 3 prong wall receptacle installed by a qualified electrician A cold water supply with water pressure of between 30 and 120 psi 207 and 827 kPa is required to operate the ice maker If you have questions about your water pressure call a licensed qualified plumber R...

Страница 5: ...le wrenches 1 4 nut driver NOTE Do not use a piercing type or e 4 76 mm saddle valve which reduces water flow and clogs more easily Connecting the Water Line 1 Turn off main water supply Turn on nearest faucet long enough to clear line of water 2 Using a 1 2 copper supply line with a quarter turn shutoff valve or the equivalent connect the ice maker as shown A I B A Bulb B Nut 3 4 Now you are read...

Страница 6: ...m air gap C PVC drain reducer D Center of drain should be 23 58 4 cm from front of door with or without the 3 4 1 91 cm panel on the door The drain should also be centered from left to right 7_ 18 56 cm from either side of the ice maker Drain Pump System on some models IM PO RTANT Connect the ice maker drain to your drain in accordance with the International Plumbing Code and any local codes and o...

Страница 7: ...er end cap D Bottom corner open no end cap 6 Set the door aside Reverse Hinges 1 Unscrew and remove the top hinge Replace the screws in the empty hinge holes 2 Remove the screws from the bottom of the opposite side of the ice maker cabinet Turn the top hinge upside down so that the hinge pin points up Place the hinge on the bottom opposite side of the ice maker and tighten screws 3 Remove the plas...

Страница 8: ...ound As each cycle ends you may hear a gurgling sound due to the refrigerant flowing in your ice maker You may hear air being forced over the condenser by the condenser fan During the harvest cycle you may hear a thud when the ice sheet slides from the evaporator onto the cutter grid When you first start the ice maker you may hear water running continuously The ice maker is programmed to run a rin...

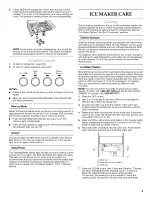
Страница 9: ...ions Exterior Surfaces Wash the exterior enamel surfaces and gaskets with warm water and mild soap or detergent Wipe and dry Regular use of a good household appliance cleaner and wax will help maintain the finish Do not use abrasive cleaners on enamel surfaces as they may scratch the finish For products with a stainless steel exterior use a clean sponge or soft cloth and a mild detergent in warm w...

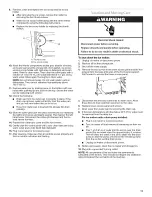
Страница 10: ...or disconnect power 2 Open the storage bin door and remove any ice that is in the bin 3 Remove the drain cap from the water pan and drain thoroughly Replace the drain cap securely on the water pan If the drain cap is loose water will empty from the water pan and you will have either thin ice or no ice 4 Remove the two screws that hold the cutter grid cover in place and remove the cutter grid cover...

Страница 11: ...ew Reconnect the cutter grid harness and the ice level sensor harness 14 Replace the cutter grid cover and the two screws 15 Gently wipe the control panel with a soft clean dishcloth using warm water and a mild liquid dish detergent 16 Plug in ice maker or reconnect power 17 After cleaning make sure that all controls are set properly and that no control indicators are flashing To shut down the ice...

Страница 12: ... sure that the drain cap is tight and the water drain pan pump is securely attached to the water pan Is there ice between the evaporator plate and the cutting grid Check that the ice maker is level See Leveling If the ice maker is level and the problem persists run a cleaning cycle See Cleaning Ice maker runs but produces no ice Is the control set to ON Be sure that the control is set to ON Is the...

Страница 13: ...r replacement parts we recommend that you only use factory specified parts Factory specified parts will fit right and work right because they are made with the same precision used to build every new KITCHENAID appliance To locate factory specified parts in your area call us or your nearest designated service center khe L S A Call the KitchenAid Customer eXperience Center toll free 1 800 422 1230 O...

Страница 14: ...eezer product failures 7 Pickup and delivery This major appliance is intended to be repaired in your home 8 Repairs to parts or systems resulting from unauthorized modifications made to the appliance 9 Expenses for travel and transportation for product service if your major appliance is located in a remote area where service by an authorized KitchenAid servicer is not available 10 The removal and ...

Страница 15: ...onge Utiliser deux ou plus de personnes pour deplacer et installer la machine glagons Deconnecter la source de courant electrique avant le nettoyage Deconnecter la source de courant electrique avant I entretien Replacer pieces et panneaux avant de faire la remise en marche CONSERVEZ CES iNSTRUCTIONS INSTRUCTIONS D INSTALLATION Risque du poids excessif Utiliser deux ou plus de personnes pour d6plac...

Страница 16: ...n respect de ces instructions peut causer un d_c_s un incendie ou un choc _lectrique Avant de deplacer la machine glagons son emplacement definitif il est important de s assurer que le raccordement electrique a ete fait correctement II faut un circuit d alimentation electrique CA seulement de 115 volts 60 Hz de 15 ou 20 amperes mis la terre conformement aux instructions du Code national de I elect...

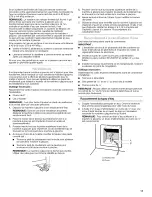
Страница 17: ...nt de la machine glagons pour reperer les vis de nivellement qui se trouvent sur le fond avant de la machine glagons 4 Au moyen d une cle a molette modifier la hauteur des pieds comme suit Tourner le pied de nivellement vers la droite pour abaisser ce c6te de la machine a glagons Tourner le pied de nivellement vers la gauche pour soulever ce c6te de la machine a glagons REMARQUE La machine a glago...

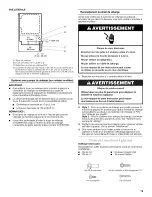
Страница 18: ...v_e d eau B Tuyau d a_ration seulement pour modeles avec pompe de vidange C Bride pour tuyau d admission d eau et connecteur _ la canalisation d afimentation en eau D Tuyau de vidange seulement pour modeles avec pompe de vidange A C D A Canalisation jusqu b la C Virole achet_e machine _ glagons D Canalisation d alimentation en B E crou achet_ eau de la machine _ glaqons 8 Installer la bride du tuy...

Страница 19: ...n mettre la machine glagons en place Risque de choc _lectrique Brancher sur une prise a 3 alv_oles reli_e a la terre Ne pas enlever la broche de liaison a la terre Ne pas utiliser un adaptateur Ne pas utiliser un c_ble de rallonge Le non respect de ces instructions peut causer un d_c_s un incendie ou un choc _lectrique 1 Brancher sur une prise 3 alveoles reliee la terre Risque du poids excessif Ut...

Страница 20: ...e pointe vers le haut Placer la charniere du c6te oppose inferieur de la machine glagons et serrer les vis 3 Enlever la douille de plastique de I axe de la charniere de la vieille charniere inferieure et la replacer sur la nouvelle charniere inferieure 4 0ter les vis de la vieille charniere inferieure et la charniere Remettre les vis dans les trous de charniere vides 5 Oter les vis du c6te superie...

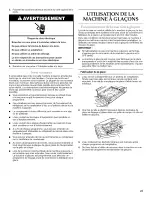
Страница 21: ... par le ventilateur du condenseur Au cours du programme de recolte vous pouvez entendre un bruit sourd Iorsque la plaque de glace glisse de I evaporateur sur la grille de coupe Lors de la mise en marche initiale de la machine a gla ons il est possible que vous entendiez I eau couler continuellement La machine gla ons est programmee pour effectuer un programme de rin _ageavant de commencer a fabriq...

Страница 22: ...ne gla ons voir Systeme de la machine glagons de la section Nettoyage Le systeme de fabrication des glagons et le condenseur air refroidi doivent etre nettoyes regulierement pour que la machine glagons puisse fonctionner au maximum de son efficacite et afin d eviter une defaillance prematuree des composants du systeme Voir les sections Systeme de la machine glagons et Condenseur Surfaces ext_rieur...

Страница 23: ...ide de la brosse d un aspirateur 5 Remettre le panneau d acces inferieur en place et le fixer I aide des quatre vis 6 Brancher la machine a gla ons ou reconnecter la source de courant electrique Composants int_rieurs 1 2 3 4 5 Debrancher la machine a gla ons ou deconnecter la source de courant electrique Ouvrir la porte oQ se trouve le bac gla ons et retirer tout gla on qui s y trouve Retirer le c...

Страница 24: ...a glace sera mince ou il n y aura pas de glace Le tuyau provenant du bac eau est inser6 dans I ouverture de vidange du bac d entreposage 13 Glisser la grille de coupe en place et la fixer en remettant la vis du c6te droit et la cale d espacement en plastique Serrer ensuite la vis du c6te gauche Reconnecter les faisceaux de la grille de coupe et du detecteur de niveau de gla ons 14 Reinstaller le c...

Страница 25: ...n vert s allume t il Iorsque le bouton Clean nettoyage est enfonc_ La machine glagons est sous tension mais necessite peut etre un nettoyage Voir Nettoyage La machine a gla ons comporte t elle une pompe de vidange Si une grande quantite d eau a ete ajoutee a la machine glagons attendre quelques minutes pour que la pompe de vidange evacue I eau S il y a de I eau stagnante dans le bac verifier pour ...

Страница 26: ...un agglomerat Rompre les agglomerats avec la pelle glace fournie I I I I _ I lI I I _ I I I Risque du poids excessif Utiliser deux ou plus de personnes pour d4placer et installer la machine a gla ons Le non respect de cette instruction peut causer une blessure au dos ou d autre blessure Le tuyau de vidange est il align4 au dessus du drain de vidange Deplacer la machine glagons pour qu elle s align...

Страница 27: ...mmage subi par le fini du gros appareil menager moins que ces dommages ne resultent de vices de materiaux ou de fabrication et ne soient signales a KitchenAid dans les 30 jours suivant la date d achat 6 Toute perte d aliments ou de medicaments due une defaillance du refrigerateur ou du congelateur 7 Le ramassage et la livraison Ce gros appareil menager est con u pour etre repare domicile 8 Les rep...

Страница 28: ...devrez connaitre le numero de modele et le numero de serie au complet Vous trouverez ces renseignements sur la plaque signaletique situ6e sur le produit Nom du marchand Adresse Numero de t_lephone Numero de module Numero de serie Date d achat W 10340960A 11 1 o 2010 All rights reserved Registered Trademark TM Trademark of KitchenAid U S A KitchenAid Canada licensee in Canada Printed in U S A Tous ...

Отзывы: