background image

10  

|  BLENDER SAFETY

ELECTRICAL EQUIPMENT WASTE DISPOSAL

Disposal of packing material 

The packing material is 100% recyclable 

and is marked with the recycle symbol 

. The various parts of the packing 

must therefore be disposed of 

responsibly and in full compliance  

with local authority regulations 

governing waste disposal. 

Scrapping the product 

- This appliance is marked in compliance 

with European Directive 2012/19/EU, 

Waste Electrical and Electronic 

Equipment (WEEE). 
- By ensuring this product is disposed  

of correctly, you will help prevent 

potential negative consequences for  

the environment and human health, 

which could otherwise be caused  

by inappropriate waste handling  

of this product. 


- The symbol 

 on the product or 

on the accompanying documentation 

indicates that it should not be treated  

as domestic waste but must be taken  

to an appropriate collection centre  

for the recycling of electrical and  

electronic equipment. 
For more detailed information about  

treatment, recovery, and recycling of  

this product, please contact your 

local city office, your household waste 

disposal service or the shop where you 

purchased the product.

BLENDER SAFETY

ELECTRICAL REQUIREMENTS

Wattage:

 550


Watts

Voltage:

 220-240 Volts

Frequency:

 50-60 Hz

NOTE: 

If the plug does not fit in the 

outlet, contact a qualified electrician. 

Do not modify the plug in any way.  

Do not use an adapter.

Do not use an extension cord. If the 

power supply cord is too short, have a 

qualified electrician or serviceman install 

an outlet near the appliance.

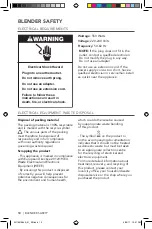
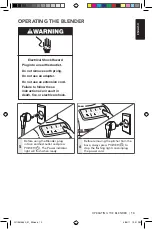
Electrical Shock Hazard

Plug into an earthed outlet.
Do not remove earth prong.
Do not use an adapter.
Do not use an extension cord.
Failure to follow these 
instructions can result in 
death, fire, or electrical shock.

W11091684A_01_EN.indd   10

4/26/17   12:31 PM

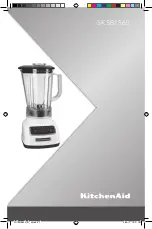
Содержание 5KSB1565

Страница 1: ...5KSB1565 W11091684A_01_EN indd 1 4 26 17 12 31 PM ...

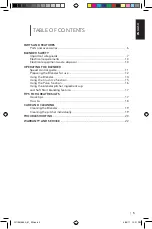
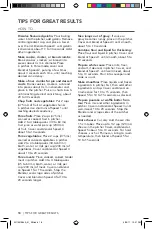
Страница 2: ...ol guide 11 Preparing the Blender for use 12 Using the Blender 14 Using the Crush Ice function 15 Using the Pulse function 16 Using the blender pitcher ingredient cup and Soft Start blending feature 17 TIPS FOR GREAT RESULTS Quick tips 17 How to 18 CARE AND CLEANING Cleaning the Blender 19 Cleaning the pitcher individually 19 TROUBLESHOOTING 20 WARRANTY AND SERVICE 22 W11091684A_01_EN indd 5 4 26 ...

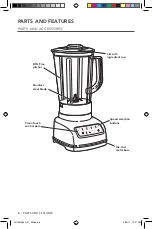
Страница 3: ...URES PARTS AND FEATURES PARTS AND ACCESSORIES BPA Free pitcher Speed selection buttons Die cast metal base Clean Touch control pad Stainless steel blade Lid with ingredient cup W11091684A_01_EN indd 6 4 26 17 12 31 PM ...

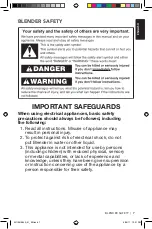
Страница 4: ... personal injury 2 To protect against risk of electrical shock do not put Blender in water or other liquid 3 This appliance is not intended for use by persons including children with reduced physical sensory or mental capabilities or lack of experience and knowledge unless they have been given supervision or instruction concerning use of the appliance by a person responsible for their safety W1109...

Страница 5: ... taken when used near children 6 Avoid contacting moving parts Keep hands hair clothing as well as spatulas and other utensils away from blade during operation to reduce the risk of injury to persons and or damage to the Blender 7 Always disconnect the Blender from the supply if it is left unattended and before assembling disassembling or cleaning Never leave the appliance unattended while it is i...

Страница 6: ...lashing light indicates ready to operate avoid any contact with blades or moveable parts 14 Do not use the Blender outdoors 15 Be careful if hot liquid is poured into the Blender as it can be ejected out of the appliance due to sudden steaming 16 Always operate Blender with lid in place 17 The use of attachments not recommended or sold by KitchenAid may cause fire electric shock or injury 18 This ...

Страница 7: ...be treated as domestic waste but must be taken to an appropriate collection centre for the recycling of electrical and electronic equipment For more detailed information about treatment recovery and recycling of this product please contact your local city office your household waste disposal service or the shop where you purchased the product BLENDER SAFETY ELECTRICAL REQUIREMENTS Wattage 550 Watt...

Страница 8: ... tip Crush ice Frozen yogurt based drink 5 Fruit juice from frozen concentrate 1 3 Fruit based drink thin Crush ice 5 Fruit based drink thick Crush ice 1 Fruit based sauce 1 Grated hard cheese 5 ITEM SPEED Gravy 3 Ice milk based drink Crush ice 5 Meat salad for sandwich filling Pulse 2 Mousse 5 Oatmeal 4 Pancake batter 3 Pesto 2 Puréed fruit Baby food 4 Puréed meat Baby food meat 4 Puréed vegetabl...

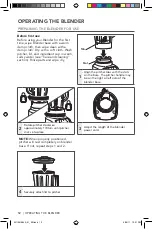
Страница 9: ...PARING THE BLENDER FOR USE OPERATING THE BLENDER Before first use Before using your Blender for the first time wipe Blender base with a warm damp cloth then wipe clean with a damp cloth Dry with a soft cloth Wash pitcher lid and ingredient cup in warm sudsy water see Care and cleaning section Rinse parts and wipe dry 1 Align the pitcher tabs with the slots on the base The pitcher handle may be on ...

Страница 10: ... ready 6 Before removing the pitcher from the base always press POWER to stop the flashing lights and unplug the power cord Electrical Shock Hazard Plug into an earthed outlet Do not remove earth prong Do not use an adapter Do not use an extension cord Failure to follow these instructions can result in death fire or electrical shock W11091684A_01_EN indd 13 4 26 17 12 31 PM ...

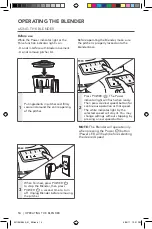
Страница 11: ... indicator light by the selected speed will stay lit You may change settings without stopping by pressing a new speed button USING THE BLENDER Before use While the Power indicator light or the Pulse function indicator light is on Do not interfere with blade movement Do not remove pitcher lid OPERATING THE BLENDER Before operating the Blender make sure the pitcher is properly locked onto the blende...

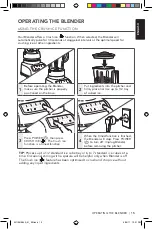
Страница 12: ...ggered intervals at the optimal speed for crushing ice or other ingredients TIP Process up to 1 2 standard ice cube tray or 6 to 7 standard ice cubes at a time Occasional stirring with a spatula will be helpful only when Blender is off The Crush ice feature has been optimised to crush and chop ice without adding any liquid ingredients 3 Press POWER then press CRUSH ICE The Crush ice function is a ...

Страница 13: ...itioned on the base 2 Put ingredients into the pitcher and firmly place lid USING THE PULSE FUNCTION 3 Press POWER then press and hold the PULSE button for the desired amount of blending time 4 When finished press POWER to turn off Unplug Blender before removing the pitcher W11091684A_01_EN indd 16 4 26 17 12 31 PM ...

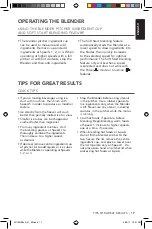
Страница 14: ...ble before blending Begin blending warm foods at Speed 1 Increase to higher speeds one at a time if necessary When blending hot foods or liquids do not fill the blender pitcher to the top Secure the lid remove the centre ingredient cup and place a towel over the lid Operate only on Speed 1 Do not place bare hand on pitcher lid when processing hot foods or liquids USING THE BLENDER PITCHER INGREDIE...

Страница 15: ... to 20 seconds Purée meats Place cooked cubed tender meat in pitcher Add 3 to 4 tablespoons 45 to 60 mL broth water or milk per cup 240 mL of meat Cover and blend on Speed 1 for 10 seconds Stop the Blender and scrape sides of pitcher Cover and blend on Speed 4 for 10 to 20 seconds longer Take lumps out of gravy If sauce or gravy becomes lumpy place in the pitcher Cover and blend at Speed 3 until s...

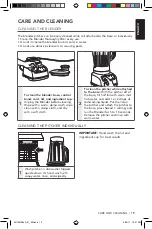
Страница 16: ...asive cleansers or scouring pads CLEANING THE BLENDER CARE AND CLEANING 1 To clean the blender base control band cord lid and ingredient cup Unplug the Blender before cleaning Wipe with a warm damp cloth wipe clean with a damp cloth and dry with a soft cloth 2 To clean the pitcher while attached to the base With the pitcher off of the base fill half full with warm not hot water and add 1 or 2 drop...

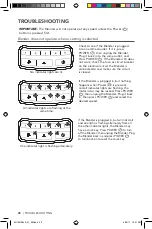
Страница 17: ...essed and all indicator lights are flashing the motor rotor may be locked Press POWER then unplug the Blender Plug it back in then press POWER and select the desired speed IMPORTANT The Blender will not operate at any speed unless the Power button is pressed first Blender does not operate when a setting is selected One indicator light is flashing alternately If the Blender is plugged in but will n...

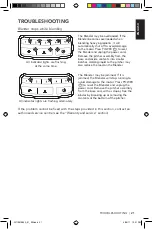
Страница 18: ...ndicator lights are flashing at the same time The Blender may be overloaded If the Blender becomes overloaded when blending heavy ingredients it will automatically shut off to avoid damage to the motor Press POWER to reset the Blender and unplug the power cord Remove the pitcher assembly from the base and divide contents into smaller batches Adding liquid to the pitcher may also reduce the load on...

Страница 19: ...ce In U K and Ireland For any questions or to find the nearest KitchenAid Authorised Service Centre please find our contact details below NOTE All service should be handled locally by an Authorised KitchenAid Service Centre Contact number for U K and Northern Ireland Tollfree number 0800 988 1266 calls from mobile phones are charged standard network rate or call 0194 260 5504 Contact number for Ir...

Страница 20: ...W11091684A 03 17 2017 All rights reserved Specifications subject to change without notice W11091684A_19_BkCov indd 296 4 26 17 12 38 PM ...

Отзывы: