background image

If your dealer have programmed QT/DQT in your transceiver, 
when you select the channel with this function, you can only 
hear the calling with the same QT/DQT tone.

This function can make you filter the unnecessary calling, even 
as if you use the special channel when the QT/DQT enabled, 
the other party with the same QT/DQT code still can receive 
your calling.

To unlock the locks, hold down FUNC for more than 1 second, 
and Press DIAL.

TIME-OUT-TIMER (TOT)

The purpose of the time-out timer is to automatically interrupt 
continuous transmitting After a specified time elapses. Holding 
down [PTT] for longer than the Programmed time causes the 
transceiver to stop transmitting and Generate a warning tone. 
Releasing [PTT] cancels the warning tone.

Your dealer also can program a warning function that alerts 
you just Before the time-out timer stops your transmission. 
After [PTT] is held Down for the time specified by your dealer, 
a warning tone sound that Is different from the time-out timer 
tone.

Busy Channel Lockout

Activated or deactivated by your dealer, this function prevents 
you from interfering with other stations that may be using the 
same channel. Pressing [PTT] while the selected channel is in 
use causes your transceiver to generate an audible warning 
tone. Your transceiver is inhibited in this situation so it will not 
transmit. Release [PTT] to cancel the alarm and restore the 
receive mode.

    Releasing [PTT] causes the squelch to open and the LED to 
flash Orange. When the transceiver receive a signal, the LED 
lights green, After the transceiver receives no further signals, 
the LED flashes orange again. After a period of time 
programmed by your Dealer passes during which no signal is 
received, the squelch closes And LED goes OFF, Press the 
[MONI] also causes the squelch to close and the LED to go 
OFF.

Keypad Lockout

This function can prevent you from any error operation to your 
transceiver.

Your dealer may set Keypad Lockout Alternatively:  CHANNEL 
SELECTOR  Or  12/16  key.

    CHANNEL SELECTOR  can lock any key other than MONI, 
FUNC, DIAL, PTT, Power/Volume.

     12/16  key can only lock DIAL.

To lockout the above keys, hold down FUNC for more than 1 
second and Press DIAL key.

     L  appears on display.

LAMP button


  You can set [LAMP] IN AUTO, ENABLE or DISABLE mode. 
In auto mode, the display is illuminated for 5 seconds after  
Being pressed any key other than [PTT] , in ENABLE mode, 
the lamp  Will light after the power switched on, in DISABLE 
mode, LAMP  Switches off.

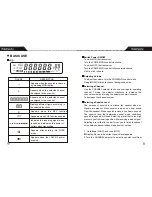
AUXILIARY FUNCTIONS

2

21

2

22

Содержание PT2508

Страница 1: ...PT2508 3508 VHF UHF HANDHELD TRANSCEIVER 0681 0681 INSTRUCTION MANUAL ...

Страница 2: ...ver WARNING Explosive atmospheres gases dust fumes etc Turn off and do not operate your transceiver while taking on fuel or while parked PRECAUTIONS Please observe the following precautions to prevent fire personal Injury and transceiver damage It is suggested that transmit period is 1 minute 4 minute for receiving Long period of transmitting or in high power mode may heat the back Of the transcei...

Страница 3: ...lecting a squelch level 10 Calling 11 Receiving 11 Channel scan 11 channel lock 12 standby channel 13 DTMF calling 13 manual dialing 13 storing dtmf numbers 14 confirming stored dtmf numbers 15 Transmitting stored DTMF numbers 15 erasing stored DTMF numbers 15 Redialing 16 Code squelch 17 receiving 17 transmitting 18 Selective call 19 Receiving 19 transmitting 20 QT DQT 21 Auxiliary features 21 ke...

Страница 4: ... first time recharging Repeating the charge discharge cycles two or three times the capacity will reach its best status The battery is not charged at the factory Charge the battery before use Please see the following steps UNPACKING AND CHECKING EQUIPMENT PREPARATION Battery Adaptor 1 Connect the adaptor to the charger then insert the adaptor into the power socket 2 Insert the battery into the cha...

Страница 5: ...charged or there is no low battery alarm If do this you will overcharge the battery which may shorten its life or damage it After charging the battery fully take it out from the Charger If having charged the battery do not insert the battery back into the changer again when the changer powers on in that case the battery will become overcharged thus the battery will be damaged Note Do not short the...

Страница 6: ...he supplied connecting loop 1 Switch power off and remove the panel from cap of MIC SP 2 Insert the speaker microphone plugs into the SP MIC jack 3 Circle the LOOP to the position 4 5cm from plug and insert the plug into the loop and fasten the loop 4 Cut off the bottom of loop and insert the pin into the loop of the right side of transceiver If the loop is removed and used again later make sure 1...

Страница 7: ...enable the other functions of the transceiver SCAN key Used for controlling the Scan function or used with FUNC key Together to exclude the locked channel from scanning and set Condition of indicator of LCD LOW key Used for setting the transmit power DTMF keypad Used for storing or transmitting DTMF numbers MIC SP jacks If desired connect a speaker microphone here POWER VOL control Turning clockwi...

Страница 8: ...he volume turn the POWER VOLcontrol while Using MONI to listen to channel background noise Selecting a Channel Use the CHANNEL selector to choose your regular operating channel Turning the selector clockwise to increase the channel number and turning the selector counterclockwise To decrease the channel number Selecting a Squelch Level The purpose of squelch is to silence the speaker when no Signa...

Страница 9: ...y key to complete the selection The original display is restored CHANAL SCAN Scan is a useful feature for monitoring activity on the channels programmed in the transceiver When scanning the transceiver checks each channel for activity and only stops on a channel if a signal is present The transceiver remains on a busy channel until the channel is no longer Busy unless transceiver check the new sig...

Страница 10: ...F tone is heard Press DIAL while the Storing DTMF Numbers One DTMF number with a maximum of 16 digits can be stored in each of the 9 Auto dial memory channels 1 Press DIAL to enter Dial mode LCD display d 2 Press Key to enter Storing mode 3 Using the keypad enter up to 16 digits maximum for the number that you want to store If incorrect digits are entered press MONI andre enter the entire number 4...

Страница 11: ... the DTMF number to be transmitted 3 Restore to the original display Erasing Stored DTMF Numbers To erase the number stored in memory channel 1 Press DIAL to enter Dialling mode LCD display D 2 Press D key to enter erasing mode LCD display CLrd Press any key except 1 9 to cancel process 3 Enter the Auto dial memory channel 0 9 that REDIALING You can re transmit up to 16 digits maximum that you las...

Страница 12: ...d Passes If your dealer has programmed Transpond an acknowledgement signal is returned from your transceiver to Code Squelch cannot be used on a channel that your dealer has Programmed with Selective Call Note TRANSMITTING 1 Refer to the MANUAL DIAL or Transmitting stored DTMF code to Make a call by DTMF keypad Make sure to enter the correct DTMF Code CH and channel Number displayed on LCD and LED...

Страница 13: ...with Selective Call Note TRANSMITTING 1 Refers to the MANUAL DIAL or Transmitting the stored DTMFcode To make a call with DTMF keypad 2 Make sure to call the ID or Group code and intermediate code that Was programmed in the transceiver When the transmission starts A bar appears on the display and the LED lights red 3 Continue to use the transceiver normally releasing PTT to receive and holding dow...

Страница 14: ...e same channel Pressing PTT while the selected channel is in use causes your transceiver to generate an audible warning tone Your transceiver is inhibited in this situation so it will not transmit Release PTT to cancel the alarm and restore the receive mode Releasing PTT causes the squelch to open and the LED to flash Orange When the transceiver receive a signal the LED lights green After the tran...

Страница 15: ...e voltage level drops further the transceiver stops Transmitting and generates an alarm If this occurs recharge the Battery pack Transmitting Power Press LOW key to select desired output power each time LOW key is Pressed the output power is toggled between low and high power When you choose low power LO appears on display MONITOR You can use MONI key to detect the weak signal in normal condition ...

Страница 16: ...b clock wisely To decrease VOX value turn the knob counter clock wisely If the VOX enabled OF appears on display and 1 indicates Volume 1 2 indicates Volume 2 3 indicates volume 3 3 Press any key to exit setting VOX appears if you select volume from 1 to 3 SELECTABLE QT You can change the preset QT frequencies in some channels of the transceiver temporarily 1 Holding down FUNC key for more than 1 ...

Отзывы: