background image

EN  Before you start

This appliance must be installed correctly by a qualified person, strictly following 

the manufacturer’s instructions.

WARNING: Danger of electric shock! The power supply must be cut off before 

the appliance is installed completely.

•  Only a qualified person in compliance with the instructions provided can install the appliance. 

The manufacturer declines all responsibility for improper installation, which may harm persons 

and animals and cause damage.

•  Check the package and make sure you have all of the parts listed.
•  Decide on the appropriate location for the appliance.
•  This appliance contains glass. Please take care when fitting or handling to prevent personal injury 

or damage to the appliance.

•  The specifications plate is available on this appliance. This plate displays all the necessary identification 

information for ordering replacement parts.

•  If you sell the appliance, give it away, or leave it behind when you move house, please ensure you pass 

on this set of instructions.

Safety

WARNING: In order to prevent overturning this appliance must be installed in an 

appliance larder cabinet and must be used with the wall brackets supplied with 

the cabinet.

WARNING: Installation must be performed by a competent person only. 

This product could be dangerous, cause injury or damage to property 

if incorrectly installed.

•  Some parts could be hazardous to small children.
•  Keep all parts out of reach and do not leave children unattended in the assembly area.
•  Serious or fatal crushing injuries can occur from furniture tip-over.
To prevent this furniture from tipping over it must be permanently fixed to the wall. Fixing devices for 

the wall are not included since different wall materials require different types of fixing devices. Use fixing 

devices suitable for the walls in your home.
•  Prevent children from climbing or hanging on the drawers, doors or shelves.
•  If you are in any doubt as to how to install this product, consult a technically competent person.

CAUTION: Always ensure the product is securely fitted before use.

IMPORTANT RETAIN THIS INFORMATION  

FOR FUTURE REFERENCE: READ CAREFULLY.

All parts and full details on how to assemble your appliance larder cabinet are supplied with the appliance 

shelf pack.

Assembly Procedure

A) Confirm your larder height from either standard or tall.
B) Decide on your appliance door opening direction and change it if required.
C) Build the cabinet and attach the hinges and decorative doors. Secure the cabinet to the wall.
D) Locate the appliance within the cabinet and secure the fridge to the cabinet.


06

EN 

Installation

213294_s1_s14_5059340169491-5059340169613-No Brand-A5-IM-Multi-V01.indd   6

213294_s1_s14_5059340169491-5059340169613-No Brand-A5-IM-Multi-V01.indd   6

08-09-2021   16:40:39

08-09-2021   16:40:39

Содержание 5059340169491

Страница 1: ...KBITF CLUKBITF 5059340169613 5059340263984 GHBITFEU CLBITFEU 213294_s1_s14_5059340169491 5059340169613 No Brand A5 IM Multi V01 indd 1 213294_s1_s14_5059340169491 5059340169613 No Brand A5 IM Multi V01 indd 1 08 09 2021 16 40 37 08 09 2021 16 40 37 ...

Страница 2: ...alare 09 ES Instalación 10 PT Instalação 11 Use 36 FR Utilisation 38 PL Użytkowanie 40 RO Utilizare 42 ES Uso 44 PT Utilização 46 Care and maintenance 48 FR Entretien et maintenance 50 PL Czyszczenie i konserwacja 52 RO Îngrijire şi întreţinere 54 ES Cuidados y mantenimiento 56 PT Cuidados e manutenção 58 213294_s1_s14_5059340169491 5059340169613 No Brand A5 IM Multi V01 indd 2 213294_s1_s14_50593...

Страница 3: ...ad separado antes de utilizar PL WAŻNE Przed użyciem proszę dokładnie zapoznać się z instrukcją bezpieczeństwa PT IMPORTANTE Leia atentamente o guía de segurança separado antes de usar Ø5 mm 01 x 1 11 x 1 08 x 4 09 x 1 10 x 1 12 x 1 13 x 1 14 x 1 04 x 2 03 x 20 T20 12 mm 05 x 4 07 x 4 06 x 4 02 x 8 T20 12 mm 213294_s1_s14_5059340169491 5059340169613 No Brand A5 IM Multi V01 indd 3 213294_s1_s14_50...

Страница 4: ...Portas decorativas EN Standard Larder FR Colonne standard PL Szafka kolumnowa standardowa RO Cămară standard ES Despensa estándar PT Coluna despenseiro padrão EN Tall Larder FR Colonne XL PL Do szafki cargo wysokiej RO Cămară înaltă ES Columna de despensa alta PT Coluna despenseiro alta EN Not included FR Non inclus PL Brak w zestawie RO Neinclus ES No incluido PT Não incluído 213294_s1_s14_505934...

Страница 5: ...zklane 4 Kosze na warzywa 5 Półka na drzwi lodówki 6 Drzwi chłodziarki RO 1 Bec LED interior 2 Panou de comandă 3 Rafturi din sticlă 4 Coșuri pentru legume 5 Etajere ușă 6 Ușă frigider ES 1 Luz LED interior 2 Panel de control 3 Estantes de cristal 4 Cestos para verduras 5 Estantes de la puerta 6 Puerta del frigorífico PT 1 Luz LED interior 2 Painel de controlo 3 Prateleiras de vidro 4 Cestos de le...

Страница 6: ... injury or damage to property if incorrectly installed Some parts could be hazardous to small children Keep all parts out of reach and do not leave children unattended in the assembly area Serious or fatal crushing injuries can occur from furniture tip over To prevent this furniture from tipping over it must be permanently fixed to the wall Fixing devices for the wall are not included since differ...

Страница 7: ...essures ou de dégâts matériels s il n est pas installé correctement Certaines pièces peuvent être dangereuses pour les jeunes enfants Garder toutes les pièces hors de leur portée et ne pas laisser des enfants sans surveillance dans la zone d assemblage Le renversement des meubles peut causer des dommages corporels par écrasement graves voire mortels Pour éviter que ce meuble ne se renverse il doit...

Страница 8: ...ować obrażenia lub uszkodzenia mienia Niektóre części mogą stanowić zagrożenie dla małych dzieci Należy trzymać wszystkie części w niedostępnym miejscu i nie pozostawiać dzieci bez nadzoru w miejscu montażu Przewrócone meble mogą spowodować poważne lub śmiertelne obrażenia Aby zapobiec przewróceniu się mebli należy przymocować je na stałe do ściany Zestaw nie zawiera mocowań ściennych ponieważ ich...

Страница 9: ...ct Unele piese ar putea fi periculoase pentru copiii mici Nu lăsa nicio piesă la îndemâna copiilor și nu lăsa copiii nesupravegheați în zona de asamblare În urma răsturnării mobilierului pot surveni leziuni grave sau fatale provocate de strivire Pentru a împiedica răsturnarea mobilierului acesta trebuie fixat permanent în perete Dispozitivele de fixare pentru perete nu sunt incluse deoarece materi...

Страница 10: ...ueden ser peligrosas para los niños pequeños Mantenga todas las piezas fuera del alcance de los niños y no deje a los niños sin vigilancia en el área de montaje Si el mueble vuelca puede ocasionar lesiones graves o mortales por aplastamiento Para evitar que este mueble vuelque debe fijarse de forma permanente a la pared No se incluyen dispositivos de fijación para la pared ya que los diferentes ma...

Страница 11: ...rigosas para crianças pequenas Mantenha todas as peças fora do alcance das crianças e não as deixe na área de montagem sem supervisão Podem ocorrer ferimentos graves ou fatais por esmagamento devido à queda do mobiliário Para evitar que o mobiliário caia este tem de estar permanentemente fixo à parede Os dispositivos de fixação para a parede não estão incluídos uma vez que diferentes materiais de ...

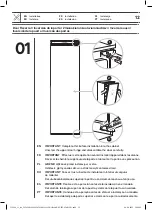
Страница 12: ... cu atenție ușa ES IMPORTANTE Realice esta operación antes de la instalación en el módulo Desatornille la bisagra superior de la puerta y desmonte la puerta con cuidado PT IMPORTANTE Conclua esta operação antes de efetuar a instalação no módulo Desaperte a dobradiça da porta superior e desmonte a porta cuidadosamente Door Reversal Inversion de la porte Zmiana kierunku otwierania drzwi Inversarea u...

Страница 13: ...ieścić zaślepki po prawej stronie korpusu RO Scoate șuruburile din partea stângă a carcasei și mută balamalele conform indicațiilor Montează șuruburile în partea dreaptă a carcasei ES Retire las puntas del lado izquierdo de la carcasa e intercambie las bisagras tal como se muestra Vuelva a colocar las puntas en el lado derecho de la carcasa PT Retire os tubos do lado esquerdo da estrutura e troque...

Страница 14: ...Instalacja RO Instalare ES Instalación PT Instalação 14 213294_s1_s14_5059340169491 5059340169613 No Brand A5 IM Multi V01 indd 14 213294_s1_s14_5059340169491 5059340169613 No Brand A5 IM Multi V01 indd 14 08 09 2021 16 40 39 08 09 2021 16 40 39 ...

Страница 15: ... incl picioarele ES Estándar 216 cm patas incluidas PT Padrão 216 cm com pés 234 cm 216 cm Cabinet Assembly Montage de la colonne Montaż szafki Asamblare corp Montaje del módulo Montagem do módulo EN Installation FR Installation PL Instalacja RO Instalare ES Instalación PT Instalação 15 213294_s1_s14_5059340169491 5059340169613 No Brand A5 IM Multi V01 indd 15 213294_s1_s14_5059340169491 505934016...

Страница 16: ...emi tropicale ST Ne pas installer l appareil dans un garage ou une dépendance où les températures ambiantes peuvent dépasser cette plage S assurer que la ventilation à l arrière de l appareil est suffisante pour garantir un fonctionnement correct Une ventilation inadéquate peut entraîner une augmentation de la température autour de l appareil et affecter les meubles adjacents PL Ustawienie urządze...

Страница 17: ... las clases climáticas subnormal SN normal N y subtropical ST No lo instale en un garaje o una estructura exterior donde la temperatura ambiente pueda superar este intervalo Asegúrese de que hay suficiente ventilación en la parte posterior del aparato para garantizar su correcto funcionamiento Una ventilación inadecuada puede afectar a los módulos adyacentes debido a un aumento de la temperatura P...

Страница 18: ...n PL Instalacja RO Instalare ES Instalación PT Instalação 18 213294_s1_s14_5059340169491 5059340169613 No Brand A5 IM Multi V01 indd 18 213294_s1_s14_5059340169491 5059340169613 No Brand A5 IM Multi V01 indd 18 08 09 2021 16 40 40 08 09 2021 16 40 40 ...

Страница 19: ...ulația aerului inclusiv o fantă ce trebuie tăiată în plintă dacă aceasta se montează Panoul posterior al corpului nu este instalat în timpul asamblării Pentru a asigura funcționarea corespunzătoare a aparatului este esențială instalarea astfel încât să se permită o circulație corespunzătoare a aerului în jurul acestuia O circulație necorespunzătoare a aerului va afecta semnificativ performanțele a...

Страница 20: ...LL x 16 MM x 4 JJ CC DD DD EE CC LL KK MM EN Installation FR Installation PL Instalacja RO Instalare ES Instalación PT Instalação 20 213294_s1_s14_5059340169491 5059340169613 No Brand A5 IM Multi V01 indd 20 213294_s1_s14_5059340169491 5059340169613 No Brand A5 IM Multi V01 indd 20 08 09 2021 16 40 41 08 09 2021 16 40 41 ...

Страница 21: ...llation PL Instalacja RO Instalare ES Instalación PT Instalação 21 213294_s1_s14_5059340169491 5059340169613 No Brand A5 IM Multi V01 indd 21 213294_s1_s14_5059340169491 5059340169613 No Brand A5 IM Multi V01 indd 21 08 09 2021 16 40 41 08 09 2021 16 40 41 ...

Страница 22: ... Installation PL Instalacja RO Instalare ES Instalación PT Instalação 22 213294_s1_s14_5059340169491 5059340169613 No Brand A5 IM Multi V01 indd 22 213294_s1_s14_5059340169491 5059340169613 No Brand A5 IM Multi V01 indd 22 08 09 2021 16 40 41 08 09 2021 16 40 41 ...

Страница 23: ...EN Installation FR Installation PL Instalacja RO Instalare ES Instalación PT Instalação 23 213294_s1_s14_5059340169491 5059340169613 No Brand A5 IM Multi V01 indd 23 213294_s1_s14_5059340169491 5059340169613 No Brand A5 IM Multi V01 indd 23 08 09 2021 16 40 42 08 09 2021 16 40 42 ...

Страница 24: ...on FR Installation PL Instalacja RO Instalare ES Instalación PT Instalação 24 213294_s1_s14_5059340169491 5059340169613 No Brand A5 IM Multi V01 indd 24 213294_s1_s14_5059340169491 5059340169613 No Brand A5 IM Multi V01 indd 24 08 09 2021 16 40 43 08 09 2021 16 40 43 ...

Страница 25: ...ES Instalación PT Instalação 25 14 PP x 4 NN x 66 QQ x 4 NN CC PP 15 QQ 213294_s1_s14_5059340169491 5059340169613 No Brand A5 IM Multi V01 indd 25 213294_s1_s14_5059340169491 5059340169613 No Brand A5 IM Multi V01 indd 25 08 09 2021 16 40 43 08 09 2021 16 40 43 ...

Страница 26: ...lare ES Instalación PT Instalação 26 16 NN x 2 RR x 2 RR NN 1 2 17 213294_s1_s14_5059340169491 5059340169613 No Brand A5 IM Multi V01 indd 26 213294_s1_s14_5059340169491 5059340169613 No Brand A5 IM Multi V01 indd 26 08 09 2021 16 40 44 08 09 2021 16 40 44 ...

Страница 27: ...lon le sens d ouverture de la porte choisi il sera peut être nécessaire de percer des trous de vis supplémentaires dans les panneaux verticaux de la colonne pour fixer toutes les charnières Les trous supplémentaires doivent être percés à l aide d un foret de 5 mm à 37 mm du bord avant du meuble et espacés de 32 mm Réunir les deux portes à l aide de deux raccords de porte non fournis 37 mm 37 mm 32...

Страница 28: ...as bisagras y las puertas antes de introducir el aparato en el módulo Dependiendo de la configuración de puerta elegida es posible que tenga que realizar nuevos orificios para tornillos en los paneles verticales del módulo para fijar todas las bisagras Los orificios adicionales deberán perforarse con una broca de 5 mm y se centrarán a 37 mm del borde frontal del módulo separados 32 mm entre sí Una...

Страница 29: ...multiprise ou de bloc d alimentation portable à l arrière de l appareil ATTENTION Brancher la fiche sur la prise secteur uniquement lorsque l installation est terminée S assurer que la fiche secteur est accessible après l installation EN Installation FR Installation PL Instalacja RO Instalare ES Instalación PT Instalação 29 213294_s1_s14_5059340169491 5059340169613 No Brand A5 IM Multi V01 indd 29...

Страница 30: ... de alimentación portátiles en la parte posterior del aparato PRECAUCIÓN Conecte el enchufe a la toma de corriente solo al final de la instalación Asegúrese de que hay acceso al enchufe de la red después de la instalación PT AVISO Não localize várias tomadas portáteis ou fontes de alimentação portáteis na parte de trás do aparelho ATENÇÃO Ligue a ficha de alimentação à tomada de alimentação apenas...

Страница 31: ...corpului de mobilier Corpul trebuie să fie cât mai la stânga posibil pentru ca aceste console glisante pentru uși 06 să nu prindă marginea acestuia ES Mueva el aparato de forma que la parte frontal del producto quede a 42 mm del borde del módulo Asegúrese de que el modulo esté lo más a la izquierda posible para que los soportes de la corredera de la puerta 06 no se enganchen en el borde del módulo...

Страница 32: ... EN Installation FR Installation PL Instalacja RO Instalare ES Instalación PT Instalação 32 213294_s1_s14_5059340169491 5059340169613 No Brand A5 IM Multi V01 indd 32 213294_s1_s14_5059340169491 5059340169613 No Brand A5 IM Multi V01 indd 32 08 09 2021 16 40 45 08 09 2021 16 40 45 ...

Страница 33: ... al aparatului pe partea inferioară a raftului folosind 2 x 03 Fixează cele două picioare pe baza corpului folosind 4 x 03 Fixează balamaua din mijloc pe corpul de mobilier folosind 2 x 03 ES Fije el panel superior del aparato a la parte inferior del estante con 2 x 03 Fije las dos patas a la base del módulo con 4 x 03 Fije la bisagra central al módulo con 2 x 03 PT Fixe o painel superior do apare...

Страница 34: ...nstalación PT Instalação 34 23 04 x 2 10 x 1 09 x 1 05 x 2 05 04 09 1 2 10 213294_s1_s14_5059340169491 5059340169613 No Brand A5 IM Multi V01 indd 34 213294_s1_s14_5059340169491 5059340169613 No Brand A5 IM Multi V01 indd 34 08 09 2021 16 40 46 08 09 2021 16 40 46 ...

Страница 35: ...siunea potrivită și fixeaz o în spațiul dintre aparat și corpul de mobilier ES Recorte la tira de sellado al tamaño adecuado y fíjela en el espacio entre el aparato y el módulo PT Corte a fita de vedação de acordo com o tamanho adequado e fixe a no espaço entre o aparelho e o módulo 2 11 1 EN Installation FR Installation PL Instalacja RO Instalare ES Instalación PT Instalação 35 213294_s1_s14_5059...

Страница 36: ...Control panel 3 1 2 1 On off control Press and hold the On Off button for three seconds to operate the appliance 2 Temperature control Press the Temperature control to adjust the operating temperature from 2 ºC to 8 ºC 3 Fast cool control Press the Fast cool control for a rapid decrease in temperature after placing food in the fridge Use for a maximum of two hours to avoid excessive use of energy ...

Страница 37: ...moval Vegetable basket removal 37 EN Use 213294_s1_s14_5059340169491 5059340169613 No Brand A5 IM Multi V01 indd 37 213294_s1_s14_5059340169491 5059340169613 No Brand A5 IM Multi V01 indd 37 08 09 2021 16 40 47 08 09 2021 16 40 47 ...

Страница 38: ...e marche arrêt Maintenir le bouton marche arrêt enfoncé pendant trois secondes pour mettre l appareil en marche 2 Commande de température Appuyer sur la commande de température pour régler la température de fonctionnement entre 2 ºC et 8 ºC 3 Commande de congélation rapide Appuyer sur la commande de congélation rapide pour réduire rapidement la température après avoir placé des aliments au congéla...

Страница 39: ...ts de porte Retrait du bac à légumes 39 FR Utilisation 213294_s1_s14_5059340169491 5059340169613 No Brand A5 IM Multi V01 indd 39 213294_s1_s14_5059340169491 5059340169613 No Brand A5 IM Multi V01 indd 39 08 09 2021 16 40 47 08 09 2021 16 40 47 ...

Страница 40: ...isk Wł Wył Nacisnąć i przytrzymać przycisk Wł Wył przez trzy sekundy aby włączyć urządzenie 2 Sterowanie temperaturą Nacisnąć pokrętło sterowania temperaturą aby ustawić temperaturę roboczą w zakresie od 2 ºC do 8 ºC 3 Sterowanie szybkim zamrażaniem Nacisnąć przycisk szybkiego zamrażania aby przyspieszyć obniżenie temperatury po umieszczeniu żywności w zamrażarce Używać przez maksymalnie dwie godz...

Страница 41: ...wi Wyjmowanie kosza na warzywa 41 PL Użytkowanie 213294_s1_s14_5059340169491 5059340169613 No Brand A5 IM Multi V01 indd 41 213294_s1_s14_5059340169491 5059340169613 No Brand A5 IM Multi V01 indd 41 08 09 2021 16 40 47 08 09 2021 16 40 47 ...

Страница 42: ...Pornire Oprire Ține apăsat butonul de pornire oprire timp de trei secunde pentru a pune în funcțiune aparatul 2 Comandă temperatură Apăsă butonul de control al temperaturii pentru a regla temperatura de funcționare de la 2 ºC la 8 ºC 3 Comandă congelare rapidă Apăsă butonul de congelare rapidă după ce ai pus alimentele în congelator pentru ca temperatura să scadă rapid Folosește timp de maximum do...

Страница 43: ...lor Îndepărtarea coșului pentru legume 43 RO Utilizare 213294_s1_s14_5059340169491 5059340169613 No Brand A5 IM Multi V01 indd 43 213294_s1_s14_5059340169491 5059340169613 No Brand A5 IM Multi V01 indd 43 08 09 2021 16 40 47 08 09 2021 16 40 47 ...

Страница 44: ...dido apagado Mantenga pulsado el botón de encendido apagado durante tres segundos para utilizar el aparato 2 Control de temperatura Pulse el control de temperatura para ajustar la temperatura de funcionamiento entre 2 ºC y 8 ºC 3 Control de congelación rápida Pulse el control de congelación rápida para reducir rápidamente la temperatura después de introducir alimentos en el congelador Utilícelo du...

Страница 45: ...tes de la puerta Extracción del cesto para verduras 45 ES Uso 213294_s1_s14_5059340169491 5059340169613 No Brand A5 IM Multi V01 indd 45 213294_s1_s14_5059340169491 5059340169613 No Brand A5 IM Multi V01 indd 45 08 09 2021 16 40 48 08 09 2021 16 40 48 ...

Страница 46: ...1 Controlo de ligar desligar Prima continuamente o botão para ligar desligar durante três segundos para utilizar o aparelho 2 Controlador de temperatura Prima o controlador de temperatura para ajustar a temperatura de funcionamento de 2 ºC a 8 ºC 3 Controlador de congelação rápida Prima o controlador de congelação rápida para diminuir rapidamente a temperatura após colocar alimentos no congelador ...

Страница 47: ... da porta Remoção do cesto de legumes 47 PT Utilização 213294_s1_s14_5059340169491 5059340169613 No Brand A5 IM Multi V01 indd 47 213294_s1_s14_5059340169491 5059340169613 No Brand A5 IM Multi V01 indd 47 08 09 2021 16 40 48 08 09 2021 16 40 48 ...

Страница 48: ...mpty all of the food and clean the inside Leave the door open to prevent the build up of odours Defrosting NOTE Care must be taken when performing the following procedure The appliance is frost free so there shouldn t be any requirement to defrost the appliance However in the unlikely event the appliance does need defrosting please follow the below steps Two hours before defrosting is due to start...

Страница 49: ... a faulty bulb The LED bulb inside the appliance cannot be replaced by the consumer If the bulb fails please contact the Customer Service helpline for your country at the end of this manual to arrange an engineer visit 49 EN Care and maintenance 213294_s1_s14_5059340169491 5059340169613 No Brand A5 IM Multi V01 indd 49 213294_s1_s14_5059340169491 5059340169613 No Brand A5 IM Multi V01 indd 49 08 0...

Страница 50: ...reil n est pas utilisé pendant une longue période Laisser les portes ouvertes pour éviter l apparition d odeurs Dégivrage REMARQUE La procédure suivante doit être suivie avec précaution L appareil est sans givre et il ne devrait donc pas être nécessaire de dégivrer le congélateur Toutefois dans le cas peu probable où l appareil aurait besoin d être dégivré procéder comme suit Deux heures avant le ...

Страница 51: ...éfectueuse L ampoule LED à l intérieur de l appareil ne peut pas être remplacée par l utilisateur En cas de défaillance de l ampoule contacter le service client du pays concerné au numéro indiqué à la fin de cette notice pour organiser une intervention par un technicien 51 FR Entretien et Maintenance 213294_s1_s14_5059340169491 5059340169613 No Brand A5 IM Multi V01 indd 51 213294_s1_s14_505934016...

Страница 52: ...te aby zapobiec gromadzeniu się nieprzyjemnych zapachów Rozmrażanie WAŻNE Podczas wykonywania poniższej czynności należy zachować ostrożność Urządzenie jest wyposażone w system bezszronowy więc nie powinno być potrzeby rozmrażania zamrażarki Jednak w mało prawdopodobnym przypadku gdy urządzenie będzie wymagać rozmrażania należy wykonać następujące czynności Na dwie godziny przed rozpoczęciem rozmr...

Страница 53: ...ądzenia nie może zostać samodzielnie wymieniona przez użytkownika Jeśli żarówka nie działa należy skontaktować się z infolinią działu obsługi klienta danego kraju aby umówić się na wizytę serwisanta Dane kontaktowe można znaleźć pod koniec niniejszej instrukcji 53 PL Czyszczenie i konserwacja 213294_s1_s14_5059340169491 5059340169613 No Brand A5 IM Multi V01 indd 53 213294_s1_s14_5059340169491 505...

Страница 54: ...chisă pentru a preveni acumularea de mirosuri Dezghețarea NOTĂ Trebuie să ai grijă când efectuezi următoarea procedură Aparatul utilizează tehnologia Frost free așadar nu trebuie să dezgheți congelatorul Cu toate acestea în cazul improbabil în care aparatul trebuie dezghețat urmează pașii de mai jos Cu două ore înainte de dezghețare rotește termostatul la minimum 2 ºC pentru a te asigura că alimen...

Страница 55: ...locuirea unui bec defect Becul cu LED din interiorul aparatului nu poate fi înlocuit de consumator Dacă becul se defectează contactează linia de asistență pentru clienți din țara ta de la sfârșitul acestui manual pentru a programa o vizită la service 55 RO Îngrijire şi întreţinere 213294_s1_s14_5059340169491 5059340169613 No Brand A5 IM Multi V01 indd 55 213294_s1_s14_5059340169491 5059340169613 N...

Страница 56: ...erta para evitar la acumulación de olores Descongelación NOTA Se debe tener cuidado al realizar el siguiente procedimiento El aparato no produce escarcha por lo que no debería ser necesario descongelar el congelador Sin embargo en el caso improbable de que el aparato necesite descongelarse siga los pasos que se indican a continuación Dos horas antes de que comience la descongelación baje el termos...

Страница 57: ...a 14 Sustitución de una bombilla defectuosa El usuario no puede sustituir la bombilla LED interior del aparato Si la bombilla falla póngase en contacto con el servicio de atención al cliente de su país que aparece al final de este manual para concertar la visita de un técnico 57 ES Cuidados y mantenimiento 213294_s1_s14_5059340169491 5059340169613 No Brand A5 IM Multi V01 indd 57 213294_s1_s14_505...

Страница 58: ...Deixe a porta aberta para evitar a acumulação de odores Descongelar NOTA É necessário ter cuidado ao efetuar o seguinte procedimento O aparelho é sem gelo por isso não deve haver necessidade de descongelar o congelador No entanto no caso improvável de o aparelho necessitar de descongelação siga os passos apresentados abaixo Duas horas antes do início da descongelação rode o termóstato até ao mínim...

Страница 59: ...r uma lâmpada avariada A lâmpada LED no interior do aparelho não pode ser substituída pelo consumidor Se a lâmpada avariar contacte o serviço de atendimento ao cliente do seu país para agendar a visita de um técnico Esta informação encontra se no final deste manual 59 PT Cuidados e Manutenção 213294_s1_s14_5059340169491 5059340169613 No Brand A5 IM Multi V01 indd 59 213294_s1_s14_5059340169491 505...

Страница 60: ... com products PL www castorama pl Infolinia dla klientów bezpłatna 800 121 2222 poland kingfisherservice com Aby zapoznać się z instrukcją obsługi online odwiedź stronę www kingfisher com products RO www bricodepot ro Asistență clienți apel gratuit 0800 895 099 romania kingfisherservice com Pentru a consulta manualele de instrucţiuni online vizitaţi www kingfisher com products ES www bricodepot es...

Отзывы: