Replacing/Rotating Cutterhead Inserts continued...
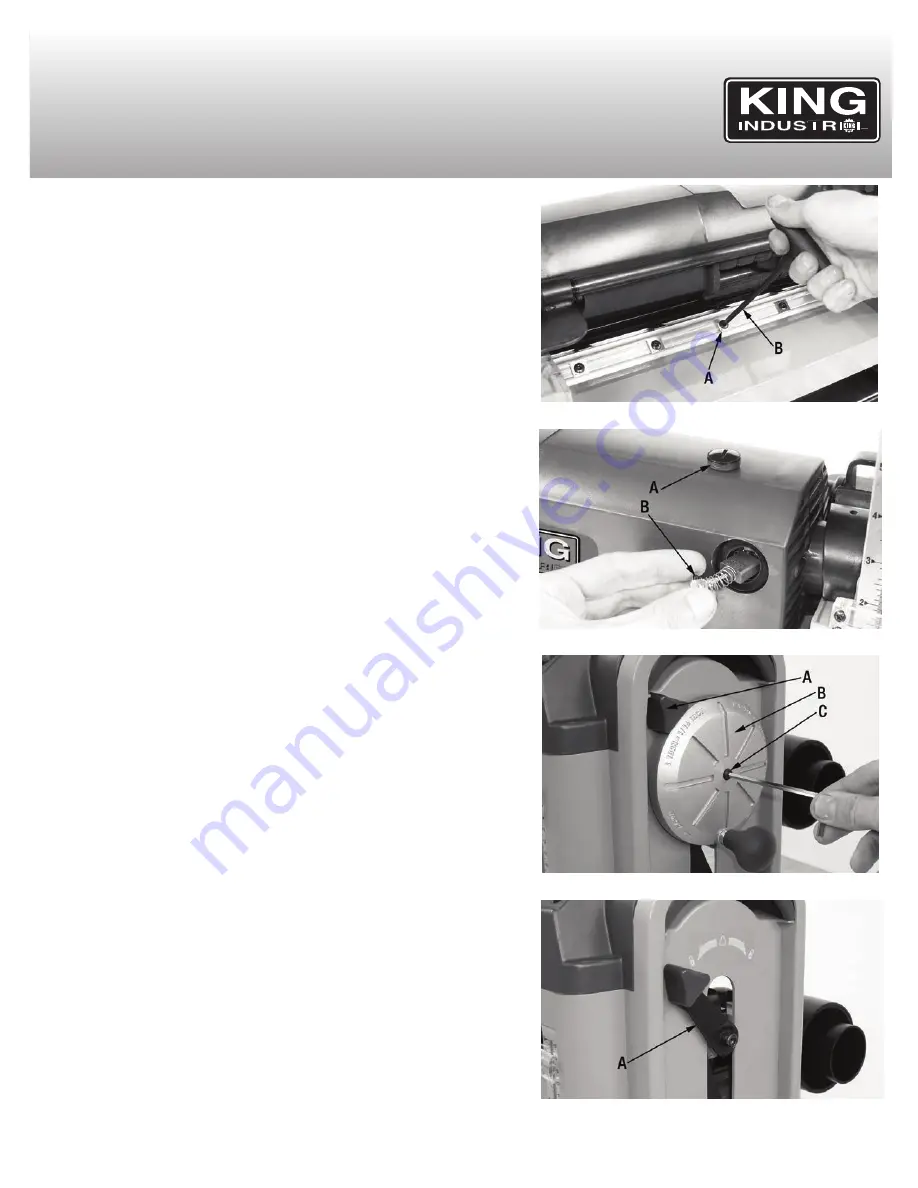
5) While preventing the cutterhead from turning, remove each of the cutter inserts
(A) Fig.15 with the supplied Torx wrench (B).
6) Before replacing or rotating the inserts take a moment to clean the screw housing,
inserts (if rotating rather than replacing), and screws with a solvent such as lac-
quer thinner.
Note:
There is an etched reference mark on each insert to help keep track of which
cutting surface to use. Make sure to rotate all inserts so that the reference mark sits
in the same position on all inserts. All cutter inserts have a flat side, this side must
be positioned against the flat of the cutterhead.
Motor carbon brush replacement (After about 150 hours of usage)
Note: Replace both motor carbon brushes when their length is less than 6 mm.
1) Unplug the machine from the power source and remove the safety key from the
switch.
2) Using a flat head screwdriver, unscrew and remove the carbon brush cover (A)
Fig.16.
3) Remove the motor carbon brush (B) Fig.16 from its housing as shown. Install the
new identical carbon brush in its housing, then re-install the cover.
4) Repeat steps 1 to 3 for the carbon brush on the opposite side of the motor. Re-
moving the dust chute will be required to access the carbon brush cover.
belt replacement
Inspect the belt afler every 100 hours of use. A belt which shows visible signs of
wear such as cracks or fraying at the edges should be replaced immediately.
1) Turn off and unplug the machine from the power source and remove the switch
safety key.
2) Unlock the cutterhead by placing the lock lever (A) Fig.17 towards the left. Raise
the cutterhead near its maximum height by turning the handwheel (B).
3) Remove the handwheel cap screw (C) Fig.17 with the supplied 4 mm hex. key
and pull the handwheel off its shaft.
4) Remove the lock lever (A) Fig.18. Pull back and then raise and pull back again
to remove it.
MAINTENANCE
FIGURE 15
FIGURE 16
FIGURE 17
FIGURE 18


