Table of contents
1 Safety instructions.........................................................................................................................................................4
1.1 Precautions for use................................................................................................................................................4
1.2 Symbols used........................................................................................................................................................ 4
2 Presentation of the device.............................................................................................................................................5
2.1 Use....................................................................................................................................................................... 5
2.2 Applications.......................................................................................................................................................... 5
2.3 References............................................................................................................................................................ 5
2.4 Description of the device.......................................................................................................................................6
2.5 Description of keys................................................................................................................................................6
2.6 Description of LEDs...............................................................................................................................................6
2.7 Connections..........................................................................................................................................................6
2.8 Mounting..............................................................................................................................................................6
3 Technical features..........................................................................................................................................................7
3.1 Technical features of the devices............................................................................................................................7
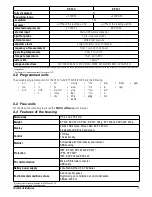
3.2 Programmed units.................................................................................................................................................9
3.3 Free units.............................................................................................................................................................. 9
3.4 Features of the housing.........................................................................................................................................9
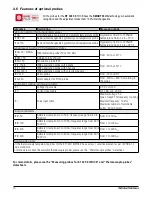
3.5 Features of optional probes.................................................................................................................................10
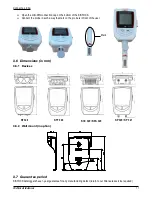
3.6 Dimensions (in mm).............................................................................................................................................11
3.6.1 Devices....................................................................................................................................................... 11
3.6.2 Wall mount (in option).................................................................................................................................11
3.7 Guarantee period................................................................................................................................................11
4 Use of the device........................................................................................................................................................ 12
4.1 Display................................................................................................................................................................ 12
4.2 Function of LEDs.................................................................................................................................................12
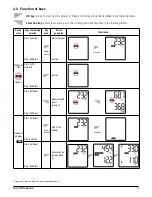
4.3 Function of keys..................................................................................................................................................13
4.3.1 Groups organisation....................................................................................................................................15
4.3.2 Measurements scroll....................................................................................................................................15
4.4 PC communication..............................................................................................................................................16
4.5 Configuration, datalogger download and data processing with the KILOG software...............................................16
5 Bluetooth
®
function.................................................................................................................................................... 17
6 Maintenance............................................................................................................................................................... 17
6.1 Replace the batteries...........................................................................................................................................17
6.2 Device cleaning...................................................................................................................................................17
6.3 Safety lock wall mount with padlock....................................................................................................................17
7 Calibration.................................................................................................................................................................. 18
7.1 KCC 320: perform a CO
2
measurement verification...............................................................................................18
7.2 KP 320 – KP 321: perform an auto-zero...............................................................................................................18
8 Accessories................................................................................................................................................................. 19
9 Troubleshooting...........................................................................................................................................................19
Содержание KISTOCK 320 Series
Страница 1: ...Class 320 KISTOCK KT 320 KCC 320 KP 320 321 KPA 320 KTT 320 USER MANUAL...
Страница 2: ......


