Kia K2500 2014 Скачать руководство пользователя страница 40

3 31

1

2

3

4

5

6

7

8

9

Knowing your vehicle

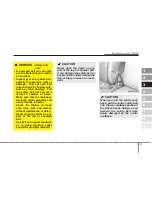
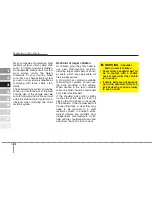
(1) Driver’s air bag*
* : if equipped

AIR BAG - SUPPLEMENTAL RESTRAINT SYSTEM (IF EQUIPPED)  

OHR022206/H

WARNING

• Even in vehicles with air bag,

you must always wear the
safety belts provided in order
to minimise the risk and
severity of injury in the event
of a collision or rollover.

• SRS and pretensioners con-

tain explosive chemicals.
If scraping a vehicle without
removing SRS and preten-
sioners from a vehicle, it may
cause fire. Before scraping a
vehicle, we recommend that
you contact an authorized Kia
dealer.

• Keep the SRS parts and

wirings away from water or any
liquid. If the SRS components
are inoperative due to expo-
sure to water or liquids, it may
cause fire or severe injury.

The actual air bag in the vehicle may differ from the illustration.

Содержание K2500 2014

Страница 1: ...will be treated with warmth hospitality and professionalism by people who care based on our Family like Care promise All information contained in this Owner s Manual is accurate at the time of public...

Страница 2: ...dations to help assure enjoyable and safe oper ation of your new vehicle Kia offers a great variety of options components and fea tures for its various models Therefore the equipment described in this...

Страница 3: ...ii 1 2 3 4 5 6 7 8 9 Introduction Your vehicle at a glance Knowing your vehicle Driving your vehicle Driving tips In case of an emergency Maintenance Specifications Index table of contents...

Страница 4: ...1 2 3 4 5 6 7 8 9 How to use this manual 1 2 Vehicle break in process 1 3 Introduction...

Страница 5: ...ndex it has an alphabetical listing of all informa tion in your manual Sections This manual has eight sec tions plus an index Each section begins with a brief list of contents so you can tell at a gla...

Страница 6: ...1 000 km 600 miles you may add to the perform ance economy and life of your vehi cle Do not race the engine Do not maintain a single speed for long periods of time either fast or slow Varying engine s...

Страница 7: ...1 2 3 4 5 6 7 8 9 Exterior overview 2 2 Interior overview 2 3 Your vehicle at a glance...

Страница 8: ...Your vehicle at a glance 2 2 1 2 3 4 5 6 7 8 9 EXTERIOR OVERVIEW 1 Bonnet 2 Headlights 3 Wiper 4 Door 5 Side gate Rear gate 6 Tyre 7 Window 8 Antenna OPU012001R...

Страница 9: ...tch fluid 4 Instrument cluster 5 Light control Turn signals 6 Wiper Washer 7 Glove box 8 Bonnet release lever 9 Headlight levelling device 10 Steering wheel 11 Shift lever 12 Parking brake 13 Fog ligh...

Страница 10: ...8 Window 3 11 Seat 3 13 Safety belts 3 18 Air bag supplemental restraint system 3 31 Bonnet 3 41 Rear gate 3 42 Side gate 3 43 Fuel filler 3 44 Mirrors 3 45 Interior lights 3 46 Storage compartment 3...

Страница 11: ...and store it in a safe place Also record the code number and keep it in a safe place not in the vehicle Key operations Used to start the engine lock and unlock the doors Type B To unfold the key press...

Страница 12: ...y Without a valid ignition key for your vehicle the engine will not start WARNING Use only Kia original parts for the ignition key in your vehicle If an aftermarket key is used the igni tion switch ma...

Страница 13: ...nt the engine from being started CAUTION The transponder in your ignition key is an important part of the immobiliser system It is designed to give years of trou ble free service however you should av...

Страница 14: ...smitter will not work if any of following occur The ignition key is in ignition switch You exceed the operating dis tance limit about 10 m 30 feet The battery in the transmitter is weak Other vehicles...

Страница 15: ...ance between the two devices CAUTION Keep the transmitter away from water or any liquid If the keyless entry system is inop erative due to exposure to water or liquids it will not be covered by your m...

Страница 16: ...ters we recommend that you contact an authorised Kia dealer OED039003A Type B 1PUA2003 Type A CAUTION The keyless entry system transmitter is designed to give you years of trouble free use however it...

Страница 17: ...t doors are closed securely To lock a door without the key push the inside door lock button to the Lock position and close the door NOTICE Always remove the ignition key engage the parking brake close...

Страница 18: ...n the path of the door Opening a door when some thing is approaching can cause damage or injury Operating door locks from inside the vehicle To unlock a door push the door lock button to the Unlock po...

Страница 19: ...ndows and lock all doors when leaving your vehicle unattended WARNING Unattended children An enclosed vehicle can become extremely hot causing death or severe injury to unat tended children or animals...

Страница 20: ...efore closing a win dow Manual windows if equipped Use the window crank to open and close each window NOTICE If you notice buffeting and pulsation wind shock with either side win dow open you should o...

Страница 21: ...or pull up the front portion of the corresponding switch Power window timer if equipped The power windows can be operated for approximately 30 seconds after the ignition key is removed or turned to th...

Страница 22: ...dren should never be left unattended in the car WARNING Driver s seat Never attempt to adjust seat whilst the vehicle is moving This could result in loss of control and an accident caus ing death seri...

Страница 23: ...he seat at the rear 2 Carefully lean back on the seat and adjust the seatback to the position you desire 3 Release the lever and make sure the seatback is locked in place The lever MUST return to its...

Страница 24: ...ion To raise the headrest pull it up to the desired position To lower the head rest push and hold the release but ton on the headrest support and lower the headrest to the desired position For best pr...

Страница 25: ...the seatback upright Engine room access Passenger s seat To access the engine room under the passenger s seat 1 Fold the passenger s seatback and centre seatback 2 Unsnap the clasps at the front of t...

Страница 26: ...5L Engine Never work on injection system with engine running or within 30 seconds after shutting off engine High pressure pump rail injectors and high pressure pipes are subject to high pres sure even...

Страница 27: ...arp turn or a colli sion the safety belt retractors will automatically lock the safety belts Since the inertial locks do not require a collision in order to lock up you may become aware of the safety...

Страница 28: ...belts should be replaced if webbing becomes frayed contaminated or damaged It is essential to replace the entire assembly after it has been worn in a severe impact even if damage to the assem bly is n...

Страница 29: ...ng position in your vehicle has a specific safety belt assembly that includes a buckle and tongue designed to be used together For greatest effectiveness fol low these guidelines in using safety belts...

Страница 30: ...ractor Check the latches to make sure they latch and release without interference or delay Never close the doors on any part of the lap or shoulder belt Any belt not in good condition or in good worki...

Страница 31: ...y 6 seconds each time you turn the ignition switch ON Lap shoulder belt To fasten the front lap shoulder belt 1 Grasp the buckle and tongue plate 2 Slowly pull the lap shoulder belt out from the retra...

Страница 32: ...retractor is designed to take up excess webbing auto matically and to maintain tension on the belt For your safety do not put any excess slack into the safe ty belt at any location NOTICE If you are...

Страница 33: ...tside arm or behind the back Never wear the shoulder por tion of the safety belt across the neck or face Wear the lap portion of the safety belt as low on the hips as possible Be sure the lap belt fit...

Страница 34: ...ed 3 Grasp the free portion of the belt webbing and pull until the belt is snug over the hips and lower abdomen If it becomes necessary to lengthen or shorten the belt hold the latch plate tongue at r...

Страница 35: ...stionable parts immediately To clean the belt webbing use a mild soap solution recommended for cleaning upholstery or carpets Follow the instructions provided with the soap Do not make modifications o...

Страница 36: ...ced around both a child and an adult or around two children at the same time It is best for children to be seated in the rear seat WARNING Pregnant women Pregnant women must never place the lap portio...

Страница 37: ...d seats or boost er seats which are appropriate for their increased size A child who has outgrown available child restraint systems should use the belts provided in the vehicle When seated in the rear...

Страница 38: ...belt through the restraint according to the seat manufacturer s instruc tions WARNING Before installing the child restraint system read the instructions supplied by the child restraint system manu fa...

Страница 39: ...cy locking usage condition Installing a child restraint system by lap belt on the centre front seat To install a child restraint system on the centre front seats do the follow ing 1 Place the child re...

Страница 40: ...a collision or rollover SRS and pretensioners con tain explosive chemicals If scraping a vehicle without removing SRS and preten sioners from a vehicle it may cause fire Before scraping a vehicle we...

Страница 41: ...ed air bag hanging out of their storage compartments after the collision In order to help provide protection in a severe collision the air bag must inflate rapidly The speed of air bag inflation is a...

Страница 42: ...kin eyes nose and throat etc If this is the case wash and rinse with cold water immediately and consult the doctor if the symptom persists Air bag warning light The purpose of the air bag warning ligh...

Страница 43: ...ag deploys there may be a loud noise followed by a fine dust released in the vehicle These conditions are normal and are not hazardous the air bag is packed in this fine powder The dust gener ated dur...

Страница 44: ...are many types of accidents in which the air bag would not be expected to provide additional protection These include rear impacts side impacts rollover second or third collisions in multiple impact...

Страница 45: ...uld not or they may not deploy when they should causing severe injury or death Therefore do not try to perform maintenance on or around the air bag sensors We recom mend that the system be checked and...

Страница 46: ...in such collisions Air bag is not designed to inflate in rear collisions because occupants are moved backward by the force of the impact In this case inflated air bag would not be able to pro vide an...

Страница 47: ...oy any air bag Just before impact drivers often brake heavily Such heavy braking lowers the front portion of the vehi cle causing it to ride under a vehi cle with a higher ground clearance Air bag may...

Страница 48: ...the SRS sys tem may result in serious personal injury WARNING Modification to SRS compo nents or wiring including the addition of any kind of badges to the pad covers or modifica tions to the body st...

Страница 49: ...tably extended and your feet on the floor Continued If the air bags inflate we recom mend that the system be replaced by an authorised Kia dealer Do not tamper with or discon nect SRS wiring or other...

Страница 50: ...ft the bonnet and hold it open with the support rod by inserting the free end of the rod into the slot Closing the bonnet 1 Before closing the bonnet check the following All filler caps in the under b...

Страница 51: ...ar gate up and lock the rear gate handle in place Make sure the rear gate is properly locked before driving REAR GATE 1PUB2005 1PUA2019 WARNING When the rear combination lamps are hidden other road us...

Страница 52: ...handle from the hook after pulling it up 3 Lower the side gate slowly with it received on both arms Closing the side gate 1 Lift the side gate up and lock the side gate handle in place 2 Push the knob...

Страница 53: ...uipped 3 To remove the cap turn the fuel tank cap counterclockwise 4 Refuel as needed 5 To install the cap turn it clockwise until it clicks This indicates that the cap is securely tightened NOTICE Ma...

Страница 54: ...off the mirror face this may damage the surface of the glass If ice should restrict move ment of the mirror do not force the mirror for adjustment To remove ice use a deicer spray or a sponge or soft...

Страница 55: ...st the day night lever is in the day position Pull the day night lever toward you to reduce glare from the headlights of vehicles behind you during night driving Remember that you lose some rearview c...

Страница 56: ...an dle and the glove box will automati cally open Close the glove box after use For your convenience a tissue hold er is located in the glove box cover Centre seatback console tray if equipped The tra...

Страница 57: ...ample may damage the socket or cause electrical failure If the lighter does not pop out within 30 seconds remove it to prevent overheating Ashtrays To remove the ashtray to empty or clean push the tab...

Страница 58: ...or a side window pull it downward unsnap it from the bracket and swing it to the side OPU028081 WARNING Hot liquids Do not place uncovered cups of hot liquid in the cup holder whilst the vehicle is in...

Страница 59: ...t the time When the ignition switch is in the ON position the clock buttons operate as follows HOUR Turn the knob to the left H will advance the time displayed by one hour MINUTE Turn the knob to the...

Страница 60: ...Antenna Your car uses a manual stainless steel antenna to receive both AM and FM broadcast signals Pull up the antenna using your fingers NOTICE If the antenna is dirty be sure to clean it in order t...

Страница 61: ...Press the button to select Radio or CD compact disc TRACK SEEK UP 4 Radio Mode Automatically search es for broadcast frequencies CD modes Shortly press the key under 0 8 seconds Moves to next or prev...

Страница 62: ...g to your vehi cle may not be strong and clear This can be due to factors such as the distance from the radio station closeness of other strong radio sta tions or the presence of buildings bridges or...

Страница 63: ...on Flutter Static Weak FM signals or large obstructions between the transmitter and your radio can dis turb the signal causing static or fluttering noises to occur Reducing the treble level may lessen...

Страница 64: ...per Make certain only CDs are insert ed into the CD player Do not insert more than one CD at a time Keep CDs in their cases after use to protect them from scratches or dirt Depending on the type of CD...

Страница 65: ...Knowing your vehicle 56 3 1 2 3 4 5 6 7 8 9 PU_GEN_RADIO CD Player AM110HDD GENERAL...

Страница 66: ...ions upwards The SCAN feature steps through each station starting from the ini tial station for 5 seconds Press the button again to stop the scan feature and to listen to the currently selected channe...

Страница 67: ...f no action is taken for 5 seconds after pressing the button it will return to the play mode After entering SETUP mode move between items using the left right and PUSH func tions of the knob The setup...

Страница 68: ...ecting each mode rotate the Audio control knob clockwise or counterclockwise BASS Control To increase the BASS rotate the knob clockwise whilst to decrease the BASS rotate the knob counter clockwise M...

Страница 69: ...play the next song Press button for 0 8 sec onds or longer to initiate forward direction high speed sound search of current song 4 Button RANDOM Press this button for less than 0 8 seconds to activat...

Страница 70: ...cur rent song Audio CD Disc Title Artist Track Title Artist Total Track MP3 CD File Name Title Artist Album Folder Total Files Not dis played if the information is unavail able on the CD or file 10 Bu...

Страница 71: ...to and play the pre vious song Press the button for 0 8 seconds or longer to play the song in reverse direction in fast speed Press the button for less than 0 8 seconds to move to the next song Press...

Страница 72: ...lay the first song in the folder Press knob to move to the folder displayed It will play the first song in the folder Press button to move to parent folder display the first song in the folder Press k...

Страница 73: ...d Use only a USB device formatted to FAT 12 16 32 USB devices without USB I F authentication may not be recog nizable Make sure the USB connection ter minal does not come in contact with the human bod...

Страница 74: ...NAGEMENT are not recognizable The data in the USB memory may be lost whilst using this audio Always back up important data on a personal storage device Please avoid using USB memory products which can...

Страница 75: ...Knowing your vehicle 66 3 1 2 3 4 5 6 7 8 9...

Страница 76: ...for less than 0 8 seconds and press it again within 1 second to move to and play the previous track Press the button for 0 8 seconds or longer to play the song in reverse direction in fast speed Pres...

Страница 77: ...ist Albums Genes Songs Compsers 8 Knob Button When you rotate the knob clockwise it will display the songs category ahead of the song currently played category in the same level Also when you rotate t...

Страница 78: ...n the audio system The USB cable provided by Apple may cause malfunction and should not be used for Kia vehicles The Kia iPod Power Cable may be purchased through your Kia Dealership When connecting i...

Страница 79: ...to be supported AUX This feature is used to play external MEDIA currently connected with the AUX terminal AUX mode will automat ically start when an external device becomes connected If an external de...

Страница 80: ...se For more information on Bluetooth Wireless Technology mobile phones refer to the Phone Setup section Pairing and connecting a Bluetooth Wireless Technology mobile phone will work only when the Blue...

Страница 81: ...jects otherwise communications with Bluetooth Wireless Technology system or mobile service stations can be dis turbed Whilst a phone is connected through Bluetooth Wireless Technology your phone may d...

Страница 82: ...neral Features This audio system supports Bluetooth Wireless Technology hands free and stereo headset fea tures HANDS FREE feature Making or receiving calls wirelessly STEREO HEADSET feature Playing m...

Страница 83: ...OTE The pairing procedure of the phone varies according to each phone model Before attempting to pair phone please see your phone s User s Guide for instructions Once pairing with the phone is complet...

Страница 84: ...system is enabled the phone previously used is automatical ly selected and re connected If you want to select different phone previ ously paired the phone can be selected through Phone menu Only a sel...

Страница 85: ...sabled all the commands related to Bluetooth Wireless Technology system prompts whether you wish to turn Bluetooth Wireless Technology ON or not 1 Press button to enter SETUP mode 2 Select PHONE then...

Страница 86: ...party on the phone 2 Keep the Bluetooth Wireless Technology volume to a low level High level volume may result in distortion and echo 3 When driving on a rough road 4 When driving at high speeds 5 Wh...

Страница 87: ...and AVRCP func tions Some A2DP and AVRCP Bluetooth Wireless Technology mobile phones may not play music through the head unit on first try Please try the below i e Menu Filemanager Music Option Play v...

Страница 88: ...3 79 Knowing your vehicle 1 2 3 4 5 6 7 8 9 AM100HDG...

Страница 89: ...e song in reverse direction in fast speed 6 Play the song in forward direction in fast speed 7 Plays songs in random order 8 Repeats the current song 9 Radio Mode Automatically search es for broadcast...

Страница 90: ...d song is dis played press the knob to play the song Moves focus in all selection menus and selects menus 12 Preset In radio mode Saves and receives frequencies channels Audio Settings This feature is...

Страница 91: ...uency saved in the corresponding key Pressing and holding the key over 0 8 seconds Pressing and holding the desired key from will save the currently playing broadcast to the selected key and sound a B...

Страница 92: ...RDM on screen Random Plays all songs in ran dom order Press the key again to turn off repeat Scan Shortly press the key for 10 seconds each Press the key again to continue listening to the current son...

Страница 93: ...ode will automatically start when an external device is con nected to the AUX terminal If an external device is connected you can also press the key to change to AUX mode AUX mode cannot be started un...

Страница 94: ...3 85 Knowing your vehicle 1 2 3 4 5 6 7 8 9 AM101HDG...

Страница 95: ...CD USB iPod modes Shortly press the key under 0 8 seconds Moves to next or previ ous song file Press and hold the key over 0 8 seconds Rewinds or fast for wards the current song file 6 Play the song...

Страница 96: ...nob left right CD USB iPod mode Searches songs files by turning the knob left right When the desired song is dis played press the knob to play the song Moves focus in all selection menus and selects m...

Страница 97: ...ency saved in the corresponding key Pressing and holding the key over 0 8 seconds Pressing and holding the desired key from will save the currently playing broadcast to the selected key and sound a BE...

Страница 98: ...g file is playing key Audio mode RDM on screen Random Shortly pressing the key under 0 8 seconds Plays all songs in random order MP3 CD USB mode FLD RDM on screen Folder Random Shortly press the key u...

Страница 99: ...song Folder Search MP3 CD USB Mode Whilst file is playing Folder Up key Searches the parent folder of the current folder Whilst file is playing Folder Down key Searches the sub folder of the cur rent...

Страница 100: ...rder If no song file is contained in the folder that folder is not dis played AUX AUX is used to play external MEDIA currently connected with the AUX ter minal AUX mode will automatically start when a...

Страница 101: ...Locking differential 4 9 Brake system 4 10 Steering wheel 4 16 Instrument cluster 4 18 Gauges 4 20 Warnings and indicators 4 23 Rear parking assist system 4 29 Lighting 4 32 Wipers and washers 4 36 Ha...

Страница 102: ...ing position after the engine is started Do not leave the ignition switch ON if the engine is not running to prevent battery discharge START Turn the ignition key to the START position to start the en...

Страница 103: ...shift lever is engaged in 1st gear set the parking brake fully and shut the engine off Unexpected and sudden vehicle movement may occur if these precau tions are not taken Continued Continued Never r...

Страница 104: ...and hold it there until the engine starts a maximum of 10 sec onds then release the key NOTICE If the engine were not started within 10 seconds after the preheating is completed turn the ignition key...

Страница 105: ...uel consumption will be increased excessively Also this could the failure of engine Starting and stopping the engine for turbo charger intercooler 1 Do not race or accelerate the engine immediately af...

Страница 106: ...erse Never operate the engine with the tachometer rpm in the red zone NOTICE To avoid premature clutch wear and damage do not drive with your foot resting on the clutch pedal Also don t use the clutch...

Страница 107: ...cle on an incline Do not operate the clutch pedal rapidly and repeatedly WARNING Manual trans mission Before leaving the driver s seat always set the parking brake fully and shut the engine off Then m...

Страница 108: ...fferent speed from the wheel on the other side when the vehicle is cornering The difference between the limited slip differential and a conventional differential is that if the wheel on one side of th...

Страница 109: ...e the vehicle and observe the operation of the lock ing differential The vehicle should not become stuck if the differential is functioning properly 2 Depress the accelerator pedal gradually and then...

Страница 110: ...rmal BRAKE SYSTEM WARNING Brakes Do not drive with your foot resting on the brake pedal This will create abnormal high brake temperatures excessive brake lining and pad wear and increased stopping dis...

Страница 111: ...te a problem with your brakes NOTICE To avoid costly brake repairs do not continue to drive with worn brake pads Rear drum brakes Your rear drum brakes do not have wear indicators Therefore have the r...

Страница 112: ...king brake To prevent unintentional movement when stopped and leaving the vehicle do not use the gearshift lever in place of the parking brake Set the parking brake AND make sure the gearshift lever i...

Страница 113: ...ntion is necessary If at all possible cease driving the vehicle immediately If that is not pos sible use extreme caution whilst operating the vehicle and only con tinue to drive the vehicle until you...

Страница 114: ...le still requires suf ficient stopping distance Always maintain a safe distance from the vehicle in front of you Always slow down when cornering The anti lock brake system cannot prevent accidents res...

Страница 115: ...ning light will stay on for approximately 3 sec onds after the ignition switch is ON During that time the ABS will go through self diag nosis and the light will go off if everything is normal If the l...

Страница 116: ...l for more than 5 seconds in either position may cause damage to the power steer ing pump If the power steering drive belt breaks or if the power steering pump malfunctions the steering effort will gr...

Страница 117: ...fore driving Horn To sound the horn press the horn symbol on your steering wheel Check the horn regularly to be sure it operates properly CAUTION To sound the horn press the area indicated by the horn...

Страница 118: ...1 Engine temperature gauge 2 Turn signal indicators 3 Headlight high beam indicator 4 Speedometer 5 Fuel gauge 6 Warning and indicator lights 7 Tripmeter mode reset button 8 Odometer Tripmeter OPU0224...

Страница 119: ...e temperature gauge 2 Turn signal indicators 3 Headlight high beam indicator 4 Speedometer 5 Fuel gauge 6 Warning and indicator lights 7 Tripmeter mode reset button 8 Odometer Tripmeter 9 Tachometer T...

Страница 120: ...u can choose the odometer trip meter A and tripmeter B by pressing the tripmeter mode button GAUGES OPU022438 OPU022439 OPU022440 OPU022441 OPU022442 OPU022443 Speedometer The speedometer indicates th...

Страница 121: ...but ton for 1 second or more and then releasing Tachometer if equipped The tachometer indicates the approx imate number of engine revolutions per minute rpm Use the tachometer to select the cor rect s...

Страница 122: ...range area toward the H position it indicates overheat ing that may damage the engine Fuel gauge The fuel gauge indicates the approxi mate amount of fuel remaining in the fuel tank Fuel tank capacity...

Страница 123: ...warning light illuminates whilst driving 1 Drive safely to the side of the road and stop 2 With the engine off check the engine oil level If the level is low add oil as required If the warning light r...

Страница 124: ...rned to ON and goes off in approximately 3 seconds if the system is operating normally If the ABS warning light remains on comes on whilst driving or does not come on when the ignition switch is turne...

Страница 125: ...e vehicle if leaks are found the warning light remains on or the brakes do not operate properly We recommend that you contact an authorised Kia dealer To check bulb operation check whether the parking...

Страница 126: ...d by the turn signals If the arrow comes on but does not blink blinks more rapidly than normal or does not illuminate at all a malfunc tion in the turn signal system is indi cated We recommend that th...

Страница 127: ...ight is blinks it may stop blink ing after driving the vehicle at more than 60km h 37 mph or at more than second gear with 1500 2000 engine rpm for a cer tain time for about 25 minutes If the malfunct...

Страница 128: ...e the engine Safety belt warning chime if equipped If the driver s seat belt is not fastened when the ignition key is turned ON or if it is disconnected after the key is ON the safety belt warning chi...

Страница 129: ...a speed over 5 km h 3 mph the system may not be activated correctly The sensing distance whilst the rear parking assist system is in operation is approximately 120 cm 47 in When more than two objects...

Страница 130: ...r The sensing range will return to normal when removed 2 Outside air temperature is extremely hot or cold The following objects may not be recognized by the sensor 1 Sharp or slim objects such as rope...

Страница 131: ...ness of the sensor Always per form a visual inspection to make sure the vehicle is clear of all obstructions before moving the vehicle in any direction CAUTION This system can only sense objects withi...

Страница 132: ...has a Headlight and a Taillight position To operate the lights turn the knob at the end of the control lever to one of the following positions OFF position Taillight position Headlight position Tailli...

Страница 133: ...n to the nor mal low beam position when released The headlight switch does not need to be on to use this flashing feature Turn signals The ignition switch must be on for the turn signals to function T...

Страница 134: ...low bulb may be burned out or have a poor electrical con nection in the circuit Front fog light if equipped Fog lights are used to provide improved visibility and avoid acci dents when visibility is p...

Страница 135: ...sun set The DRL system will make your low beam headlights turn OFF when 1 The head light switch is on 2 The taillight switch is on 3 Engine stops Headlight levelling device if equipped This manual sys...

Страница 136: ...e wipe OFF 0 Off INT Intermittent wipe LO 1 Low wiper speed HI 2 High wiper speed B Intermittent wipe time adjust ment C Wash with brief wipes if equipped Windscreen wipers WIPERS AND WASHERS OPU02890...

Страница 137: ...bout 10 minutes or until the snow and or ice is removed before using the wind screen wipers to ensure proper oper ation If you do not remove the snow and or ice before using the wiper and wash er it m...

Страница 138: ...washer pump do not operate the washer when the fluid reservoir is empty The hazard warning flasher causes the rear tail lights and front turn sig nal lights to flash on and off which serves as a warn...

Страница 139: ...an speed control knob 3 Temperature control knob 4 Air intake control button 5 Air conditioning button if equipped 1PUR3033 CAUTION Operating the blower when the ignition switch is in the ON posi tion...

Страница 140: ...Medium speed 3 High speed 4 Maximum speed To turn off the blowers To turn off the blowers turn the fan speed control knob to the 0 position Temperature control knob The temperature control knob allows...

Страница 141: ...ed from the outlet outlet port Face floor position Air flow is directed towards the face and the floor The air to the floor is warmer than the air to the face except when the temper ature control is s...

Страница 142: ...e side window defrosters The outside fresh air and air conditioning will be selected automatically outlet port Defrost position Most of the air flow is directed to the windscreen with a small amount o...

Страница 143: ...ircu lated air position will cause fogging of the windscreen and side windows and the air within the passenger compartment will become stale In addition prolonged use of the air conditioning with the...

Страница 144: ...ition 3 Set the temperature control to the desired position 4 Set the fan speed control to the desired speed Heating 1 Set the mode to the position 2 Set the air intake control to the outside fresh ai...

Страница 145: ...ure control to maintain maximum comfort When maximum cooling is desired set the temperature control to the extreme left position set the air intake control to the recirculated air position then set th...

Страница 146: ...using the air conditioning system you may notice clear water dripping or even pudding on the ground under the passenger side of the vehicle This is a normal sys tem operation characteristics The air c...

Страница 147: ...refore we recommend that the system be inspected by an autho rised Kia dealer Air conditioner refrigerant and compressor lubricant NOTICE When the performance of the air conditioning system is reduced...

Страница 148: ...extreme hot position 3 Select the position 4 The outside fresh air and air con ditioning will be selected WINDSCREEN DEFROSTING AND DEFOGGING 1PUA2069 1PUA2070 CAUTION Do not use the or posi tion duri...

Страница 149: ...probability of fogging up the inside of the windscreen the air intake control is set to the outside fresh air position automatically if any of following occur The mode is selected to the or whilst the...

Страница 150: ...light in the air intake control button will blink 3 times with 0 5 second of interval It indi cates that the defogging logic is can celed or returned to the programmed status If the battery has been d...

Страница 151: ...1 2 3 4 5 6 7 8 9 Emission control system 5 2 Before driving 5 3 Suggestions for economical operation 5 6 Special driving conditions 5 7 Overloading 5 11 Label information 5 12 Loading Your Vehicle 5...

Страница 152: ...onoxide Carbon monoxide can be present with other exhaust fumes Therefore if you smell exhaust fumes of any kind inside your vehi cle we recommend that the sys tem be inspected and repaired by an auth...

Страница 153: ...e to observe these precautions could result in damage to the catalyt ic converter and to your vehicle Additionally such actions could void your warranties Diesel Particulate Filter if equipped The Die...

Страница 154: ...nking for a long time the DPF system can be damaged and fuel consumption can be worsen Before entering vehicle Be sure that all windows outside mirror s and outside lights are clean Check the conditio...

Страница 155: ...iving is danger ous Drunk driving is the num ber one contributor to the high way death toll each year Even a small amount of alcohol will affect your reflexes perceptions and judgement You are much mo...

Страница 156: ...pres sures Maintain a safe distance from other vehicles to avoid sudden stops This will reduce wear on brake lin ings and pads Driving in such a way will also save fuel because extra fuel is required...

Страница 157: ...e vehicle is stopped If stalled in snow mud or sand use second gear Accelerate slow ly to avoid spinning the drive wheels Use sand rock salt tyre chains or other non slip material under the drive whee...

Страница 158: ...needed to stop your vehicle so slow down Keep your windscreen wiping equipment in good shape Replace your windscreen wiper blades when they show signs of streaking or missing areas on the windscreen I...

Страница 159: ...your vehicle s handling in all weather conditions Keep in mind that the traction provid ed by snow tyres on dry roads may not be as high as your vehicle s orig inal equipment tyres You should drive c...

Страница 160: ...ting the body or chassis stop and tighten them If they still make contact slow down until it stops Remove the chains as soon as you begin driving on cleared roads WARNING Mounting chains When mounting...

Страница 161: ...VWR for your vehicle are on the manufactur er s label attached to the pas senger s door Exceeding these ratings can cause an accident or vehicle damage You can cal culate the weight of your load by we...

Страница 162: ...e several important labels and identification numbers located on your vehicle The label locations are identified in the illustrations shown Vehicle identification number VIN Identification label if eq...

Страница 163: ...5 13 Driving tips 1 2 3 4 5 6 7 8 9 Load sensing proportioning valve if euipped Engine number OPU082001 OPU062003 1PUA6003A 2 7L 2 5L...

Страница 164: ...ront and rear axles called Gross Axle Weight Rating GAWR Never exceed the GVWR for your vehicle or the Gross Axle Weight Rating GAWR for either the front or rear axle And if you do have a heavy load y...

Страница 165: ...1 2 3 4 5 6 7 8 9 Road warning 6 2 In case of an emergency whilst driving 6 3 Overheating 6 4 Emergency starting 6 5 Electrical circuit protection 6 7 Towing 6 14 If you have a flat tyre 6 18 In case...

Страница 166: ...vehicle is stopped near the edge of a roadway Depress the flasher switch with the ignition switch in any position The flasher switch is located in the centre console switch panel All turn signal light...

Страница 167: ...loss of control When the car has slowed to such a speed that it is safe to do so brake carefully and pull off the road Drive off the road as far as possible and park on firm level ground If you are on...

Страница 168: ...to permit the engine to cool gradually If the temperature does not go down with the engine idling stop the engine and allow sufficient time for it to cool 4 The coolant level should then be checked I...

Страница 169: ...generator set Connecting jumper cables Connect cables in numerical order and disconnect in reverse order WARNING Battery Keep all flames or sparks away from the battery The bat tery produces hydrogen...

Страница 170: ...it to or near any part that moves when the engine is cranked Do not con nect the jumper cable from the negative terminal of the booster battery to the negative terminal of the discharged battery Do no...

Страница 171: ...lows this indicates an electrical problem Avoid using the system involved and we recommend that you consult an authorised Kia dealer Two kinds of fuses are used stan dard for lower amperage rating and...

Страница 172: ...se of the same rating from a circuit you may not need for operating the vehicle such as the cigar lighter fuse If the headlight or other electrical components do not work and the fuses are OK check th...

Страница 173: ...10A Instrument Cluster A BAG 15A SRS Control Module B UP LP 10A Back Up Lamp Switch Rear Parking Assist Buzzer IG 1 15A ECM Fuel Filter Warning Sensor Vehicle Speed Sensor ABS Control Module Air Flow...

Страница 174: ...tch DRL 10A DRL Control Module HAZARD 15A Hazard Switch ICM Relay Box Hazard Relay KEY ILLUMI 10A Door Warning Switch AUDIO 15A Audio TAIL LAMP LH 10A Heater Control Module Audio Instrument Cluster Mu...

Страница 175: ...G 2 40A Ignition Switch I C FAN 20A I C FAN Relay IG 1 40A Ignition Switch START Relay B 2 40A I P Juntion Box TAIL LP Relay Fuse TAIL LAMP LH RH LUMBAR SUPPORT HORN FOG LP FRT RR DR LOCK STOP LAMP AB...

Страница 176: ...Juntion Box Fuse KEY ILLUMI HAZARD BLOWER 30A Blower Relay COND 20A COND Relay RR HTD 20A RR HTD Relay IGN 2 30A Ignition Switch IGN 1 30A Ignition Switch START Relay BTN 2 30A I P Juntion Box TAIL L...

Страница 177: ...d period 1 Turn off the engine 2 Turn off the headlights and tail lights 3 Open the driver side knee bolster cover and pull up the MEMORY 15A NOTICE If the memory fuse is pulled up from the fuse panel...

Страница 178: ...latbed is recommended It is acceptable to tow the vehicle with the front wheels on the ground without dollies and the rear wheels off the ground When being towed by a commercial tow truck and wheel do...

Страница 179: ...able in an emergency your vehicle may be temporarily towed using a cable or chain secured to the emergency tow ing hook under the front of the vehi cle Use extreme caution when tow ing the vehicle A d...

Страница 180: ...a verti cal angle Always pull straight ahead Use a towing strap less than 5 m 16 feet long Attach a white or red cloth about 30 cm 12 inches wide in the middle of the strap for easy visibility Drive c...

Страница 181: ...Press the brake pedal with more force than normal since you will have reduced brake performance More steering effort will be required because the power steer ing system will be disabled If you are dri...

Страница 182: ...he jack 1 Pull down and unhook the rubber band 2 Lift the jack carefully After using replace the jack in the reverse order of removal Removing the spare tyre 1 Insert the wheel nut wrench to the spare...

Страница 183: ...e stopper bracket on the support hook with the slots in the guide plate and turn the support hook 3 Reinstall the rear spare tyre on the front spare tyre as illustration 4 Connect the steel wire with...

Страница 184: ...ised with the jack WARNING Changing tyres Never attempt vehicle repairs in the traffic lanes of a public road or highway Always move the vehicle com pletely off the road and onto the shoulder before t...

Страница 185: ...e and spare tyre from the vehicle 5 Block both the front and rear of the wheel that is diagonally opposite the jack position 1PUA4013E 1TUA4016 WARNING Changing a tyre To prevent vehicle movement whil...

Страница 186: ...nsert the screwdriver into the grove of the wheel cover and pry gently to remove the wheel cover if equipped 7 Loosen the wheel lug nuts coun terclockwise one turn each but do not remove any nut until...

Страница 187: ...movement or slip page 11 Remove the wheel lug nuts by turning them counterclockwise then remove the wheel 12 Mount the spare tyre into position and install the wheel lug nuts with the beveled edge in...

Страница 188: ...in a pattern If you are unsure of the tightness of the wheel lug nuts have them checked at the nearest service station Improperly tightened wheel lug nuts could cause brake pedal vibration whilst brak...

Страница 189: ...stud or vice versa will not secure the wheel to the hub properly and will damage the stud so that it must be replaced Note that most lug nuts do not have metric threads Be sure to use extreme care in...

Страница 190: ...s 7 11 Owner maintenance 7 15 Engine compartment 7 18 Engine oil and oil filter 7 20 Engine cooling system 7 22 Brakes and clutch 7 25 Parking brake 7 26 Power steering 7 27 Steering wheel 7 28 Lubric...

Страница 191: ...1 2 3 4 5 6 7 8 9 Bulb replacement 7 48 Lubricant specifications 7 54 Exterior care 7 56 Interior care 7 60 Maintenance 1 2 3 4 5 6 7 8 9...

Страница 192: ...e or a lack of required maintenance are not covered We recommend you have your vehi cle maintained and repaired by an Authorised Kia Dealer An Authorised Kia Dealer meets Kia s high service quaility s...

Страница 193: ...ther corrosive materials are being used Driving on rough or muddy roads Driving in mountainous areas Extended periods of idling or low speed operation Driving for a prolonged period in cold temperatur...

Страница 194: ...r replace MAINTENANCE INTERVALS MAINTENANCE ITEM Number of months or driving distance whichever comes first Months 6 12 18 24 30 36 42 48 54 Miles 1 000 0 6 6 12 18 24 30 36 42 48 54 Km 1 000 1 10 20...

Страница 195: ...irst Months 6 12 18 24 30 36 42 48 54 Miles 1 000 0 6 6 12 18 24 30 36 42 48 54 Km 1 000 1 10 20 30 40 50 60 70 80 90 Cooling system Engine coolant 2 Battery condition I I I I I I I I I All electrical...

Страница 196: ...rst Months 6 12 18 24 30 36 42 48 54 Miles 1 000 0 6 6 12 18 24 30 36 42 48 54 Km 1 000 1 10 20 30 40 50 60 70 80 90 Steering gear rack linkage and boots I I I I I I I I I Drive shaft and boots I I I...

Страница 197: ...clearance 2 7L I I I I Vapour hose and fuel filler cap 2 7L I I I Vacuum and crankcase ventilation hoses 2 7L I I I Fuel filter R R Fuel lines and hoses I I I I I I Inspect and if necessary adjust cor...

Страница 198: ...akes and pads I I I I I I I I I Drum brakes and linings I I I I I I I I I Power steering fluid and hoses if equipped I I I I I I I I I Inspect Coolant level adjustment and leak every day For New Zeala...

Страница 199: ...I I I Front suspension I I I I I I I I I Leaf spring U bolt 3 I I I I I I I I I Bolt and nuts on chassis and body I I I I I I I I I Front rear wheel bearing play 4 I I I I I I I I I Dust filter I I I...

Страница 200: ...il filter 2 5L R Every 7 500 km 4 500 miles or 6 months H I J Air cleaner element I or R C E Manual transmission fluid R Every 120 000 km 75 000 miles A C E F G H I J Rear differential fluid I or R Ev...

Страница 201: ...railer I Driving for patrol car taxi commercial car or vehicle towing J Driving over 170 km h 106 MPH Disc brakes and pads calipers and rotors I C D E G H Drum brakes and linings I C D E G H Parking b...

Страница 202: ...6 months A B C D F G Other countries H I J Engine oil and Every 5 000 km 3 000 miles or 6 months engine oil filter For New Zealand South Africa 2 7L R Every 4 000 km 2 500 miles or 6 months A B C D F...

Страница 203: ...riving over 140 km h 85 MPH Steering gear rack linkage and boots I C D E F G Front suspension I C D E F G Disc brakes and pads calipers and rotors I C D E G H Drum brakes and linings I C D E G H Parki...

Страница 204: ...hanges in the sound of the exhaust or any smell of exhaust fumes in the vehicle Check for vibrations in the steering wheel Notice any increased steer ing effort or looseness in the steer ing wheel or...

Страница 205: ...en washer spray and wiper operation Clean wiper blades with clean cloth dampened with washer fluid Check headlight alignment Check muffler exhaust pipes shields and clamps Check the lap shoulder belts...

Страница 206: ...maintenance work on a vehicle can be dangerous You can be seriously injured whilst performing some main tenance procedures If you lack sufficient knowledge and expe rience or the proper tools and equi...

Страница 207: ...Engine oil dipstick 2 Power steering fluid reservoir if equipped 3 Engine oil filler cap 4 Radiator cap 5 Dust filter 6 Engine coolant reservoir 7 Windscreen washer fluid reservoir Bonnet 2 5L Engine...

Страница 208: ...2 Power steering fluid reservoir if equipped 3 Engine oil filler cap 4 Radiator cap 5 Dust filter 6 Engine coolant reservoir 7 Windscreen washer fluid reservoir Passenger s side 2 7L Engine Bonnet Dr...

Страница 209: ...he oil pan 4 Pull the dipstick out wipe it clean and re insert it fully 5 Pull the dipstick out again and check the level The level should be between F and L NOTICE The engine oil dipstick is located...

Страница 210: ...dealer WARNING Used engine oil may cause irri tation or cancer of the skin if left in contact with the skin for pro longed periods of time Used engine oil contains chemicals that have caused cancer in...

Страница 211: ...n you are sure all the pressure has been released press down on the cap using a thick towel and continue turning counter clockwise to remove it Continued Continued Even if the engine is not oper ating...

Страница 212: ...ed by an authorised Kia dealer Adding coolant When adding coolant use only deionized water or soft water for your vehicle and never mix hard water in the coolant filled at the fac tory An improper co...

Страница 213: ...not remove the radiator cap when the engine and radiator are hot Scalding hot coolant and steam may blow out under pressure This could cause serious injury 15 C 5 F 35 65 25 C 13 F 40 60 35 C 31 F 50...

Страница 214: ...e wear of the brake linings If the fluid level is excessively low we recom mend that the system be checked by an authorised Kia dealer Use only the specified brake clutch fluid Refer to Recommended Lu...

Страница 215: ...m be serviced by an autho rised Kia dealer Stroke 5 7 clicks at a force of 20 kg 44 lbs 196 N 1PUR7004 PARKING BRAKE CAUTION Do not allow brake clutch fluid to contact the vehicle s body paint as pain...

Страница 216: ...commend that the system be inspected by an authorised Kia dealer NOTICE To avoid damage to the power steering pump do not operate the vehicle for prolonged periods with a low power steering fluid leve...

Страница 217: ...tion Turn the steering wheel to the left and right with a little force and check the free play until you get a feel for resistance against the tyre wheels movement Standard value 30 mm 1 2 in or less...

Страница 218: ...t on locks during cold weather Make sure the engine bonnet sec ondary latch keeps the bonnet from opening when the primary latch is released 1PUA5016 WARNING Do not use radiator coolant or antifreeze...

Страница 219: ...of the fuel filter Pump up and down until the fuel flows out of the plug opening Set the plug firmly into place if air has been extracted NOTICE Use cloths when you extract air so that the fuel is no...

Страница 220: ...n the drain plug and drain water After water is drained securely tighten the drain plug Pump the pump priming plunger and check to make sure that no fuel is leaking from the drain plug After starting...

Страница 221: ...loth If the vehi cle is operated in extremely dusty or sandy areas clean or replace this element more often than at the usual recommended intervals Element replacement A dry paper air cleaner filter i...

Страница 222: ...st or other foreign substances that come into the vehicle from the out side through the heating and air con ditioning system The dust filter should be cleaned every 20 000 km 12 000 miles If the vehic...

Страница 223: ...car washes If the blades are not wiping properly clean both the win dow and the blades with a good cleaner or mild detergent and rinse thoroughly with clean water NOTICE To prevent damage to the wiper...

Страница 224: ...de assembly to expose the plastic locking clip NOTICE Do not allow the wiper arm to fall against the windscreen 2 Compress the clip and slide the blade assembly downward 3 Lift it off the arm 4 Instal...

Страница 225: ...arefully when handling a battery Keep lighted cigarettes and all other flames or sparks away from the battery Hydrogen which is a highly combustible gas is always present in bat tery cells and may exp...

Страница 226: ...sed battery excessive pressure on the case may cause battery acid to leak resulting in per sonal injury Lift with a battery carrier or with your hands on opposite corners Never attempt to charge the b...

Страница 227: ...The cold test current in amperes by SAE 6 440A The cold test current in amperes by EN Battery recharging Your vehicle has a maintenance free calcium based battery If the battery becomes discharged in...

Страница 228: ...ring charging Disconnect the battery charg er in the following order 1 Turn off the battery charger main switch 2 Unhook the negative clamp from the negative battery ter minal 3 Unhook the positive cl...

Страница 229: ...r the tyres will be underinflated Underinflation results in excessive wear poor handling reduced fuel economy and the possibility of blowouts from overheated tyres Also low tyre pressure can cause poo...

Страница 230: ...eels severe braking or severe cornering Look for bumps or bulges in the tread or side of tyre Replace the tyre if you find either of these conditions Replace the tyre also if you can see fabric or cor...

Страница 231: ...ases you will not need to have your wheels aligned again However if you notice unusual tyre wear or your vehicle pulling one way or the other the alignment may need to be reset If you notice your vehi...

Страница 232: ...t ride handling ground clear ance tyre clearance and speedometer calibration Continued Continued Driving on worn out tyres is very hazardous and will reduce braking effectiveness steering accuracy and...

Страница 233: ...R Tyre construction code Radial 14 Rim diameter in inches C Commercial tyre 102 100 Load Index a numerical code associated with the maximum load the tyre can carry R Speed Rating Symbol See the speed...

Страница 234: ...gs currently being used for passenger car The speed rating symbol is part of the tyre size designation on the sidewall of the tyre This symbol corresponds to that tyre s designed maximum safe operatin...

Страница 235: ...e DOT XXXX XXXX OOOO The first letters numbers of the DOT indicate the manufacturing plant tyre size and tread pattern last four num bers indicate week and year manu factured For example DOT XXXX XXXX...

Страница 236: ...ter driving inspect tyres and wheels When passing over a pothole speed bump manhole or curb stone drive slowly so that the tyres and wheels are not dam aged If the tyre is impacted we rec ommend that...

Страница 237: ...ows inside your vehicle during the rain and doesn t indicate a problem with your vehicle If the water leaks into the lamp bulb cir cuitry we recommend that the sys tem be checked by an authorised Kia...

Страница 238: ...res surized gas that will produce flying pieces of glass if broken Always handle them carefully and avoid scratches and abra sions If the bulbs are lit avoid contact with liquids Never touch the glass...

Страница 239: ...g wire into position by aligning the wire with the groove on the bulb 9 Connect the headlight bulb socket connector 10 Install the headlight bulb cover by turning it clockwise 11 Connect the headlight...

Страница 240: ...ector 7 Reinstall the light assembly to the body of the vehicle Front fog light bulb replacement if equipped 1 Reach your hand into the front bumper below the fog light hous ing 2 Remove the socket fr...

Страница 241: ...osen the lens retaining screws with a cross tip screwdriver 2 Remove the bulb from the socket by pressing it in and rotating it until the tabs on the bulb align with the slots in the socket Pull the b...

Страница 242: ...the bulb from the socket by pressing it in and rotating it until the tabs on the bulb align with the slots in the socket Pull the bulb out of the socket 4 Insert a new bulb by inserting it into the s...

Страница 243: ...tant in dusty or sandy areas and when the vehicle is used on unpaved roads Cleaning the plug and dipstick areas will prevent dirt and grit from entering the engine and other mechanisms that could be d...

Страница 244: ...hose recommended could result in engine damage When choosing an oil consider the range of temperature your vehicle will be operated in before the next oil change Proceed to select the rec ommended oil...

Страница 245: ...ollution and similar deposits can damage your vehicle s finish if not removed immediately Even prompt washing with plain water may not completely remove all these deposits A mild soap safe for use on...

Страница 246: ...if the rest of the vehicle does not yet need wax ing NOTICE Wiping dust or dirt off the body with a dry cloth will scratch the finish Do not use steel wool abrasive cleaners or strong detergents con t...

Страница 247: ...f wax or preservative If necessary coat the parts with non corrosive petroleum jelly or other protective compound Underbody maintenance Corrosive materials used for ice and snow removal and dust contr...

Страница 248: ...ergent and rinse thoroughly with water Also be sure to clean the wheels after driving on salted roads This helps prevent corrosion Avoid washing the wheels with high speed car wash brushes Do not use...

Страница 249: ...if the material is not proper ly maintained Cleaning the lap shoulder belt webbing Clean the belt webbing with any mild soap solution recommended for cleaning upholstery or carpet Follow the instruct...

Страница 250: ...1 2 3 4 5 6 7 8 9 Specifications 8 2 Specifications...

Страница 251: ...1 340 1 460 Wheel base 2 415 2 615 2 415 Length 2 810 3 110 2 810 Cargo deck Width 1 630 1 630 1 630 Height 355 355 355 SPECIFICATIONS The specifications given here are for general information only Fo...

Страница 252: ...8PR 450 65 Double cab 195R15 8PR 310 45 145R13C 8PR 430 62 Highdeck 195R15 8PR 350 51 195R15 8PR 390 57 2 7L Lowdeck Standard cab King cab 195R14 6PR 310 45 5 00R12 8PR 390 57 Double cab 195R14 6PR 31...

Страница 253: ...2 4 US qt Transfer case fluid if equipped 1 1 l 1 2 US qt API Service GL 4 SAE 75W 85 fill for life Differential fluid 2 7L With LSD 1 3 l 1 4 US qt LSD OIL API Service GL 5 SAE 85W 90 Without LSD 1...

Страница 254: ...ion Power steering fluid 1 1 l 1 2 l 1 2 1 3 US qt PSF III Coolant 2 5L 12 6 l 13 3 US qt Ethylene glycol base for aluminum radiator 2 7L 11 2 l 11 8 US qt Brake clutch fluid 0 35 l 0 37 US qt FMVSS11...

Страница 255: ...lights if equipped 21 License plate lights 10 Front room lamp 10 Dome lamp if equipped 10 Wattage 8 6 Specifications 1 2 3 4 5 6 7 8 9 CE0678 DECLARATION OF CONFORMITY The radio frequency components o...

Страница 256: ...1 2 3 4 5 6 7 8 9 Index...

Страница 257: ...placement 7 52 License plate light bulb replacement 7 52 Position turn signal light bulb replacement 7 50 Rear combination light bulb replacement 7 53 Capacities 8 4 Centre seatback console tray 3 48...

Страница 258: ...r care 7 56 Exterior overview 2 2 Flat tyre 6 18 Changing tyres 6 20 Jack and tools 6 18 Reinstalling the spare tyre 6 19 Removing the spare tyre 6 18 Front fog light bulb replacement 7 51 Front seat...

Страница 259: ...Interior light bulb replacement 7 52 Interior overview 2 3 Jack and tools 6 18 Jump starting 6 5 Keys 3 2 Label information 5 12 Engine number 5 13 Identification label 5 12 Load sensing 5 13 Vehicle...

Страница 260: ...ower steering 4 16 7 27 Power window 3 11 Push starting 6 6 Rear combination light bulb replacement 7 53 Rear gate 3 42 Rear parking assist system 4 29 Remote keyless entry 3 5 Road warning 6 2 Rockin...

Страница 261: ...omical operation 5 6 Sunvisor 3 49 Tachometer 4 21 Tilt steering 4 16 Tyre 8 3 Tyre chains 5 9 Tyres and wheels 7 40 Checking a tyre life 7 46 Low aspect ratio tyre 7 47 Tyre care 7 40 Tyre replacemen...

Страница 262: ...9 7 1 2 3 4 5 6 7 8 9 Index Windscreen defrosting and defogging 4 48 Defogging logic 4 49 Winter driving 5 9 Snow tyres 5 9 Tyre chains 5 9 Wiper blades 7 34 Wipers and washers 4 36...

Отзывы: