


Laptop Garage
®
Installation & Operating Instructions
Assemble units as described herein only. To do otherwise
may result in instability. All screws, nuts and bolts must be
tightened securely and must be checked periodically after
assembly. Failure to assemble properly, or to secure parts
may result in assembly failure and personal injury.
3
Release Lever Operation
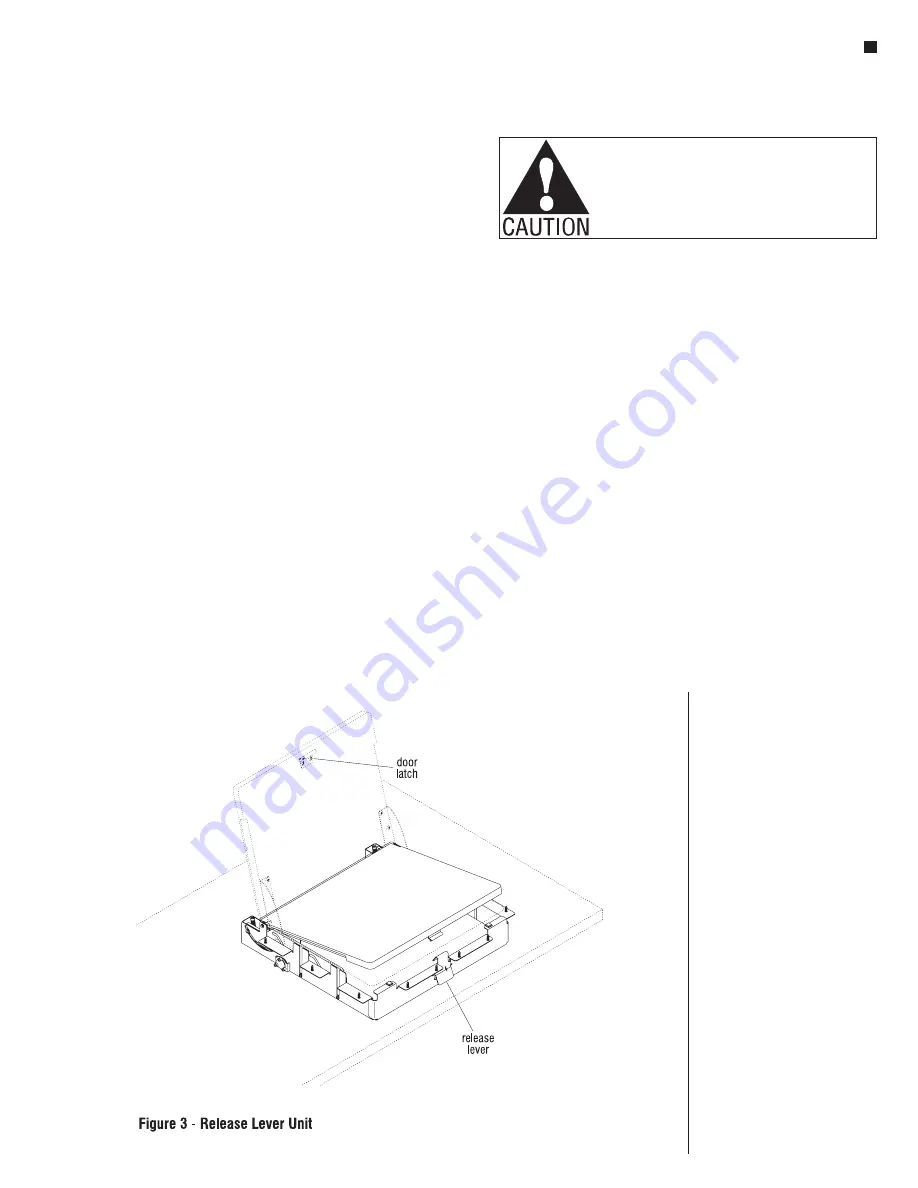
1. Open the Laptop Garage door
by pressing the release lever
located under the worksurface
near the center front of the unit.
Allow the door front to open
approximately 2" and grasp the
open edge of the door and rotate
to the open position. To close
the unit, grasp the top of the top
or sides of the door and rotate
closed until the door is open
approximately 2". Firmly push
down on the front center of door
until the door latch engages the
release lever (Figure 3).
2. The latch on the door can be
adjusted if necessary to ensure
the top of the door is flush with
the top of the worksurface when
closed. To adjust the latch,
loosen the two wood screws that
attach it to the door and slide
toward front or back of door.
Re-tighten screws.
Laptop Computer Installation
Note:
It is important that
all wiring and cables be
routed appropriately to avoid
interference with Laptop Garage
mechanism and cause damage.
Dual lock patches (Figure 2) will
also help to stabilize and locate
the laptop computer inside the
Laptop Garage unit while still
allowing easy removal when
required.
1. Open the Laptop Garage per the
previous instructions. Peel the
adhesive protection off one side
of the dual lock patch (Figure 2)
and install to a flat location on
a bottom corner of the laptop
computer. Remove the adhesive
protection from the underside of
the dual lock patch and carefully
position the laptop computer
onto the Laptop Garage shelf so
it will not interfere with the unit's
opening or closing. Next, lift the
laptop computer up, splitting
the one fully-secured dual
lock patch between the shelf
and the computer and remove
the adhesive protection from
the remaining three dual lock
patches. Carefully set the laptop
computer back into its correct
position and press down firmly
to seat the dual lock patches to
the shelf (Figure 2).
2. Laptop power and data wiring
can now be run through the
holes or lay-in notches in the
laptop shelf (Figure 2). Ensure
that no wires are directly below
the laptop shelf or near the
door pivot brackets on each
side. Secure extra wiring to the
underside of the worksurface or
unit with nylon wire ties or place
in electrical beam of desk.


