


14
Omni Wi-Fi IP Camera User’s Manual
Web Client
Network Configuration
Select this menu option to configure the network and DDNS service settings.
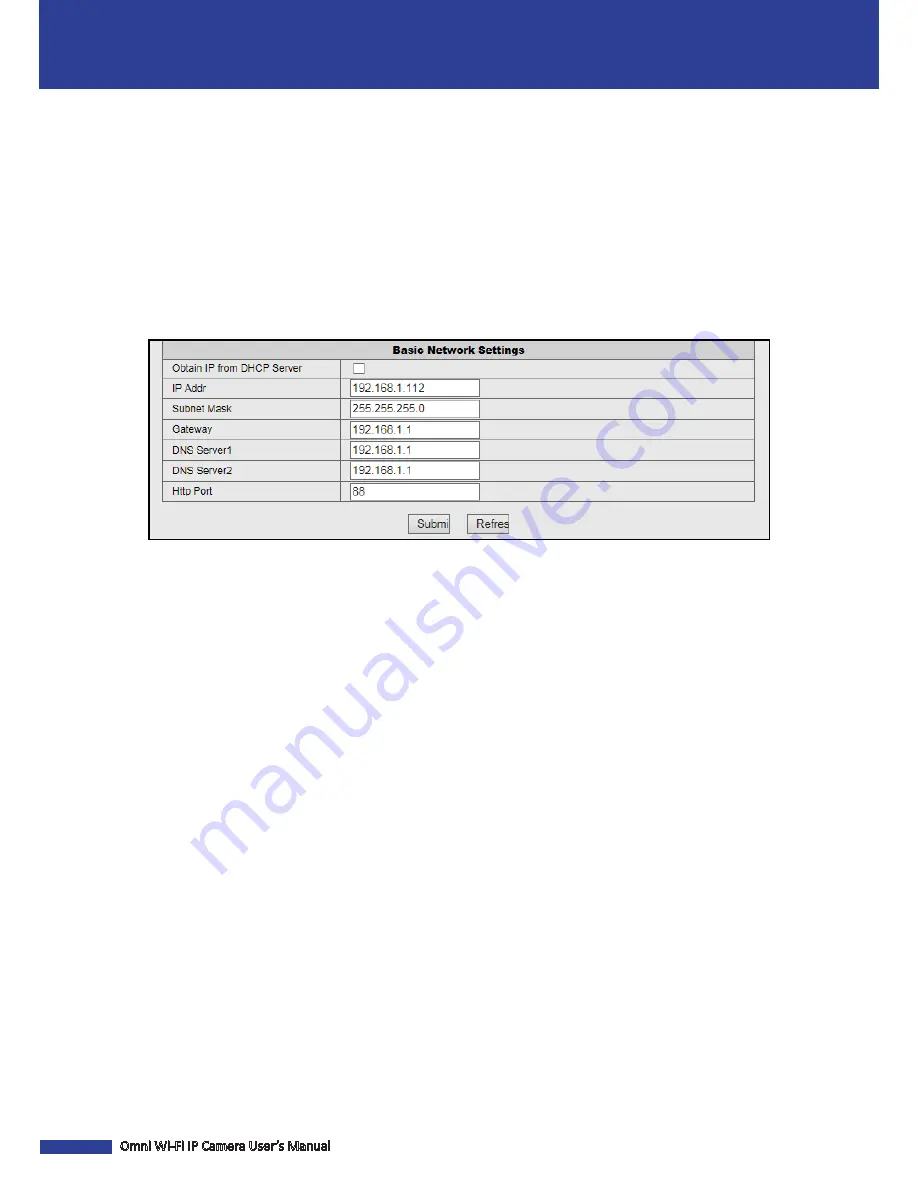
Configure the Basic Network Settings
Click
Basic Network Settings
to configure how the camera connects to the network.
This camera provides two network connection options: Static IP (Static Address) and DHCP (Dynamic Address).
• Static IP:
Select this connection if the camera is directly connected to a DSL modem and your ISP has supplied you
with a predefined IP for your Internet connection.
•
DHCP:
Select this connection if the camera is connected to a router and DHCP is enabled.
Obtain IP from DHCP Server
: Check this box to select DHCP network connection if the camera is connected to a router
and DHCP is enabled.
IP Addr:
Enter the static IP address.
Subnet Mask:
Enter the subnetwork IP address.
Gateway:
Enter the gateway IP addresss.
DNS Server1/2:
Enter the DNS server address.
DNS Server1
is the primary DNS server and
DNS Server2
is a backup
DNS server. Usually should be enough just to enter the
DNS Server1
server address.
Http Port:
Enter the port number that you will use to log in to the device via the web.
NOTE:
•
The
IP Addr
,
Subnet Mask
,
Gateway
,
DNS Server1
, and
DNS Server2
options are only available when the
Obtain IP
from DHCP Server
function is disabled.
• Obtain these information from your network administrator or your Internet Service Provider (ISP).
• If you cannot use the either of the two default media.web ports, 80 or 38401, the specified port may be occupied
by other programs or it is being blocked by your service provider. Enter other port number. In this case, you need
to add the port number after the IP address. For example, if you set the Web Port as 85, you need to enter the IP
address as “192.168.3.103:85”.
Содержание QRT-501
Страница 1: ...QRT 501 IE Operation Manual...


