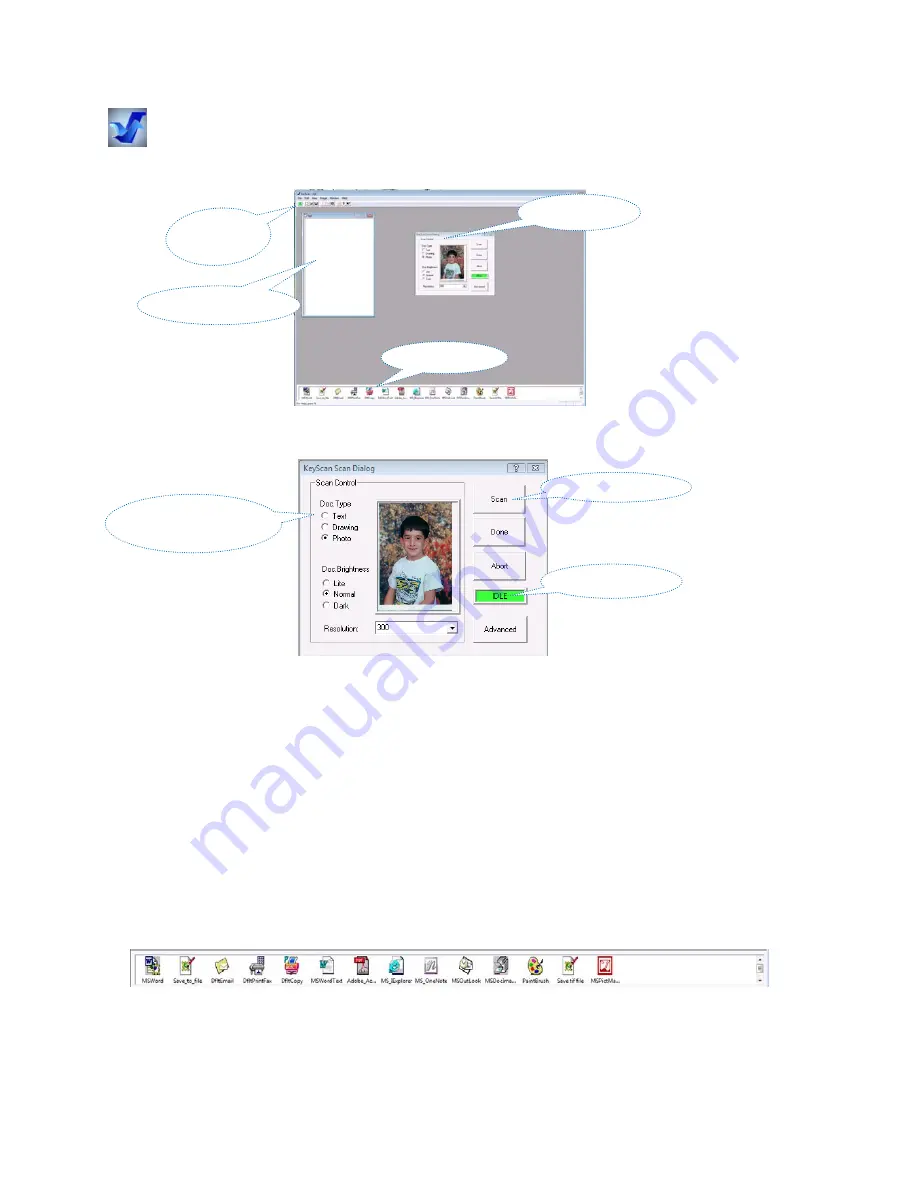
“KeyScan Imaging” application
Activate “KeyScan Imaging” by double clicking on its’ desktop icon.
In order to scan a document click on the green icon on its top left functions icon bar.
A scanning control dialog pops up and let the user define the scanning parameters such as color mode, resolution
etc.
Click on the dialog’s <Scan> button to start a new scan. The status window will change from Green to Red
indicating the status of the scanning process, then return back to Green the current page scan is finished.
If required, place a new page and click <Scan> again, a new scan process will start scanning a second page into
the same document (also to the same window). You can repeat the process as many time as needed (limited by
your hard-drive space), you can press page down to browse the pages of the document.
When finished all pages press <Done>, the scanning dialog will be removed.
You can scan more documents as explained before and each new document will have its own window.
The scanned documents are saved on KeyScan’s temporary folder only for the duration of the current activation of
KeyScan Imaging. The temporary folder is “cleaned” on each activation of KeyScan Imaging.
What can you do with the scanned documents:
In order to save or perform other functions on the scanned documents
Select a document by clicking on its window.
Click on one of the function-icons listed on the bottom functions bar in order to perform the required
function. KeyScan will scan your computer and place icons only for the applications actually installed on
your system.
For example click on a scanned document window to select it.
Click on the Save_To_File icon on the bottom applications bar to save it to folder in a required file format.
Click on the DfltEmail to send it as an email attachment.
Click on Painbrush to view it in Painbrush application
Scan
Green
Icon
Scan
dialog
Status
window
Scan
button
Select
color,
gray
or
B&W
Document
window
Functions
bar


