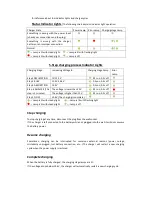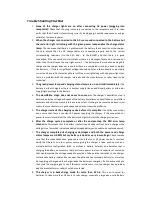
Trouble Shooting Checklist
1.
None of the charger lights are on after connecting AC power (plugging into
receptacle):
Check that the plug is securely connected to the receptacle and if so, then
verify that the AC outlet is functioning correctly by plugging in another appliance or using a
voltmeter to measure power.
2.
When the charger is connected to the AC source and connected to the battery but
the red error light is lit along with the green power lamp and/or the charge status
lamp:
This can mean that there is a problem with the battery, the connection or the charger.
Check to ensure that the DC charge cables are connected properly and to the correct
corresponding terminals (+to the RED and – to the BLACK) and that there is a good
connection, if the connection is intermittent or there is a blockage of some kind, corrosion or
other, then this will cause the error light as well. ---The battery could also be too damaged to
charge and the charger does not sense that there is a completed circuit (you need to replace
the battery). --- If there is significant voltage (above 9 volts) and the connections are clearly
correct and have solid contact and there is still an error light along with the power light then
there is a problem with the charger internally and the manufacturer or seller needs to be
contacted.
3.
The green power lamp and charging status lamp are on and solid immediately:
The
battery is either charged or there is another supply like an additional battery or alternator
supplying the voltage to the battery.
4.
The desulfation stage does not seem to come on:
The charger’s desulfation step is
determined by the voltage and needs of the battery. Sometimes no desulfation or very little is
necessary and this step may only last a second or less. Nothing to be concerned about, it just
means that your battery is in good shape and does not require desulfation.
5.
The charger restarts the charging cycles before it is complete:
Check the connections
and ensure that there is constant AC power supplying the charger. If the connections or
power source is intermittent then the battery charger will start the charging cycle over.
6.
After the charge cycle is complete or after the analyze step, the RED error lamp
comes on:
This means that the battery is defective and either will not hold a charge or the
voltage is too low which indicates a badly damaged battery and needs to be replaced as well.
7.
The charger completed its charging cycle/stages and both the power and charge
status lamps are GREEN but my battery is dead or very low voltage:
Check to make
sure that the connections have good contact and that your AC power source is constant.
Verify that there is no other power source giving the charger a false positive such as a
multiple battery configuration (with or without a battery isolator), an alternator that is
charging the battery, an accessory that has its own power source or a capacitor of some kind
that would provide the voltage needed to provide a false positive indication to the charger.
(occasionally battery isolator kits can open the gate and the secondary battery (or more) can
be supplying a charge and the charger reads the battery as charged). If all checks out above,
then start the charger again to see if the same results occur, if so, the charger has a problem
and the manufacturer or seller should be contacted.
8.
The charger is in bulk charge mode for more than 24 hrs:
This is not unusual for
batteries to take more than 24 hours to fully charge, especially a large deep cycle battery.

