a.
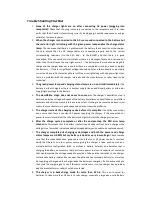
If necessary to remove the battery from the vehicle prior to charging then always
remove the ground terminal from the battery first and make sure all accessories
are off or disconnected so as not to cause an arc.
b.
Be sure area around battery is well ventilated while battery is being charged.
c.
Clean battery terminals and be careful to keep any corrosive materials away from
skin
d.
(for lead acid batteries) Carefully follow all manufacturer recommendations for
adding water to batteries for charging.
e.
Follow all battery manufacturers’ instructions for charging time and rates.
f.
Determine battery voltage by referring to owner’s manual or manufacturer’s
literature and do not use this charger unless it matches the output voltage of the
battery.
14)
Charger Location
a.
Position charger as far away from battery as possible while charging and never
place the charger on top or near the battery while charging because gases from
the battery will damage and corrode charger.
b.
Never allow charger to come in contact with battery acid.
c.
Do not operate charger in restricted or unventilated area.
d.
Do not place a battery on top of the charger for any reason
DANGER! NEVER ALTER AC CORD OR PLUG SUPPLIED WITH CHARGER – if it does not fit the
receptacle then have a proper receptacle installed by a qualified electrician. Improper connection
can result in electric shock and serious injuries. This charger is for use on a standard 120 volt
circuit and should always be used with a properly grounded receptacle.
Operation Guide
Automatic Charging and Battery Progress Monitoring
KeyLine Chargers © are fully automatic and may be left connected to AC power source and the battery
that is charging for long periods of time. However, it is always a good idea to check periodically to
ensure proper functioning during these extended charging periods.
The charger output power is completely determined by the condition and state of the battery being
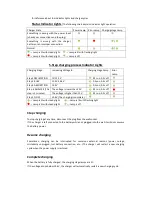
charged. KeyLine Mini-Pro chargers have 3 LED status lights to (1 red, 2 green) that indicate the status
of the charger and the battery it is charging.
The charger operates in one of five charging modes/stages. The desulfation mode that send sends very
fast electrical pulses back through the battery to loosen or dissolve sulfate deposits in the battery that
rob the battery of performance and charge capacity. Desulfation is intended to help maintain batteries
and is not intended to repair seriously damaged and neglected batteries. Desulfation stage duration is
determined by the charger and state of battery. New batteries, for example will not require
desulfation so the desulfation stage will be almost instantaneous before it moves on to the bulk stage.
More damaged or older batteries may require extended desulfation and this stage can last minutes.
See the 5-step charging process chart for desulfation LED status. After desulfation the charger enters
into bulk mode where it will remain most of the time. This time can range from minutes to days
depending on the size and level of charge in the battery. In bulk mode the charger is emitting full

