background image

― 5 ―

5. Preparation

5-1

Checking Battery Voltage

Set the Function Selector Switch to other positions except the OFF position.
Battery Voltage is enough if indication is clear and

symbol is not indicated in this bout.

If

symbol is indicated or no indication on the display, follow to the Battery. 

Replacement procedures shown in section 9 in this document and replace with new batteries.

6. Measurements

6-1  Voltage Measurement (DCV, ACV)

DANGER

● To avoid the danger of getting electrical shock, never make measurement on a circuit over 600V AC/DC. (electrical potential to ground 300V AC/DC)
● Do not operate the Function Selector Switch during measurement.
● Do not make measurement when opening the battery cover and the instrument case.

6-1-1  DC Voltage Measurement (DCV)

(1) Insert the black test lead plug into the COM terminal and the red test lead plug into the VΩHz terminal.
(2) Set the Function Selector Switch to "   " position.(Then, "DC" , "Auto", and "mV" symbols are indicated on the display.)
(3) Connect the black test lead to the negative side of the circuit under the test and the red test lead to the positive side of the circuit, then the measured value

is indicated on the display. If you connect the test leads the other way, "ー" symbol is indicated on the display.

6-1-2  AC Voltage Measurement (ACV)

(1) Insert the black test lead plug into the COM terminal and the red test lead plug into the VΩHz terminal.

+−

+−

① 

③ 

④ 

⑤ 

② 

⑪ 

⑫ 

⑩ 

⑨ 

⑧ 

⑦ 

⑬ 

⑭ 

⑥ 

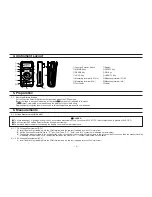
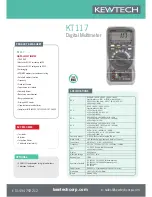
①Function Selector Switch

②Display       

③MIN/MAX Key

④SELECT Key 

⑤RANGE Key

⑥REL Key

⑦HOLD Key

⑧Hz/DUTY Key

⑨Measuring terminal (V/Ω/Hz)

⑩Measuring terminal (COM)

⑪Measuring terminal (10A)

⑫Measuring terminal (mA)

⑬Test Leads

⑭Holster

4. Instrument Layout

Содержание KT117

Страница 1: ...INSTRUCTION MANUAL AUTO RANGE DIGITAL MULTIMETER KT117...

Страница 2: ...parts in the manual for safe operation of the instrument Be sure to carefully read the instructions following each symbol in the manual DANGER is reserved for conditions and actions that are likely t...

Страница 3: ...quipment which is supplied power from a distribution board and cable run from a distribution board to an outlet 2 Features This instrument KT117 is a Digital Multimeter which designed for making measu...

Страница 4: ...600V DC or AC rms Note Forward DC current approx 0 4mA Reversed DC voltage approx 2 8V Open circuit voltage approx 0 5V Test condition Note It can not display bar graph on capacitance range It can not...

Страница 5: ...ss than 90 Insulation Resistance It should be more than 100M DC1000V between electrical circuit and enclosures Withstand Voltage It should be more than AC3700V for one minute between electrical circui...

Страница 6: ...the instrument case 6 1 1 DC Voltage Measurement DCV 1 Insert the black test lead plug into the COM terminal and the red test lead plug into the V Hz terminal 2 Set the Function Selector Switch to pos...

Страница 7: ...e circuit 5 Power on the circuit under test 6 Measured value is indicated on the display If you connect the test leads the other polarity symbol is indicated on the display 6 2 2 DC Current Measuremen...

Страница 8: ...ke sure that the O L symbol is indicated on the display at this bout then short the test lead tips and check 0 is indicated on the display 3 Connect the test leads to both ends of the resistance under...

Страница 9: ...ed on the display Measuring unit nF uF is automatically chosen and indicated due to the measured value Note It may take some time according to the measuring capacitance Measuring capacitance 4uF Measu...

Страница 10: ...uto ranging there are following 2ways 1 Press RANGE Key for 2seconds 2 Change to the other functions 7 4 REL Key The difference between measured values can be indicated on the display at each ACV DCV...

Страница 11: ...e to remove test leads from the instrument when opening the battery cover in order to replace batteries and fuses 9 1 Battery replacement 1 Remove test leads from the instrument 2 Remove the holster f...

Страница 12: ...92 1819A...
Страница 13: ...Impedance 10M 1 5 5dgt 6 000V 1 2 3dgt 60 00 600 0V 1 5 5dgt 600V DC A 600 6000 A 60 600mA 6 10A 1 2 3dgt 600 6000 A 60 600mA 2 0 5dgt 6 10A AC A 600 6000 A 60 600mA 6 10A 1 5 4dgt 600 6000 A 60 600mA...

Отзывы: