


14
• Power up the brewer and follow the "PRIMING" procedure again,
perform several (10) cleansing brews to remove any residual
taste from the the Keurig
™
Descaling Solution.
NOTE:
The cleaning action of the Keurig
™
Descaling Solution may result in a
foam dispensed from the brewer. This is natural, as the solution is reacting
with the scale inside. For a brewer that is heavily scaled, the brewer may
not fill properly after the descaler is added. If this occurs, you may see only
a small or no output dispensed followed by the sound of air blowing out.
If this occurs:
• Turn off and unplug the brewer.
• Plug the brewer back in, power on, and repeat Step 2 Fill and Clean.The
brewer should begin to function normally as the solution is rinsed out and
the scale is removed. If problem persists, allow the brewer to sit unplugged
for at least 30 minutes before continuing with the rinse.
For further descale information please contact your Keurig Authorized Distributor.
Service
Beyond these recommended cleaning and maintenance procedures this
brewer is not user serviceable. For service, please refer to the Warranty
section of this guide.
SECTION 3
Cleaning & Maintenance
STEP 1: FILL AND CLEAN
• If asked "WAS THE BREWER DRAINED,"
select "YES." If this prompt does not appear
then the brewer will automatically start
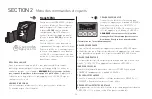
priming and heating. Use a Flojet pump
system as shown in figure 20 to add the
Keurig
™
Descaling Solution to the brewer.
Complete the "PRIMING" process.
• After the brewer has primed and heated,
place a ceramic mug on the Drip Tray and
run a brew cycle.
DO NOT USE A K-CUP
®
POD,
just press the 10 oz. Brew Button.
When the brew process is complete discard
the contents from the mug into the sink.
• Now let the brewer stand for at least
one hour.
• Repeat the brew process without a K-Cup
®
pod at least 10 times, pouring
the contents of the mug into the sink after each cycle. Remember to
completely lift and lower the brewer Handle between each cycle so the
Brewer Interface Buttons indicating the brew size will flash.
• Power off the brewer and drain both hot and cold water tanks.
• Reconnect the brewer to the filtered cold water supply and follow
the "PRIMING" procedure to refill the brewer.
• Once the "PRIMING" process is complete, power off the brewer and
drain both hot and cold water tanks again.
fig.
20


