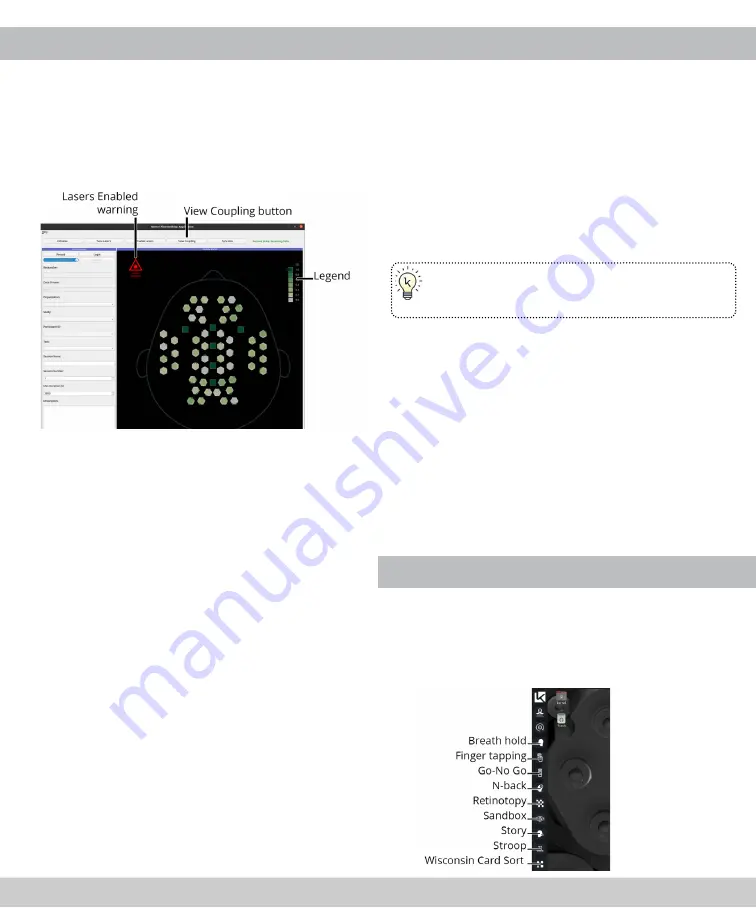
STEP 7: CHECK THE SCALP COUPLING
The Module Status View displays the quality of signal
received by each detector, and in aggregate by each
module.
The legend indicates the signal quality that each color
represents; darker green means a better signal.
By default, the Module Status View uses the total
count of photons received to determine the quality of
the data for each detector.
At any point you can click
View Coupling
to switch
the view to display in SCI (scalp coupling index) values
rather than total counts. There will be a five-second
delay before the view updates.
Click
View Total Counts
to switch back.
If the Module Status View indicates modules with
insufficient signal, first switch to Total Counts, then
try the actions below to improve the connection:
• Verify that you have the most appropriately
sized Sizing Bars installed, and that the Tension
Dial is properly tightened.
• Attempt to move thick locks of hair out of the
way of the affected module(s).
• Gently manipulate or wiggle the headset.
• Re-run the Tune Lasers command.
• For additional troubleshooting instructions,
STEP 8: RECORD A SESSION
NOTE: Remember that participants must explicitly
provide consent by accepting a participant Invita-
tion Code before their session data may be viewed,
downloaded, or analyzed.
1.
In the Kernel Flow Desktop Application, click the
Login
button (if you haven’t already).
2.
Enter your Kernel Cloud ID (email address) and
password and click Login or press Enter.
Once logged in, your organization and available
Studies are loaded into the software.
TIP: Kernel Flow can be operated offline (without
an Internet connection). Instructions are available
at
3.
Choose a Study, Participant ID and optionally
enter other metadata (such as a Task name,
Session name, which Sizing Bars are used, or
other notes) to save with the session.
4.
Optionally change the value in the Maximum
Duration field. Enter in seconds (for example:
10 minutes = 600).
5.
Click
Record
.
6.
Confirm that the participant wearing the headset
is correctly associated with the Participant ID
displayed onscreen, and click
Continue
.
The system begins recording.
STEP 9: PERFORM A TASK
Kernel provides a collection of standardized tasks
to aid in your data collection. These tasks are pre-
installed on the Kernel Flow PC. Each task is
represented by an icon in the Taskbar.
For a description of each task, go to
10
9


