background image

KeriGen DuoPak – 2-door Access Control System with AutoUSB


01576-001 


1 of 9 


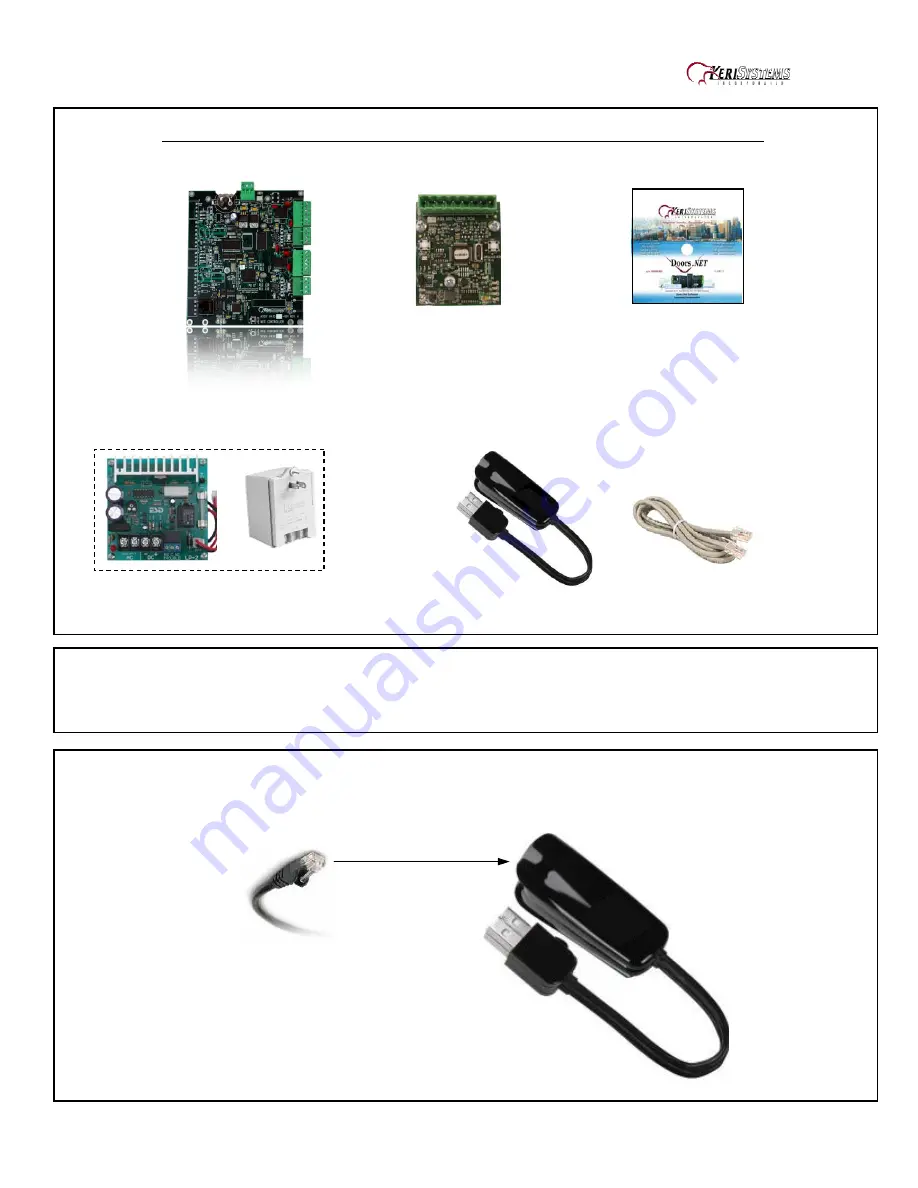
Step 1 - Contents for KeriGen DuoPak, 2 Door Access Control System with AutoUSB 

1ea. NXT-2D 


   2ea. NXT-RM3 


   Software 


1ea. KPS-4-1   


               1ea. KUSB-1                       1ea. KPC-1       


Note: the NXT-2D includes the enclosure, which is not shown above. 


Step 2 – Mount all Controllers and Readers in the desired locations 


Step 3 - Connect the KPC-1 cable to the K-USB. 


Содержание KeriGen DuoPak

Страница 1: ...eriGen DuoPak 2 Door Access Control System with AutoUSB 1ea NXT 2D 2ea NXT RM3 Software 1ea KPS 4 1 1ea KUSB 1 1ea KPC 1 Note the NXT 2D includes the enclosure which is not shown above Step 2 Mount al...

Страница 2: ...lug the USB Connector of the K USB to any available USB port on the PC Step 5 Plug the one end of the KPC 1 into the K USB and the other end into the black RJ 45 connector J2 on the NXT 2D Step 6 Plug...

Страница 3: ...the readers Individual details are not provided here because the NXT RM3s are capable of interfacing to various forms of Wiegand interface devices as well as Keri MS series readers Step 8 Connect the...

Страница 4: ...KeriGen DuoPak 2 door Access Control System with AutoUSB 01576 001 4 of 9 Step 9 Connecting the Door Hardware Use the Diagram below to hook up the remaining door hardware...

Страница 5: ...T utilizes the latest Microsoft NET framework and service patches Depending on the computer Windows Update may need to be run multiple times before installing Doors NET The installer will install the...

Страница 6: ...services This process will also activate the software in demo mode that will last for 30 days o The Application Server Service will restart after Activation is successful Run the Gateway Wizard Start...

Страница 7: ...ervice is automatically added to the list of exceptions in the Windows Firewall during installation however if another firewall is being used it may prevent Autoconfig from finding the controllers on...

Страница 8: ...the Status Messages section Detected controllers will appear in the Available Controllers section o Click Apply and then click Yes in the dialog that appears to continue the Auto Configuration Process...

Страница 9: ...controller on the tree o Click on the Firmware Upgrade button which will be present in the Selected Items Toolbar ribbon o Select the controller or controllers that need to be updated in the Available...

Отзывы: