Basic Operations
10
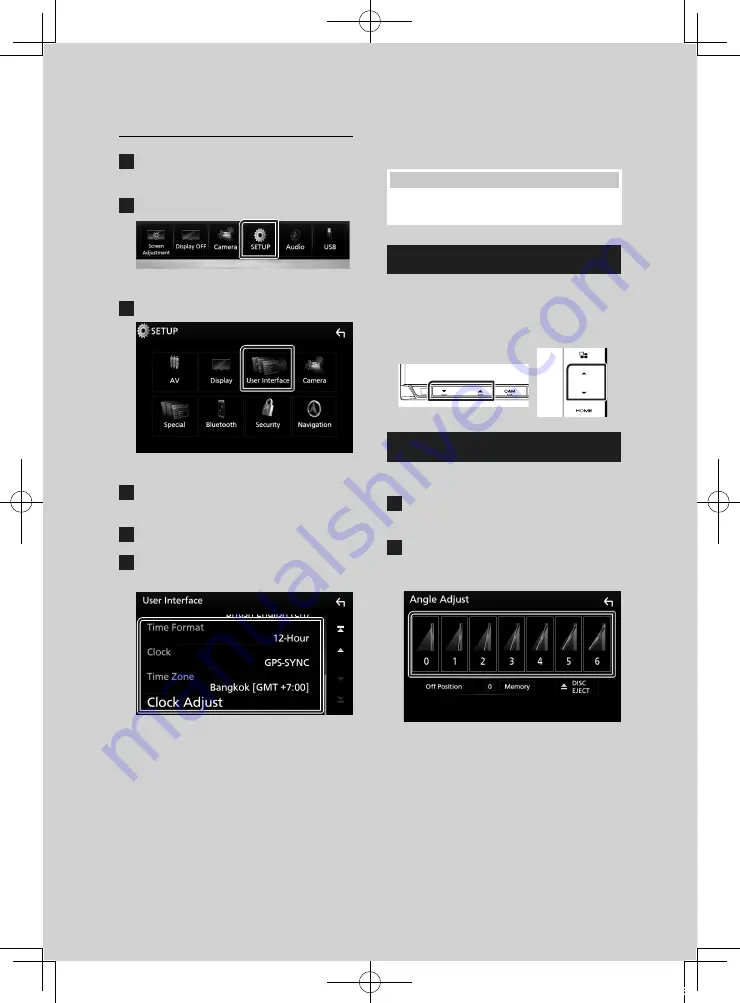
Calendar/clock settings
1
Press the
[
MENU
]
button.
h
h
Popup menu appears.
2
Touch
[
SETUP
]
.
h
h
SETUP Menu screen appears.
3
Touch
[
User Interface
]
.
h
h
User Interface screen appears.
4
Touch
[
Time Zone
]
in the User Interface
screen.
5
Select the time zone.
6
Set each item as follows.
Scroll the page to show hidden items.
■
[
Time Format
]
Select the time display format.
[
12-Hour
]
(Default)/
[
24-Hour
]
■
[
Clock
]
[
GPS-SYNC
]
(Default): Synchronizes the clock
time with the GPS.
[
Manual
]
: Set the clock manually.
■
[
Time Zone
]
Select the time zone.
■
[
Clock Adjust
]
If you select
[
Manual
]
for Clock, adjust the
date and time manually.
NOTE
• Please set the date and time. If they not set, some
functions may not work.
Adjusting the volume
To adjust the volume (0 to 40),
Press
[
R
]
to increase, and press
[
S
]
to decrease.
Holding
[
R
]
increases the volume continuously
to level 15.
Monitor Angle Control
You can adjust the position of the monitor.
1
Press the
[
G
]
button.
h
h
Angle Adjust screen appears.
2
Select a number below that represents
your desired angle setting.
Default is “0”.
■
[
Off Position
]
You can store the current monitor angle as
the angle during power off. Touch
[
Memory
]
when the desired angle is selected.
!B5A-2486-00_18DDX_M_En.indb 10
2018/02/20 9:37


