background image

ENGLISH

USING YOUR MICROWAVE OVEN


Using Your Microwave

Oven

This section gives you instructions for operating

each function. Please read these instructions

carefully.

Audible signals are available to guide you when

setting and using your oven:

• A programming tone will sound

each time

you touch a pad.

• Seven tones

signal the end of a Timer

countdown.

• Four tones

signal the end of a cooking cycle.

AUDIBLE SIGNALS

You can stop the oven during a cycle by opening
the door. The oven stops heating and the fan
stops, but the light stays on.

To restart cooking, 

close the door and

Touch

START.

If you do not want to continue cooking,

open the door and touch STOP.

INTERRUPTING COOKING

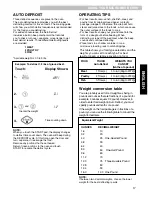
Use this safety feature to lock the control panel
when you are cleaning the oven, or so that children
cannot use the oven unsupervised.

To set CHILD LOCK:

Touch:

Display Shows:

CHILD LOCK

Touch and hold until
“L” appears in the
display


(approximately 4 seconds)

.

To cancel CHILD LOCK:

Touch:

Display Shows:

1.

1.

2.

Touch and hold until
“L” disappears in the
display


(approximately


4 seconds)

.

Example: To set the clock for 10:30


AM

 or PM

.

Touch:

Display Shows:

When your microwave oven is first plugged in or
after a power failure, the Display will show “

:

”. 

If a time of day is not set, “:” will

 show on the Display

until you touch “Clock”.

CLOCK

1.

2.

3.

NOTES:

• 

If you enter

in an incorrect time and touch “Clock”, 

you cannot set time of day. Enter the correct time.

• 

If you touch

STOP/Clear while setting the clock, the

Display will show the last time of day set or “:” 
if no time of day has been set.

10 

::

30

10 

::

30

4.

::

1

::

00

Time of day.

13
Содержание PlasmaWave 85450

Страница 1: ...ation Use Care Guide Four à micro ondes à hotte intégrée Guide d utilisation et d entretien Models Modèles 85450 85453 MFL39431003 SEARS DU CANADA INC TORONTO M5B 2B8 H S I L G N E FRANÇAIS 85459 H S I L G N E www sears ca ...

Страница 2: ...suse or use for other than its intended purpose 6 Damage to or failure of this product caused by the use of detergents cleaners chemicals or utensils other than those recommended in all instructions supplied with the product 7 Damage to or failure of parts or systems resulting from unauthorized modifications made to this product Disclaimer of implied warranties limitation of remedies Customer s so...

Страница 3: ...tions All safety messages will identify the hazard tell you how to reduce the chance of injury and tell you what can happen if the instructions are not followed wWARNING To reduce the risk of burns electric shock fire injury to persons or exposure to excessive microwave energy Read all instructions before using the microwave oven Read and follow the specific PRECAUTIONS TO AVOID POSSIBLE EXPOSURE ...

Страница 4: ...rted in the microwave oven as they may create a fire or risk of electric shock Do not clean with metal scouring pads Pieces can break off the pad and touch electrical parts involving a risk of electric shock Do not store anything directly on top of the microwave oven when the microwave oven is in operation Do not cover or block any openings on the microwave oven Do not store this microwave oven ou...

Страница 5: ...hould not be adjusted or repaired by anyone except properly qualified service technician GROUNDING INSTRUCTIONS For all cord connected appliances The microwave oven must be grounded In the event of an electrical short circuit grounding reduces the risk of electric shock by providing an escape wire for the electric current The microwave oven is equipped with a cord having a grounding wire with a gr...

Страница 6: ...g add minute section Stir turn over or rearrange the food being cooked about halfway through the cooking time for all recipes This will help make sure the food is evenly cooked If you do not have a cover for a dish use wax paper or microwave approved paper towels or plastic wrap Remember to turn back a corner of the plastic wrap to vent steam during cooking Microwave ovens are safe Microwave energ...

Страница 7: ...aks contact your dealer for a replacement When you use a browning dish the browning dish bottom must be at least 3 16 inch above the turntable Follow the directions supplied with the browning dish Never cook or reheat a whole egg inside the shell Steam buildup in whole eggs may cause them to burst and possibly damage the oven Slice hard boiled eggs before heating In rare cases poached eggs have be...

Страница 8: ...rm all functions Charcoal Filter behind Vent Grille The turntable reverses rotation each time the microwave oven door is opened and closed This helps cook food evenly Do not operate the microwave oven without the turntable in place To Install 1 Place the support on the oven cavity bottom 2 Place the turntable on the support Fit the raised curved lines in the center of the turntable bottom between ...

Страница 9: ...er Pads located on the control panel For more information on these features see Using your microwave oven section 1 Display The display includes a clock and indicators to tell you time of day cooking time settings cook powers quantities weights and cooking functions selected 2 Popcorn Touch this pad to pop one of 2 bag sizes of popcorn without entering a cook time or power Remove metal rack before...

Страница 10: ...ber Pads to set a cooking time 19 Power Touch this pad after the cook time has been set followed by a Number Pad to set the amount of microwave energy released to cook the food The higher the number the higher the microwave power or cooking speed 12 Timer Touch this pad to set the kitchen timer 20 START Touch this pad to start a function If the door is opened after the oven begins to cook retouch ...

Страница 11: ...e Steam can build up under the membrane during cooking causing the food to burst To relieve the pressure and to prevent bursting pierce these foods before cooking with a fork cocktail pick or toothpick Using standing time Always allow food to stand either in or out of oven Standing time after defrosting and cooking allows the temperature to evenly spread throughout the food improving the cooking r...

Страница 12: ...ways place the container on the turntable Shield with small pieces of aluminum foil parts of food that may cook quickly such as wing tips and leg ends of poultry Heating food in aluminum foil containers usually takes up to double the time compared to reheating in plastic glass china or paper containers The time when food is ready will vary depending upon the type of container you use Let food stan...

Страница 13: ...safety feature to lock the control panel when you are cleaning the oven or so that children cannot use the oven unsupervised To set CHILD LOCK Touch Display Shows CHILD LOCK Touch and hold until L appears in the display approximately 4 seconds To cancel CHILD LOCK Touch Display Shows 1 1 2 Touch and hold until L disappears in the display approximately 4 seconds Example To set the clock for 10 30 A...

Страница 14: ...e bottom center of the control panel controls the cooktop light Example To set the Lamp for HIGH Touch Display Shows COOKTOP LIGHT 1 To turn off touch pad one or two times depending on light setting 2 0 The pad on the bottom left of the control panel controls the 2 speed exhaust fan Example To set the exhaust fan speed Touch Display Shows EXHAUST FAN Once for HIGH Twice for LOW Turn off fan when d...

Страница 15: ... 7 minute cook time for second stage To set a 3 minute cook time for first stage 7 9 0 0 3 00 7 00 P hi P hi P 80 8 To set a 50 cook power for the second stage To set an 80 cook power for the first stage P 50 When the first stage is over you will hear two short tones as the oven begins the second cook stage 10 Time counting down and COOK TIMED COOKING 1 2 5 3 4 This feature lets you program a spec...

Страница 16: ...ull power 9 90 of full power 8 80 of full power 7 70 of full power 6 60 of full power 5 50 of full power 4 40 of full power 3 30 of full power 2 20 of full power 1 10 of full power 0 0 of full power High Medium High Medium Medium Low Defrost Low None Quickly heating convenience foods and foods with high water content such as soups and beverages Cooking tender cuts of meat ground meat or chicken He...

Страница 17: ...ever in order to enter food weight in Auto Defrost you must specify pounds and tenths of a pound If the weight on the food package is in fractions of a pound you can use the following table to convert the weight to decimals OUNCES 1 6 3 2 4 0 4 8 6 4 8 0 9 6 11 2 12 0 12 8 14 4 16 0 DECIMAL WEIGHT 10 20 25 One Quarter Pound 30 40 50 One Half Pound 60 70 75 Three Quarters Pound 80 90 1 00 One Pound...

Страница 18: ...areas with aluminum foil Remove thawed portions with fork Return remainder to oven Separate and rearrange Separate and rearrange Separate and rearrange Turn over Cover warm areas with aluminum foil Separate and rearrange Remove thawed portions with fork Turn over Return remainder to oven Turn over Cover warm areas with aluminum foil Meat of irregular shape and large fatty cuts of meat should have ...

Страница 19: ...ace in a microwave safe dish Finish defrosting by immersing in cold water Place in a microwave safe dish Finish defrosting by immersing in cold water FOOD AT BEEP SETTING SPECIAL INSTRUCTIONS FISH Fillets Steaks Whole SHELLFISH Crabmeat Lobster tails Shrimp Scallops FISH FISH FISH FISH FISH FISH FISH Turn over Separate fillets when partially thawed if possible Separate and rearrange Turn over Brea...

Страница 20: ...e container Slit the skins if any of frozen food such as sausage Bend plastic pouches of food to ensure even defrosting Always underestimate defrosting time If defrosted food is still icy in the center return it to the microwave oven for more defrosting To make Hold Warm automatically follow another cycle While you are touching in cooking instructions touch Hold Warm before touching START When the...

Страница 21: ...nd place in a microwavable container Stir at the end of cycle to complete melting Use processed cheese food only Cut into cubes Place in a single layer in a microwavable container Stir at the end of cooking to complete melting Large or miniature marshmallows may be used Place in a microwavable container Stir at the end of cycle to complete melting Butter or Margarine CODE CATEGORY DIRECTION AMOUNT...

Страница 22: ...Shows When the cook time is over you will hear four tones and End will display Time counting down and COOK 2 2 0 2 Time counting down and COOK When the cook time is over you will hear four tones and End will display POPCORN Popcorn lets you pop 3 0 and 3 5 ounce bags of commercially packaged microwave popcorn Pop only one package at a time If you are using a microwave popcorn popper follow manufac...

Страница 23: ...tes 1 2 cups add 2 tbsp water 3 4 cups add 2 tbsp water Place in a microwavable bowl or casserole Cover with plastic wrap and vent Stir and let stand 3 minutes Place in a microwavable bowl or casserole Cover with plastic wrap and vent Let stand 5 minutes 1 cup 2 cups 3 cups 4 cups 1 cup 2 cups 3 cups 4 cups 1 cup 2 cups 1 cup 2 cups 3 cups 4 cups Category Touch pad Time s 1 2 3 4 Fresh vegetable F...

Страница 24: ...ry Beverage Soup sauce Casserole Roll Muffin Number of cups Items 1 2cups 1 4 cups 1 4 cups 1 4 pieces CATEGORY CODE 1 2 3 4 BEVERAGE SOUP SAUCE CASSEROLE ROLL MUFFIN Remove from display package and place on a plate Do not cover Be careful The Place in shallow microwavable casserole Cover with vented plastic wrap Stir and let stand 3 minutes Place in a microwavable bowl or casserole Cover with pla...

Страница 25: ...ring cooking This is normal For stubborn soil boil a cup of water in the oven for 2 to 3 minutes Steam will soften the soil To get rid of odors inside the oven boil a cup of water with some lemon juice or vinegar in it For exterior surfaces and control panel Use a soft cloth with spray glass cleaner Apply the spray glass cleaner to the soft cloth do not spray directly on the oven NOTE Abrasive cle...

Страница 26: ...t on one side of the opening Push filter upward and push to the other side to lock into place 5 Plug in microwave oven or reconnect power ENGLISH CARING FOR THE FILTERS Charcoal filter Part No 5230W1A011C 1 Unplug microwave oven or disconnect power 2 Remove the vent grille mounting screw 3 Tip the grille left and forward then lift out to remove 4 Lift the back of the charcoal filter Slide the filt...

Страница 27: ...ithout the grease filters in place The cooktop light 1 Unplug microwave oven or disconnect power 2 Remove the bulb cover mounting screws 3 Replace bulb with candelabra base 30 watt bulb Part No 6912W3Q001A available from Sears by calling 1 800 4 MY HOME 4 Plug in microwave oven or reconnect power The oven light 1 Unplug microwave oven or disconnect power 2 Remove the vent grille mounting screw 3 T...

Страница 28: ...a base 30 watt bulb Part No 3B70067A available from Sears by calling 1 800 4 MY HOME 6 Slide the top of the vent grille into place Push the bottom until it snaps into place Replace the mounting screw 7 Plug in microwave oven or reconnect power Bulb holder REPLACING THE COOKTOP AND OVEN LIGHTS CONT 28 ...

Страница 29: ...se small flat pieces small skewers and shallow foil trays if tray is not taller than 3 4 in 1 9 cm deep and is filled with food to absorb microwave energy Never allow metal to touch walls or door Yes The turntable rotates clockwise or counter clockwise depending on the rotation of the motor when the cooking cycle begins This appearance is normal and does not affect the operation of your oven You m...

Страница 30: ...ing Touch STOP to cancel that operation Food is not cooked enough The display shows a time counting down but the oven is not cooking PROBLEM CAUSE The electric supply to your home or wall outlets is low or lower than normal Your electric company can tell you if the line voltage is low Your electrician or service technician can tell you if the outlet voltage is low The cook power is not at the reco...

Страница 31: ...er shaft The support is not operating correctly Remove the turntable and restart the oven If the support still does not move call Sears Service at 1 800 4 MY HOME Cooking without the turntable can give you poor results You do not hear the programming or end of cycle tone PROBLEM CAUSE You have not entered the correct command If none of these items are causing your problem call Sears Service at 1 8...

Страница 32: ...olution phone support from a Sears representative on all products Think of us as a talking owner s manual Power surge protection against electrical damage due to power fluctuations 250 Food Loss Protection annually for any food spoilage that is the result of mechanical failure of any covered refrigerator or freezer Rental reimbursement if repair of your covered product takes longer than promised 1...

Страница 33: ...ctronics For Sears Parts Service to order the replacement parts accessories and owner s manuals that you need to do it yourself www sears ca To purchase or inquire about a Sears Maintenance Agreement call 1 800 361 6665 9 a m 11 p m Mon Fri EST 9 a m 4 p m Sat Pour service en francais 1 800 LE FOYERMC 1 800 533 6937 www sears ca TM Trademarks of Sears Roebuck and Co used under license by Sears Can...

Страница 34: ...ation Use Care Guide Four à micro ondes à hotte intégrée Guide d utilisation et d entretien Models Modèles 85450 85453 MFL39431003 SEARS DU CANADA INC TORONTO M5B 2B8 H S I L G N E FRANÇAIS 85459 H S I L G N E www sears ca ...

Страница 35: ... responsabilité pour les dommages fortuits ou indirects Certains États et provinces ne permettent pas l exclusion ou la limitation des dommages fortuits ou indirects ou les limitations de la durée des garanties implicites de qualité marchande ou d adaptation à un usage particulier de sorte que ces exclusions ou limitations peuvent ne pas s appliquer à votre cas Cette garantie s applique seulement ...

Страница 36: ...les consignes avant d utiliser le four à micro ondes Lisez et respectez les PRÉCAUTIONS À PRENDRE POUR ÉVITER UNE EXPOSITION EXCESSIVE À L ÉNERGIE DES MICRO ONDES que vous trouverez à la page 6 Le four à micro ondes doit être mis à la terre Branchez le uniquement sur une prise mise à la terre Consultez les CONSIGNES DE MISE À LA TERRE que vous trouverez aux pages 4 5 et 6 Installez ou placez le fo...

Страница 37: ...us ne devez pas insérer des aliments ou des ustensiles en métal surdimensionnés dans le four à micro ondes car cela risque de causer un incendie ou un choc électrique N utilisez pas de tampons de récurage en métal Des morceaux pourraient se détacher du tampon et toucher les pièces électriques causant un risque de choc électrique Ne placez rien sur le dessus du four à micro ondes lorsque celui ci f...

Страница 38: ...ler ou réparer le four DIRECTIVES DE MISE À LA TERRE Pour tous les appareils électroménagers branchés à l aide d un cordon L utilisation inadéquate de la fiche de mise à la terre peut entraîner un risque de choc électrique Faites appel à un électricien ou à un réparateur qualifié si vous ne comprenez pas les directives de mise à la terre ou si vous n êtes pas certain que l appareil est mis à la te...

Страница 39: ...nute Remuez retournez ou réarrangez les aliments vers la mi cuisson pour toutes les recettes Cela assurera une cuisson uniforme des aliments Si un plat n a pas de couvercle utilisez du papier ciré des essuie tout qui vont au four à micro ondes ou une pellicule plastique N oubliez pas de retourner un coin de la pellicule plastique pour laisser la vapeur s échapper pendant la cuisson Les fours à mic...

Страница 40: ...er Pour de meilleurs résultats remuez les liquides plusieurs fois pendant que vous les faites chauffer ou réchauffer Les liquides chauffés dans certains contenants particulièrement les contenants en forme de cylindre peuvent surchauffer Les liquides peuvent éclater en émettant un bruit fort pendant le réchauffage ou après celui ci ou lorsque vous y ajoutez des ingrédients grains de café sachets de...

Страница 41: ...ur les touches de ce panneau pour exécuter toutes les fonctions 9 Filtre à charbon derrière la grille de ventilation Le plateau rotatif tourne dans le sens inverse chaque fois que l on ouvre ou que l on ferme la porte Cela assure une cuisson plus uniforme des aliments N utilisez pas le four à micro ondes si le plateau rotatif n est pas en place Installation 1 Placez le support dans le fond du four...

Страница 42: ... de ces caractéristiques consultez la section Utilisation du four à micro ondes 1 Affichage L affichage comprend une horloge et des indicateurs qui indiquent l heure le réglage du temps de cuisson la puissance de cuisson la quantité le poids et la fonction de cuisson sélectionnés 2 Popcorn Maïs soufflé Appuyez sur cette touche pour faire éclater un des deux formats de sacs de maïs soufflé sans ent...

Страница 43: ...a catégorie d aliments 14 Clock Horloge Appuyez sur cette touche pour entrer l heure 15 Add Minute Ajouter une minute Appuyez sur cette touche pour faire cuire des aliments pendant une minute à pleine puissance ou pour ajouter des minutes supplémentaires au cycle de cuisson à la puissance réglée 16 Hold Warm Garder au chaud Appuyez sur cette touche pour garder des aliments cuits au chaud dans le f...

Страница 44: ... recouverts d une pelure ou d une membrane bien serrée De la vapeur peut s accumuler sous la membrane pendant la cuisson faisant éclater les aliments Pour libérer la pression et éviter un éclatement percez ces aliments à l aide d une fourchette d un pique olive ou d un cure dent avant de les faire cuire Utilisation du temps de repos Laissez toujours les aliments reposer à l intérieur ou à l extéri...

Страница 45: ...ant sur le plateau rotatif Utilisez de petits morceaux de papier d aluminium pour protéger les parties des aliments qui peuvent cuire rapidement comme les extrémités des ailes ou des cuisses de poulet Il faut habituellement deux fois plus de temps pour faire chauffer des aliments dans un contenant en papier d aluminium que dans un contenant en plastique en verre en porcelaine ou en papier Le temps...

Страница 46: ...é Appuyez sur L affichage indique L heure Appuyez jusqu à ce que la lettre L s affiche environ quatre secondes 1 1 2 Vous pouvez arrêter le four pendant un cycle en ouvrant la porte Le four arrête de chauffer et le ventilateur s arrête mais l éclairage reste allumé Pour remettre le four en marche fermez la porte et appuyez sur la touche START MISE EN MARCHE Si vous ne voulez pas poursuivre la cuis...

Страница 47: ...o ondes en guise de minuterie de cuisine Vous pouvez régler la minuterie jusqu à 99 minutes et 99 secondes Exemple Pour régler la minuterie à 3 minutes Appuyez sur L affichage indique MINUTERIE La minuterie et le compte à rebours 1 2 3 La touche au bas et au centre du panneau de commande contrôle l éclairage de la table de cuisson Exemple Pour régler l éclairage à HIGH FORT Appuyez sur L affichage...

Страница 48: ...utes pour la deuxième étape Pour régler un temps de cuisson de 3 minutes pour la première étape 7 9 8 Pour régler une puissance de cuisson à 50 pour la deuxième étape Pour régler une puissance de cuisson à 80 pour la première étape Lorsque la première étape est terminée et que la deuxième commence vous entendrez deux brèves tonalités 10 Compte à rebours et COOK CUISSON AJOUTER UNE MINUTE 1 2 Cette...

Страница 49: ... 4 40 de la pleine puissance 3 30 de la pleine puissance 2 20 de la pleine puissance 1 10 de la pleine puissance 0 0 de la pleine puissance High Élevé Pour faire chauffer rapidement des aliments prêts à servir et des aliments à teneur élevée en eau comme les soupes et les boissons Pour faire cuire des coupes de viande tendre du bœuf haché ou du poulet Medium High Moyen élevé Medium Moyen Medium Lo...

Страница 50: ...ions d une livre par exemple 4 onces équivalent à 1 4 livre Toutefois pour entrer le poids des aliments en mode de décongélation automatique vous devez préciser les livres et les dixièmes de livre Si le poids indiqué sur l emballage est en fractions de livre vous pouvez utiliser le tableau suivant pour convertir le poids en décimales ONCES 1 6 3 2 4 0 4 8 6 4 8 0 9 6 11 2 12 0 12 8 14 4 16 0 POIDS...

Страница 51: ...éarrangez Séparez et réarrangez Séparez et réarrangez Retournez Couvrez les parties chaudes de papier d aluminium Séparez et réarrangez Enlevez les portions décongelées à l aide d une fourchette Retournez Remettez le reste dans le four Retournez Couvrez les parties chaudes de papier d aluminium Au début du cycle de décongélation protégez la partie étroite de la viande de forme irrégulière ou les p...

Страница 52: ...LIMENT AU SON DU BIP RÉGLAGE DIRECTIVES SPÉCIALES Placez dans une assiette qui va au four à micro ondes Terminez la décongélation en immergeant le poulet dans l eau froide Placez dans une assiette qui va au four à micro ondes Terminez la décongélation en immergeant la dinde dans l eau froide Placez le poulet dans un plat de cuisson qui va au four à micro ondes poitrines vers le haut Terminez la dé...

Страница 53: ...e repos consultez la section Conseils pour la cuisson au four à micro ondes Retournez les aliments pendant la décongélation ou le temps de repos Séparez et retirez les aliments au besoin Pour que la fonction Hold Warm Garder au chaud soit activée automatiquement à la fin d un autre cycle Pendant que vous entrez les directives de cuisson appuyez sur Hold Warm Garder au chaud avant d appuyer sur STA...

Страница 54: ...ro ondes Remuez à la fin du cycle jusqu à ce que les guimauves soient complètement fondues Beurre ou margarine CODE CATÉGORIE DIRECTIVES QUANTITÉ 1 2 Chocolat Fromage Guimauves 3 4 UTILISATION DU FOUR À MICRO ONDES RAMOLLIR 1 La fonction Soften Ramollir comprend quatre catégories préréglées pour faire ramollir les aliments le beurre la crème glacée le fromage à la crème et le jus congelé Exemple P...

Страница 55: ...sous Exemple Pour faire éclater un sac de 3 0 oz Appuyez sur L affichage indique Compte à rebours et COOK CUISSON Compte à rebours et COOK CUISSON À la fin du temps de cuisson quatre tonalités se font entendre et End Fin s affiche PIZZA La fonction Pizza vous permet de faire réchauffer jusqu à trois tranches de pizza Par tranche on entend une tranche de cinq onces REMARQUE Placez sur une assiette ...

Страница 56: ... Remuez et laissez reposer 3 minutes 1 tasse 2 tasses 3 tasses 4 tasses 1 tasse 2 tasses 3 tasses 4 tasses 1 tasse 2 tasses 3 tasses 4 tasses 4 1 tasse 2 tasses Placez dans un bol ou une cocotte qui va au four à micro ondes Recouvrez d une pellicule plastique en laissant une ouverture Remuez et laissez reposer 5 minutes Placez les tranches de bacon dans une assiette à dîner recouverte d un essuie ...

Страница 57: ... 1 ou 2 portions 1 à 4 tasses 1 à 4 tasses 1 à 4 CATÉGORIE CODE 1 2 3 4 ASSIETTE DE DÎNER SOUPE SAUCE PLAT EN COCOTTE PETIT PAIN MUFFIN Placez dans une cocotte peu profonde qui va au four à micro ondes Couvrez d une pellicule plastique en laissant une ouverture Remuez et laissez reposer 3 minutes Placez dans un bol ou une cocotte qui va au four à micro ondes Couvrez d une pellicule plastique en la...

Страница 58: ...chaude savonneuse et une éponge ou un chiffon doux Utilisez uniquement du savon doux et non abrasif ou un détersif doux Veillez à bien nettoyer les zones où la porte et le cadre du four entrent en contact lorsque la porte est fermée Essuyez les bien avec un chiffon propre Au fil du temps des taches peuvent apparaître sur les surfaces à cause d éclaboussures durant la cuisson Cela est normal Utilis...

Страница 59: ... Poussez les filtres vers le haut puis vers l autre côté pour les enclencher en place 5 Branchez le four à micro ondes ou rétablissez l alimentation électrique ENTRETIEN DES FILTRES Filtre à charbon Pièce n 5230W1A011C 1 Débranchez le four à micro ondes ou coupez l alimentation électrique 2 Enlevez la vis de montage de la grille de ventilation 3 Faites basculer la grille vers la gauche et vers l a...

Страница 60: ...pièce n 6912W3Q001A que vous pouvez vous procurer auprès de Sears en composant le 1 800 LE FOYERMC 1 800 533 6937 4 Branchez le four à micro ondes ou rétablissez l alimentation électrique Ampoule du four 1 Débranchez le four à micro ondes ou coupez l alimentation électrique 2 Enlevez la vis de montage de la grille de ventilation 3 Faites basculer la grille vers l avant puis soulevez la pour l enle...

Страница 61: ...auprès de Sears en composant le 1 800 LE FOYERMC 1 800 533 6937 6 Faites glisser le haut de la grille de ventilation en place Poussez le bas jusqu à ce qu il s enclenche Remettez la vis de montage 7 Branchez le four à micro ondes ou rétablissez l alimentation électrique Porte ampoule REMPLACEMENT DES AMPOULES POUR L ÉCLAIRAGE DU FOUR ET DE LA TABLE DE CUISSON SUITE FRANÇAIS 60 ...

Страница 62: ...ats en papier d aluminium peu profonds si le plat ne mesure pas plus de _ po 1 9 cm de haut et qu il est rempli d aliments pour absorber l énergie des micro ondes Ne laissez jamais le métal entrer en contact avec les parois ou la porte Oui Le plateau rotatif tourne dans le sens des aiguilles d une montre ou dans le sens inverse selon la rotation du moteur au début du cycle de cuisson Cette apparen...

Страница 63: ...st pas réglée au niveau recommandé Vérifiez le tableau à la page 15 La porte du four n est pas bien fermée Vous avez réglé la minuterie du four Appuyez sur STOP ARRÊT pour annuler la minuterie Vous utilisez le four en guise de minuterie Appuyez sur STOP ARRÊT pour annuler la minuterie de cuisine La porte n est pas bien fermée et verrouillée Vous n avez pas appuyé sur START MISE EN MARCHE Vous n av...

Страница 64: ...t sur la tige centrale Le support ne fonctionne pas correctement Enlevez le plateau rotatif et remettez le four en marche Si le support ne bouge toujours pas appelez le service Sears au 1 800 LE FOYERMC 1 800 533 6937 Sans le plateau rotatif vous obtiendrez de piètres résultats de cuisson Vous n avez pas entré la bonne commande Si aucun de ces points n est la cause du problème appelez le service S...

Страница 65: ...résentant Sears pour tous les produits Considérez nous comme un guide d utilisation parlant Protection contre les surtensions et les dommages électriques dus aux fluctuations de courant Protection contre la perte d aliments de 250 annuellement pour toute altération des aliments qui découle d une défaillance mécanique d un réfrigérateur ou congélateur couvert par la garantie Remboursement de la loc...

Страница 66: ...gazon ou appareils électroniques Pour connaître le n de téléphone du de l entretien Sears afin de commander les pièces de rechange accessoires et manuels d instructions requis pour effectuer vous même les réparations www sears ca Pour acheter ou demander des renseignements sur un contrat d entretien Sears téléphonez au 1 800 361 6665 de 9 h à 23 h du lundi au vendredi HNE de 9 h à 16 h le samedi F...

Отзывы: