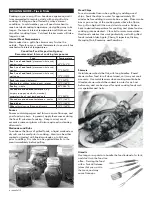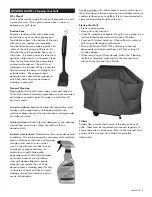
background image

USE  AND CARE

OPD Hand Wheel

LP (Liquefied Petroleum Gas)

• LP gas is nontoxic, odorless and colorless when produced. 

For 

Your Safety

, LP gas has been given an odor (similar to rotten 

cabbage) so that it can be smelled. 

• LP gas is highly flammable and may ignite unexpectedly when 

mixed with air.

LP Tank Filling

• Use only licensed and experienced dealers.

• LP dealer 

must purge new tank

 before filling.

 Dealer should 

NEVER


fill LP Tank more than 80% of LP Tank


volume. Volume of propane in tank will vary by temperature.

• A frosty regulator indicates gas overfill. Immediately close LP 

Tank valve and call local LP gas dealer for assistance.

• Do not release liquid propane (LP) gas into the atmosphere. 

This is a hazardous practice.

• To remove gas from LP Tank, contact an LP dealer or call a 

local fire department for assistance. Check the telephone 
directory under “Gas Companies” for nearest certified LP 
dealers.

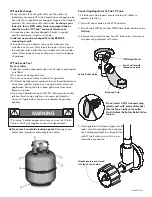
LP Tank   

• The LP Tank used with your grill must meet the following 

requirements:

• Use LP Tanks only with these required measurements: 12" 

(30.5cm) (diameter) x 18" (45.7 cm) (tall) with 20 lb. (9 kg.) 
capacity maximum.

• LP Tanks must be constructed and marked in accordance with 

specifications for LP Tanks of the U.S. Department of 
Transportation (DOT) or for Canada, CAN/CSA-B339, tanks, 
spheres and tubes for transportation of dangerous goods. 
Transport Canada (TC). See LP Tank collar for marking.

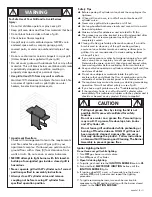
• LP Tank valve must have:

• Type 1 outlet compatible with 

regulator or grill.

• Safety relief valve.

• UL listed Overfill Protection 

Device (OPD). This OPD safety
feature is identified by a unique triangular hand wheel.

 Use 

only LP Tanks equipped with this type of valve.

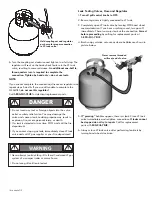
• LP Tank must be arranged for vapor withdrawal and include 

collar to protect LP Tank valve. Always keep LP Tanks in 
upright position during use, transit or storage.

LP Tank in upright position for vapor withdrawal


LP Tank Removal, Transport And Storage

LP Tank Valve

Retainer Strap

Safety Cap

• A disconnected LP tank in storage or being transported must 

have a safety cap installed (as shown). Do not store an LP 
tank in enclosed spaces such as a carport, garage, porch, 
covered patio or other building. Never leave an LP tank 
inside a vehicle  which may become overheated by the sun.

• Do not store an LP tank in an area where children play.

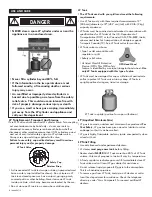
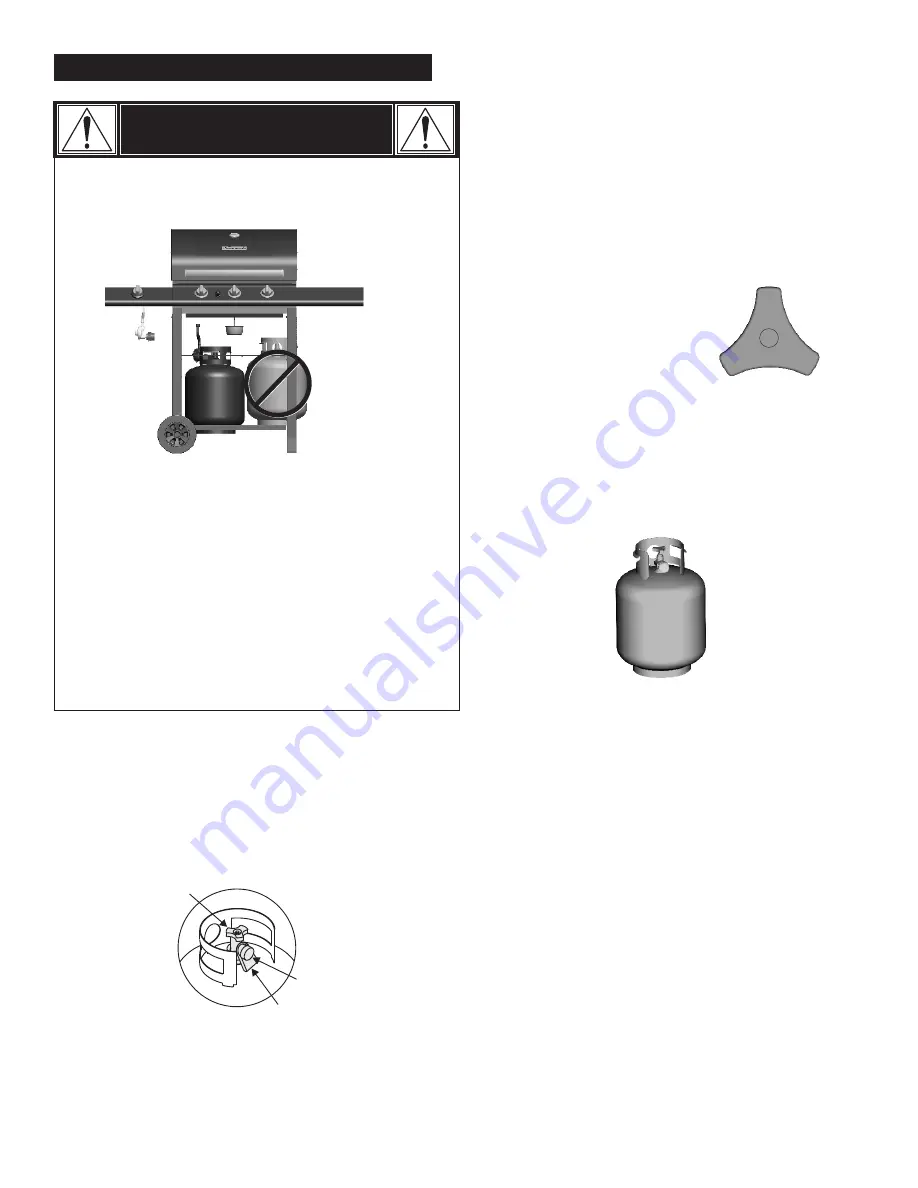
NEVER store a spare LP cylinder under or near the 
appliance or in an enclosed area. 

Never fill a cylinder beyond 80% full.

If the information in the two points above is not 
followed exactly, a fire causing death or serious 
injury may occur. 

An overfilled or improperly stored cylinder is a 
hazard due to possible gas release from the safety 
relief valve.  This could cause an intense fire with 
risk of property damage, serious injury or death.

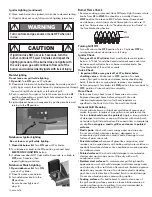
If you see, smell or hear gas escaping, immediately 
get away from the LP cylinder and appliance and  
call your fire department.

DANGER

Failure to use safety cap as directed may result in serious 
personal injury and/or property damage. 

•Turn OFF all control knobs and LP cylinder valve. Turn coupling 

nut counterclockwise by hand only - do not use tools to 
disconnect. Loosen cylinder screw beneath bottom shelf or  

Always use cap and strap supplied with valve. 

disconnect other retention means, then lift PL cylinder up and

and out of cart. Install safety cap onto LP cylinder valve.

8 • 466424712

Содержание D02 M90225

Страница 1: ...Use Care Guide Model D02 M90225 Kenmore Liquid Propane Gas Grill P N 307010129 Model 466424712 Jan 31 12 MD MC Sears Canada Inc Toronto ON M5B 2C3 www sears ca ...

Страница 2: ...conform with local codes or in the absence of local codes with either the National Fuel Gas Code ANSI Z223 1 NFPA 54 Natural Gas and Propane Installation Code CSA B149 1 or Propane Storage and Handling Code B149 2 All electrical accessories such as a rotisserie must be electrically grounded in accordance with local codes or National Electrical Code ANSI NFPA 70 or Canadian Electrical Code CSA C22 ...

Страница 3: ...e rusting which are either expendable parts that can wear out from normal use within the warranty period or are conditions that can be the result of normal use accident or improper maintenance Toronto ON M5B 2C3 Sears Canada Inc Read and follow all Safety Assembly and Use and Care Instructions in this Guide before assembling and cooking with this grill Failure to follow all instructions in this Us...

Страница 4: ...nadvertently activate this safety feature without having a gas leak This typically occurs when you turn on the gas using the grill control knob before you turn on the LP tank valve If the gas regulator safety feature activates the grill will only reach temperatures between 250 F and 300 F even with all burners on the high setting If your grill is not getting hotter than 250 F to 300 F these steps ...

Страница 5: ...the meat to catch grease and food drippings and helps minimize clean up Rotisserie Cooking Rotisserie cooking is best for round meat such as large roasts whole poultry and pork It generally requires an accessory motor and spit rod that allows the meat to be turned at a constant speed Rotisserie cooking is best done in front of a special rotisserie burner or utilizing an indirect cooking burner arr...

Страница 6: ...ke box or pan on top of the cooking grate above the flame Turn grill on high until the wood starts to smoke Reduce heat to desired temperature for cooking and place food on cooking grate as desired Close lid to retain more smoke Hardwood varieties that work particularly well with grilled foods include Alder Apple Cherry Grapevines Hickory Mesquite Oak Rosemary and Sassafras Skewers Metal skewers s...

Страница 7: ...teel can rust under certain conditions This can be caused by environmental conditions such as chlorine or salt water or improper cleaning tools such as wire or steel wool It can also discolor due to heat chemicals or grease build up To maintain your grill s high quality appearance wash with mild detergent and warm water or use a stainless steel grill cleaner Baked on grease deposits may require th...

Страница 8: ... by a unique triangular hand wheel Use only LP Tanks equipped with this type of valve LP Tank must be arranged for vapor withdrawal and include collar to protect LP Tank valve Always keep LP Tanks in upright position during use transit or storage LP Tank in upright position for vapor withdrawal LP Tank Removal Transport And Storage LP Tank Valve Retainer Strap Safety Cap A disconnected LP tank in ...

Страница 9: ...During leak test keep grill away from open flames or sparks Use a clean paintbrush and a 50 50 mild soap and water solution Brush soapy solution onto areas indicated by arrows in figure below Leaks are indicated by growing bubbles WARNING If growing bubbles appear do not use or move the LP tank Contact an LP gas supplier or your fire department Do not use household cleaning agents Damage to gas va...

Страница 10: ...y close LP tank valve and call LP gas supplier or your fire department Leak Testing Valves Hose and Regulator 1 Turn all grill control knobs to OFF 2 Be sure regulator is tightly connected to LP tank 3 Completely open LP tank valve by turning OPD hand wheel counterclockwise If you hear a rushing sound turn gas off immediately There is a major leak at the connection Correct before proceeding by cal...

Страница 11: ...GNITION button until the To ignite remaining burners turn each burner knob in sequence to the HI position starting with the burner closest WARNING For Safe Use of Your Grill and to Avoid Serious Do not let children operate or play near grill Keep grill area clear and free from materials that burn Do not block holes in sides or back of grill Check burner flames regularly Use grill only in well vent...

Страница 12: ...faces Because of glass like composition most residue can be wiped away with baking soda water solution or specially formulated cleaner Use nonabrasive scouring powder for stubborn stains Painted surfaces Wash with mild detergent or nonabrasive cleaner and warm soapy water Wipe dry with a soft nonabrasive cloth Stainless steel surfaces To maintain your grill s high quality appearance wash with mild...

Страница 13: ...l store outdoors in a well ventilated space and out of reach of children Cover grill if stored outdoors Choose from a variety of grill covers offered by manufacturers Store grill indoors ONLY if LP cylinder is turned off and disconnected removed from grill and stored outdoors When removing grill from storage follow Cleaning the Burner Assembly instructions before starting grill Firebox Carryovertu...

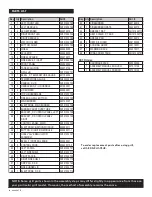
Страница 14: ...1002720 8 2 WHEEL 302450005 9 1 AXLE ROD 302460003 10 2 WHEEL SPACER 302470077 11 2 SIDE BRACE F CART SH101002722 12 2 FRONT PANEL 204060004 13 1 TANK EXCLUSION 302470136 14 1 GRILL LID SH101002701 15 1 BEZEL F TEMPERATURE GAUGE 201150002 16 1 TEMPERATURE GAUGE SH302020010 17 1 HANDLE F LID SH101002703 18 2 HANDLE END F LID HANDLE 201090001 19 4 LID BUMPER 302060001 20 1 TOP LID HARDWARE SH1010027...

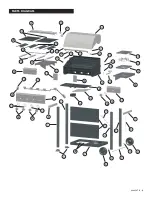
Страница 15: ...1 2 12 7 8 10 9 10 8 5 6 4 11 14 15 13 37 36 43 35 30 29 31 34 38 39 40 44 46 48 19 17 27 26 25 28 24 3 11 22 18 19 21 20 23 33 41 42 47 45 45 32 32 32 31 22 20 19 19 18 16 31 PARTS DIAGRAM 15 466424712 ...

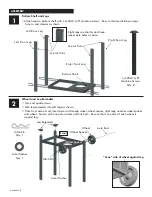
Страница 16: ...heel Qty 1 Hitch Pin Axle Washer Qty 1 Left Rear Leg Metal Tabs Metal Tabs Turn cart upside down Push leg extenders into left legs as shown From front side of cart insert axle rod through wheel wheel spacer right legs another wheel spacer and wheel Secure with one axle washer and hitch pin Be sure that cone side of each wheel is against leg ASSEMBLY Right Rear Leg Wheel Spacer Cone side of wheel a...

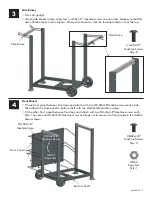
Страница 17: ...8 32x3 8 Keps Nut Qty 1 8 32 Side Brace Machine Screw 8 32x3 8 Front Panels Machine Screw 8 32x3 8 Bottom Shelf Fit one front panel between front legs and attach with two 8 32x3 8 machine screws each side Then attach the front panel to bottom shelf with two 8 32x3 8 machine screws Fit the other front panel between front legs and attach with two 8 32x3 8 machine screws each side Then use one 8 32x3...

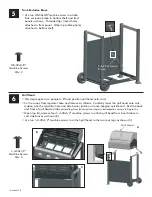
Страница 18: ...uding from front and rear legs as indicated by arrows in figure A Open top lid and use four 1 4 20x1 2 machine screws to attach grill head from inner firebox to cart side braces as shown B Use two 1 4 20x1 2 machine screws to attach grill head to the two rear legs as shown C 5 Tank Exclusion Brace Machine Screws Qty 2 8 32x3 8 Tank Exclusion Brace Use two 8 32x3 8 machine screw to attach tank excl...

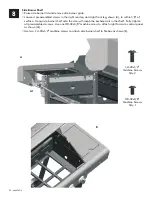
Страница 19: ...the screws through the keyhole slots in the shelf Fully tighten all preassembled screws Use one 8 32x3 8 machine screw to attach left fascia to control panel as shown A1 Use two 1 4 20x1 2 machine screws to attach left side shelf to firebox from inner firebox as shown B A Machine Screws Qty 2 1 4 20x1 2 Machine Screws Qty 1 8 32x3 8 466424712 19 A1 ...

Страница 20: ...ront leg shown A to within 1 8 of surface Hang side burner shelf onto the screws through the keyhole slots in the shelf Fully tighten all preassembled screws Use one 8 32x3 8 machine screw to attach right fascia to control panel as shown A1 Use two 1 4 20x1 2 machine screws to attach side burner shelf to firebox as shown B Machine Screws Qty 1 8 32x3 8 20 466424712 A1 ...

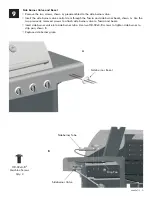
Страница 21: ...a and side burner bezel shown A Use the two previously removed screws to attach side burner valve to fascia and bezel Insert side burner valve into side burner tube Use two 8 32x3 8 screws to tighten side burner to drip pan shown B Replace side burner grate Sideburner Bezel Sideburner Tube Sideburner Valve A Machine Screws Qty 2 8 32x3 8 466424712 21 Drip Pan ...

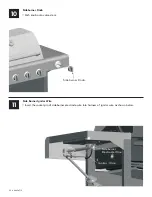
Страница 22: ... Push knob onto valve stem 4 11 Side Burner Ignitor Wire Sideburner Knob Sideburner Electrode Wire Ignitor Wire Insert the socket pin of sideburner electrode wire into harness of ignitor wire as shown below 22 466424712 ...

Страница 23: ...se tray past rail stops 4 13 Heat Diffusers Place heat diffusers over burners as shown Diffuser ends insert into channels on front and back of firebox Failure to install grease cup clip and cup will cause hot grease to drip from bottom of grill with risk of fire or property damage CAUTION Grease Tray Grease Pan Heat Diffuser Grease Tray 466424712 23 ...

Страница 24: ...stall tank correctly may cause gas hose to be damaged in operation resulting in the risk of fire See Use and Care section to correctly Leak Test and perform the Burner Flame Check LP Tank Tank Thumbscrew Warming Rack Cooking Grate _ AAA Battery Insert grates so that side with four corner feet face down To obtain sear marks in cooked meat be sure to insert grates so that side with four corner feet ...

Страница 25: ...ose regulator Discontinue use of grill until a plumber or gas technician has investigated and corrected the problem See Spider Alert and Cleaning the Burner Assembly sections of this Use Care Guide Burner s will not light using ignitor See Electronic Ignition Troubleshooting also Continued on next page GAS ISSUES Trying to light wrong burner Burner not engaged with control valve Obstruction in bur...

Страница 26: ...be s Prevention Solution See Section I of Electronic Ignition System See Section II of Electronic Ignition System See Section III of Electronic Ignition System Use long stem match fireplace match See Match Lighting section of Use and Care Check for gas in LP cylinder Turn off knobs wait 30 seconds and light grill If flames are still low turn off knobs and LP cylinder valve Disconnect regulator Rec...

Страница 27: ... on and tight Are output connections on and tight If possible observe grill in dark location Operate ignition system and look for arcing between output wires and grill frame All sparks present but weak or at slow rate Has moisture accumulated on electrode and or in burner ports Inspect electrodes for cracks Prevention Solution Install battery make sure that and connectors are oriented correctly wi...

Страница 28: ......
Отзывы: