background image

21

Broil

Setting Oven Controls

Suggested broil settings table

 (electric oven)

Food

Rack position

Setting

Cook time in minutes

(See Fig. 1)

1st side

2nd side

Doneness

Steak 1” thick

6th or 7th*

Hi

6

4

Medium

Steak 1” thick

6th or 7th*

Hi

7

5

Medium-well

Steak 1” thick

6th or 7th*

Hi

8

7

Well

Pork chops 3/4” thick 6th

Hi

8

6

Well

Chicken-bone in

5th

Lo

20

10

Well

Chicken-boneless

6th

Lo

8

6

Well

Fish

6th

Hi

- as directed -

Well

Shrimp

5th

Hi

- as directed -

Well

Hamburger 1” thick

6th or 7th*

Hi

9

7

Medium

Hamburger 1” thick

6th

Hi

10

8

Well

Fig. 3

Fig. 1

5

6

7

 Should an oven fire occur, close the oven

door and turn the oven OFF. If the fire continues, use a fire
extinguisher. DO NO

DO NO

DO NO

DO NO

DO NOTTTTT put water or flour on the fire. Flour

may be explosive.

Important notes:

• Always arrange oven racks when the oven is cool.
• For best results when broiling, use a quality broil pan

along with a broil pan insert. A broil pan is designed to
drain the fat from the food, help avoid spatter and
reduce smoking.

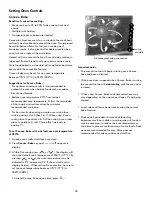
• When broiling, always pull the oven rack out to the stop

position before turning or removing food.

• Cook Time or Delay Start will not operate with the Broil

function.

 Always use pot holders or oven mitts when

using the oven. 

 When cooking, the oven interior, exterior,

oven racks and cooktop will become very hot which can
cause burns

Fig. 2

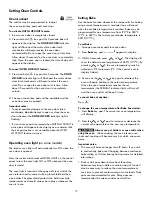
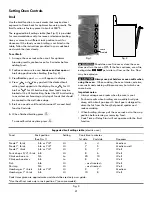
Use the broil function to cook meats that require direct
exposure to flame heat for optimum browning results. The
Broil function is factory preset to broil at 550°F.

The suggested broil settings table (See Fig. 3) is provided
for recommendations only. Increase or decrease broiling
times, or move to a different rack position to suit for
doneness. If the food you are broiling is not listed in the
table, follow the instructions provided in your cookbook
and watch the item closely.

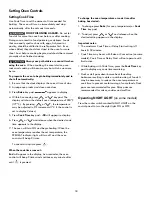
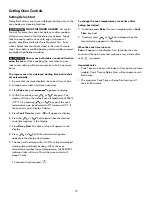
1. Arrange the oven racks when cool. For optimum

browning results, preheat oven for 5 minutes before
adding food.

2. Position cookware in oven. 

Leave oven door open 

at

broil stop position when broiling (See Fig. 2).

3. Press 

Broil

 key pad.  — — will appear in display.

4. Press  

 or 

 key pad until the desired broil

setting level appears in the display. Press 

 for HI

broil or 

 for LO broil setting. Most foods may be

broiled at the HI broil setting. Select the LO broil setting
to avoid excess browning or drying of foods that should
be cooked to the well-done stage.

5. Broil on one side until food is browned. Turn and broil

food on 2nd side.

6. When finished broiling press 

.

To cancel Broil at anytime press 

.

To set Broil:

Cook times given are approximate and should be used only as a guide.
*Use the off-set rack only in rack position 7 (on some models).

some
models

4

3

2

1

Содержание 970-6363*

Страница 1: ... utilisation et d entretien English Français Model Modèles Kenmore Electric Range Cuisinière électrique color number numéro de couleur 970 6362 P N 316902121 Rev B Sears Canada Inc Toronto Ontario Canada M5B 2B8 www sears ca ...

Страница 2: ... fitness for a particular purpose are limited to one year or the shortest period allowed by law Sears shall not be liable for incidental or consequential damages Some states and provinces do not allow the exclusion or limitation of incidental or consequential damages or limitation on the duration of implied warranties of merchantability or fitness so these exclusions or limitations may not apply t...

Страница 3: ... children to play with packaging material Proper installation Be sure your appliance is properly installed and grounded by a qualified technician in accordance with the National Electrical Code ANSI NFPA No 70 latest edition and local electrical code requirements Install only per installation instructions provided in the literature package for this range Ask your dealer to recommend a qualified te...

Страница 4: ...om steam Do not let potholders touch hot heating elements Do not use a towel or other bulky cloth instead of a potholder Important Safety Instructions Important Safety Notice The California Safe Drinking Water and Toxic Enforcement Act requires the Governor of California to publish a list of substances known to the state to cause cancer birth defects or other reproductive harm and requires busines...

Страница 5: ...turned inward and does not extend over adjacent surface units Never leave surface elements unattended at high heat settings Boilovers cause smoking and greasy spillovers that may ignite or a pan that has boiled dry may melt Glazed cooking utensils Only certain types of glass glass ceramic ceramic earthenware or other glazed utensils are suitable for cook top service without breaking due to the sud...

Страница 6: ...Do not allow grease to accumulate Kitchen cleaners and aerosols Always follow the manufacturer s recommended directions for use Be aware that excess residue from cleaners and aerosols may ignite causing damage and injury Clean ventilating hoods frequently Grease should not be allowed to accumulate on the hood or filter Follow the manufacturer s instructions for cleaning hoods Before manually clean...

Страница 7: ... See Fig 3 some models Fig 2 2 3 4 5 6 1 7 The flat oven rack some models or flat handle oven rack some models may be used for most cooking needs The offset oven rack some models is designed to place the base of the rack about 1 2 of a rack position lower than flat oven racks This design provides several additional possible positions between the flat rack positions To maximize oven cooking space p...

Страница 8: ...e the radiant element power level setting needed for best cooking results Be sure to follow the recommendations for using proper cookware as illustrated in both Figs 1 2 Fig 1 Flat bottom and straight sides Tight fitting lids Weight of handle does not tilt pan Pan is well balanced Pan sizes match the amount of food to be prepared and the size of the surface element Made of material that conducts h...

Страница 9: ...hakers spoon holders or plastic wrappings on top of the range when it is in use These items could melt or ignite Potholders towels or wooden spoons could catch fire if placed too close to the surface elements Do not allow aluminum foil empty glass porcelain cookware or ANY material that can melt to make contact with the ceramic cooktop If these items melt on the cooktop they may damage the ceramic...

Страница 10: ...ommendations for home canning procedures Use only quality flat bottom canners when home canning Use a straight edge to check canner bottom Use only a completely flat bottom canner with no ridges that radiate from the bottom center when home canning using a ceramic cooktop Make sure the diameter of the canner does not exceed 1 inch beyond the surface element markings or burner It is recommended to ...

Страница 11: ...ch as salt and pepper shakers spoon holders or plastic wrappings on top of the range when it is in use These items could melt or ignite Potholders towels or wooden spoons could catch fire if placed too close to the surface elements Do not allow aluminum foil empty glass porcelain cookware or ANY material that can melt to make contact with the ceramic cooktop If these items melt on the cooktop they...

Страница 12: ...om the single or dual settings at any time during cooking 3 When cooking is complete turn the radiant surface element OFF before removing the cookware Fig 1 Fig 2 Important notes For efficient cooking turn OFF the element several minutes before cooking is complete This will allow residual heat to complete the cooking process The surface control knobs do not have to be set exactly on a particular s...

Страница 13: ...rticular food is not listed start with the medium level and adjust as needed Most foods can be kept at serving temperatures using the medium setting Food Item Heating Level Breads Pastries LO Low Casseroles LO Low Dinner Plates with Food LO Low Eggs LO Low Gravies LO Low Meats MED Medium Sauces MED Medium Soups cream MED Medium Stews MED Medium Vegetables MED Medium Fried Foods HI High Hot Beverag...

Страница 14: ...oktop controls and functions are locked out until the cooktop is unlocked To turn the COOKTOP LOCKOUT feature OFF 1 Be sure all surface element controls are set to the OFF position 2 Press and hold until one beep sounds about 3 seconds If a triple beep sounds check to be sure all surface control elements are in the OFF position The COOKTOP LOCKOUT indicator light will turn OFF and the cooktop may ...

Страница 15: ...ads 1 Oven Light Use to turn the oven lights ON and OFF and activate COOKTOP LOCKOUT feature 2 Clock Use to set the time of day 3 Cook Time Use to enter length of cook time desired 4 Select Clean Use to set a 2 3 or 4 hour self clean cycle 5 Timer Set Off Use to set or cancel Timer 6 Delay Start Use with Bake and Select Clean functions to program a delay start time or delay start self cleaning cyc...

Страница 16: ... will beep when the set time has run out The timer may be used alone or when any other oven function is active The indicator light located above the Timer Set Off key pad will glow when the timer is active The timer will display hours and minutes until 1 hour remains When less than 1 hour remains the display will count down in minutes and seconds Once the timer has less than 1 minute remaining onl...

Страница 17: ...prevent overbrowning of some foods Dark pans are recommended for pies Shiny pans are recommended for cakes cookies and muffins Always use pot holders or oven mitts when using the oven When cooking the oven interior oven racks and cooktop will become very hot which can cause burns Setting Bake Use the bake function whenever the recipe calls for baking using normal temperatures A reminder tone will ...

Страница 18: ... temperature reaches the set temperature the PREHEAT indicator light will turn off and the oven control will beep 3 times To cancel at anytime press Always use pot holders or oven mitts when using the oven When cooking the oven interior oven racks and cooktop will become very hot which can cause burns When the cook time runs out End will appear in the display As a reminder the oven control will be...

Страница 19: ...time appears in the display and release 9 The oven will automatically turn ON at the set delayed starting time and begin heating When the oven temperature reaches the set temperature the PREHEAT indicator light will turn off and the oven control will beep 3 times To cancel at anytime press FOOD POISONING HAZARD Do not let food sit for more than one hour before or after cooking Doing so can result ...

Страница 20: ...bakeware resulting in dark or overbrowning of foods It may be necessary to reduce the oven temperature or cook time to prevent overbrowning of some foods Dark pans are recommended for pies Shiny pans are recommended for cakes cookies and muffins Suggestions for Convec Bake For optimum cooking results it is recommended to preheat the oven when baking foods such as cookies biscuits and breads Reduce...

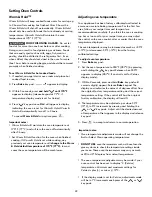
Страница 21: ...ooking the oven interior exterior oven racks and cooktop will become very hot which can cause burns Fig 2 Use the broil function to cook meats that require direct exposure to flame heat for optimum browning results The Broil function is factory preset to broil at 550 F The suggested broil settings table See Fig 3 is provided for recommendations only Increase or decrease broiling times or move to a...

Страница 22: ...lay will read 0 4 The temperature may be adjusted up or down 35 F 19 C in 5 F increments by pressing and holding the or key pads Adjust until the desired amount of temperature offset appears in the display and release key pad 5 Press to accept and return to normal operation Setting Oven Controls Warm Hold Important notes Warm Hold will maintain the oven temperature at 170 F 77 C and will turn the ...

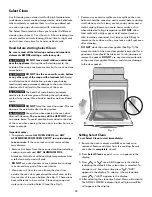
Страница 23: ...erior Aluminum foil will melt to the interior of the oven The health of some birds is extremely sensitive to the fumes given off during the self cleaning cycle of any range Move birds to another well ventilated room DO NOT force the oven door open This can damage the automatic door locking system Use caution when opening the oven door after self cleaning The oven may still be VERY HOT and can caus...

Страница 24: ...d door latch mechanism to completely lock or unlock the oven door When the clean time finishes the oven door will remain locked until the range has cooled sufficiently In addition to the clean time that was programmed you must allow about 1 additional hour for the oven to cool before you will be able to open the oven door The Select Clean function will not operate whenever a radiant surface elemen...

Страница 25: ...ch cleaning pad Rinse and wipe dry with a clean cloth Do not allow food spills with high sugar or acid content milk tomatoes sauerkraut fruit juices or pie filling to remain on the surface they may cause a dull spot even after cleaning For oven interior remove excessive spillovers from oven cavity bottom before starting Select Clean Clean any soils from oven frame and door liner outside the oven d...

Страница 26: ...ktop cleaner on a hot cooktop The fumes can be hazardous to your health and can chemically damage the ceramic glass surface Before cleaning the cooktop be sure the controls are turned to OFF and the cooktop is COOL The glass surface could be hot and burns may occur if the glass surface is touched before it has cooled sufficiently For light to moderate soil Apply a few drops of CookTop Cleaning Cre...

Страница 27: ...he Cleaning recommendation table in the Care Cleaning section for more detailed information about cleaning specific parts of the range Aluminum foil Use of aluminum foil on a hot cooktop can damage the cooktop Do not use thin aluminum cooking utensils or allow aluminum foil to touch the surface elements under ANY circumstances Aluminum utensils The melting point of aluminum is much lower than that...

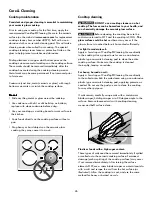
Страница 28: ... oven bake element is visible The following cleaning instruction applies ONLY for models that have a visible lower bake element Cleaning oven bottom on some models Oven elements may appear to have cooled after they have been turned off The oven bake and broil elements may still be hot and burns may occur if touched before they have cooled sufficiently The bake element may be tilted from the front ...

Страница 29: ...Fig 4 The hook of the hinge arms must be fully seated onto the roller pins 3 Fully open the oven door horizontal with floor Fig 1 4 Push the door hinge locks up towards and into the oven frame on both left and right oven door hinges Fig 2 to the locked position then close the oven door Special door care instructions Most oven doors contain glass that can break Read the following recommendations Re...

Страница 30: ...ion Service wiring is not complete Call 1 800 4 MY HOME for assistance See back cover The time of day is not set The time of day must first be set in order to operate the oven See Setting clock in Setting Oven Controls section Be sure the oven controls are set properly for the desired function See Setting Oven Controls section and review instructions for the desired cooking function in this manual...

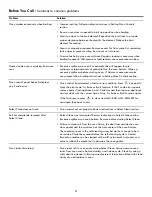
Страница 31: ...e meat the element Preheat the broil element for searing Meat not properly prepared Remove excess fat from meat Cut remaining fatty edges to prevent curling but do not cut into lean Grease has built up on oven surfaces Regular cleaning is necessary when broiling frequently Old grease or food spatters cause excessive smoking Select Clean does not work Oven control not set properly Review instructio...

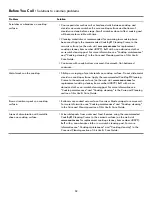
Страница 32: ...d For more information see Cooktop maintenance and Cooktop cleaning in the Care and Cleaning section of this Use Care Guide Scratches or abrasions on cooktop surface Coarse particles such as salt or hardened soils between cooktop and utensils can cause scratches Be sure cooktop surface and bottoms of utensils are clean before usage Small scratches do not affect cooking and will become less visible...

Страница 33: ...énéficier du soutien téléphonique d un représentant Sears pour tous les produits Nous sommes votre guide d utilisation parlant Une protection contre les surtensions pour les dommages électriques causés par des fluctuations électriques Une couverture annuelle de 250 pour la perte d aliments à la suite de toute détérioration d aliments résultant d une défaillance mécanique d un réfrigérateur ou d un...

Страница 34: ......
Отзывы: