background image

Содержание 790. 9270 Series

Страница 1: ... uso y cuidada English Espafiol Model Modelos 790 9270 9280 9290 I enmoreo El collor nur_ _llo _ c6di _9o de cdor P N 316902018 Sears Brands Management Corporation Hoffman Estates IL 60179 U S A www kenmore com www sears com ...

Страница 2: ... Sears will NOT pay for 1 Cracks in a ceramic glass cooktop that are not a result of thermal shock 2 Stains and scratches on a ceramic glass cooktop resulting from failure to maintain it properly according to all instructions supplied with the product 3 Expendable items that can wear out from normal use including but not limited to filters belts light bulbs and bags 4 A service technician to instr...

Страница 3: ...d technician This may reduce the risk of personal injury and damage to the range Ask your dealer to recommend a qualified technician and an authorized repair service Know how to disconnect the power to the range at the circuit breaker or fuse box in case of an emergency Tip Over Hazard A child or adult can tip the range and be killed Verify the anti tip device has been installed to floor or wall E...

Страница 4: ...rfaces may result in burns from steam Do not let potholders touch hot heating elements Do not use a towel or other bulky cloth instead of a potholder Do not heat unopened food containers buildup of pressure may cause container to burst and result in injury Important Safety Notice The California Safe Drinking Water and Toxic Enforcement Act requires the Governor of California to publish a list of s...

Страница 5: ... be positioned so that it is turned inward and does not extend over adjacent surface units Never leave surface elements unattended at high heat settings _ Boilovers cause smoking and greasy spillovers that may ignite or a pan that has boiled dry may melt Glazed cooking utensils _ Only certain types of glass glass ceramic ceramic earthenware or other glazed utensils are suitable for cook top servic...

Страница 6: ...ded directions for use Be aware that excess residue from cleaners and aerosols may ignite causing damage and iniury Clean ventilating hoods frequently m Grease should not be allowed to accumulate on the hood or filter Follow the manufacturer s instructions for cleaning hoods Do Not Clean Door Gasket The door gasket is essential for a good seal Care should be taken not to rub damage or move the gas...

Страница 7: ...n Broiling Cookies cakes pies biscuits muffins Frozen pies angel food cake yeast bread and casseroles Small cuts of meat or poultry Turkey roast or ham See broil 4or5 2or3 lor2 lor2 Types of oven racks ___ flat handle rack oven rack ffset _ oven rack oven rack The flat oven rack some models or flat handle oven rack some models may be used for most cooking needs The offset oven rack some models is ...

Страница 8: ...t Iron A slow heat conductor however will retain heat very well Cooks evenly once cooking temperature is reached Not recommended for use on ceramic cooktops W liiiliiiilililiiiiiiiii i ii_ i iiii_ii iiii ili Flat bottom and straight sides Tight fitting lids Weight of handle does not tilt pan Pan is well balanced Pan sizes match the amount of food to be prepared and the size of the surface element ...

Страница 9: ...will glow when a surface element is turned ON A quick glance at this indicator light after cooking is an easy check to be sure ALL surface controls are turned OFF The Hot Surface indicator lights are located on the control panel just above each surface control knob They will glow when any surface cooking area heats up and will remain on until the cooktop has cooled to a MODERATE level Hot Surface ...

Страница 10: ...hen bringing larger quantities of liquid to temperature and when preparing larger quantities of food Home Canning Be sure to read and observe all the following points when home canning with your appliance Check with the USDA United States Department of Agriculture website and be sure to read all the information they have available as well as follow their recommendations for home canning procedures...

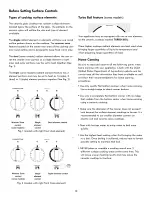
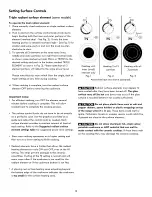
Страница 11: ... melt to make contact with the ceramic cooktop If these items melt on the cooktop they may damage the ceramic cooktop Fig 2 Single radiant surface elements all models To operate the single radiant element 1 Place correctly sized cookware on single radiant surface element 2 Push in and turn the surface control knob in either direction to the desired setting See Fig 2 3 When cooking is complete turn...

Страница 12: ...ns on a higher setting and then turn to a lower setting to finish cooking Radiant elements have a limiter that allows the radiant heating element to cycle ON and OFF even at the HI setting This helps prevent damage to the ceramic smoothtop Cycling at the HI setting is normal and will occur more often if the cookware is too small for the radiant element or if the cookware bottom is not flat A glowi...

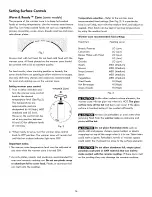
Страница 13: ...nt amount of heat at each setting Refer to the Suggested radiant surface element settings table for suggested power level settings Start most cooking operations on a higher setting and then turn to a lower setting to finish cooking Radiant elements have a limiter that allows the radiant heating element to cycle ON and OFF even at the HI setting This helps prevent damage to the ceramic smoothtop Cy...

Страница 14: ...recommended for oven and ceramic cooktop use Do not use plastic wrap or aluminum foil to cover food Plastic or aluminum foil can melt onto the cooktop Temperature selection Refer to the warmer zone recommended food settings See Fig 3 If a particular food is not listed start with the medium level and adjust as needed Most foods can be kept at serving temperatures by using the medium level Warmer zo...

Страница 15: ...l Timer 15 AirGuard Use to freshen kitchen air during cooking 16 Add 1 Minute Use to add additonal minutes to Timer 17 Clock Use to set the time of day 18 STOP Use to cancel any oven mode previously entered except clock and timer Press STOP to stop cooking Use to activate or cancel OVEN LOCI OUT 19 START Use to start oven functions except oven light 0 9 keypads Use to enter temperatures and times ...

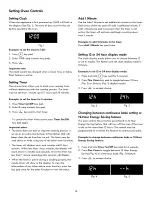
Страница 16: ...ring a cooking process the minute timer will show in the display To view the information of any other active oven function press the key pad once for the other function to view the status Add 1 Minute Use the Add 1 Minute to set additional minutes to the timer Each press of the key pad will add 1 additional minute If Add 1 Minute key pad is pressed when the timer is not active the timer will activ...

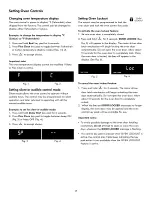
Страница 17: ... oc will appear in the display See Fig 6 Fig 1 Fig 2 Setting silent or audible control mode Silent mode allows the oven control to operate without audible tones The control may be programmed for silent operation and later returned to operating with all the normal audible tones Example to set for silent or audible mode 1 Press and hold Delay Start key pad for 6 seconds 2 Press Flex Clean key pad to...

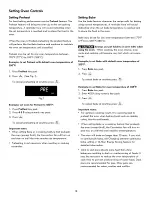
Страница 18: ...und indicating when the set bake temperature is reached and to place the food in the oven Bake may be set for any oven temperature between 170 F 77 C to 550 F 288 C Always use pot holders or oven mitts when using the oven When cooking the oven interior oven racks and cooktop will become very hot which can cause burns Example to set Bake with default oven temperature of 350 F 1 Press Bake key pad 2...

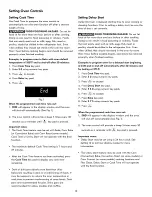
Страница 19: ...uce the oven temperature or cook time to prevent overbrowning of some foods Dark pans are recommended for pies Shiny pans are recommended for cakes cookies and muffins Setting Delay Start Delay Start sets a delayed starting time to oven cooking or cleaning functions Prior to setting a delay start be sure the time of day is set correctly FOOD POISONING HAZARD Do not let food sit for more than one h...

Страница 20: ...scuits and breads Reduce oven temperature 25 F from recipe s recommended oven temperature Follow the remainder of the recipe s instructions using the minimum recommended cook time Example to set Conv Convection Bake with a default oven set temperature of 350 F 1 Press Conv Bake key pad some models or Press Convection Bake key pad some models 2 Press START Air movement using convection Fig 1 some m...

Страница 21: ... the food at this time If necessary increase cook time until the desired doneness is obtained Do not cover foods when dry roasting this will prevent the meat from browning properly Example to set Conv Roast with a default oven set temperature of 350 F 1 Press Conv Roast key pad some models 2 Press START TO cancel Conv Roast at anytime press sToP Important notes The convection fan will begin rotati...

Страница 22: ... occur close the oven door and turn the oven OFF If the fire continues use a fire extinguisher DO NOT put water or flour on the fire Flour may be explosive Always use pot holders or oven mitts when using the oven When cooking the oven interior exterior oven racks and cooktop will become very hot which can cause burns Important notes Always arrange oven racks when the oven is cool For best results ...

Страница 23: ...e sauces during the last hour of cooking FOOD POISONING HAZARD Do not let food sit for more than one hour before or after cooking Doing so can result in food poisoning or sickness Foods that can easily spoil such as milk eggs fish meat or poultry should be chilled in the refrigerator first Even when chilled they should not stand in the oven for more than 1 hour before cooking begins and should be ...

Страница 24: ...77 C for 3 hours Warm Hold may be set when finished cooking or may be added to automatically turn on after cooking using Cook Time Delay Start may also be added Recipe Recall Use the Recipe Recall feature to record and recall your favorite baking recipe settings This feature may store and recall up to 3 different recipe settings using the numeric key pads 1 2 and 3 Recipe Recall may be programmed ...

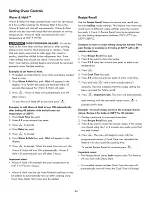
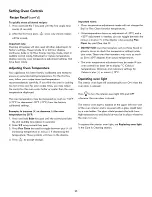
Страница 25: ...0 using numeric key pad 3 Press Flex Clean key pad to toggle between plus if increasing temperature or minus if decreasing the temperature These symbols will show in the display 4 Press START to accept change Important notes Oven temperature adjustments made will not change the Broil or Flex Clean function temperatures If the temperature shows an adjustment of 20 F and a 20 F adjustment is needed ...

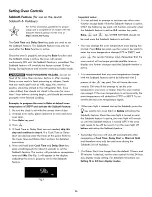
Страница 26: ...g 1 will appear in the display indicating the oven is properly set for the Sabbath feature Fig 1 Important notes It is not advised to attempt to activate any other oven function except Bake while the Sabbath feature is active ONLY the following key pads will function correctly when the Sabbath feature is active 0 9 number key pads Bake START and sToP ALL OTHER KEYPADS should not be used once the S...

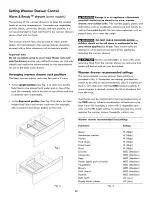
Страница 27: ...bath feature What to do during a power failure or power interruption after the Sabbath feature was activated Should you experience a power failure or interruption the oven will shut off When power is restored the oven will not turn back on automatically The oven will remember that it is set for the Sabbath The food may be safely removed from the oven while still in the Sabbath feature however the ...

Страница 28: ...h as cookbooks plasticware and towels as well as flammable liquids Do not store explosives such as aerosol cans on or near the range DO NOT LEAVE CHILDREN ALONE children should nat be left alone or unattended in the area where appliance is in use They should never be allowed to sit or stand on any part of the appliance including the warmer drawer Always use potholders or oven mitts when removing f...

Страница 29: ...ates will be hot and you can be burned To set warmer drawer 1 Open warmer drawer when cool and arrange warmer drawer rack as needed For best results close the warmer drawer and preheat the drawer before adding food or plates An empty warmer drawer will fully preheat in approximately 15 minutes 3 Place food in warmer drawer that is already at serving temperature on warmer drawer rack Dinner plates ...

Страница 30: ...e utensils and ANY ALUMINUM FOIL Aluminum foil will not withstand high temperatures from a self clean cycle and will melt DO NOT use oven cleaners or oven protective coatings in or around any part of the oven interior Clean any soil from the oven frame the door liner outside the oven door gasket and the small area at the front center of the oven bottom See Fig 1 These areas heat sufficiently to bu...

Страница 31: ...ou must allow about 1 additional hour for the oven to cool before you will be able to open the oven door The Flex Clean function will not operate whenever a radiant surface element is ON or the oven lockout is active Delayed Start Flex Clean Example to start a delay Flex Clean with default clean time of 3 hours and a start time of 9 00 o clock 1 Be sure the clock is set with the correct time of da...

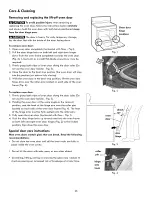
Страница 32: ...ch cleaning pad Rinse and wipe dry with a clean cloth Do not allow food spills with high sugar or acid content milk tomatoes sauerkraut fruit juices or pie filling to remain on the surface they may cause a dull spot even after cleaning Oven interior For oven interior remove excessive spillovers from oven cavity bottom before starting Flex Clean Clean any soils from oven frame and door liner outsid...

Страница 33: ... drops of CookTop Cleaning Creme directly to the cooktop Use a paper towel or use a non abrasive plastic type no scratch cleaning pad to clean the entire cooktop surface Make sure the cooktop is cleaned thoroughly leaving no residue For heavy burned on soil Apply a few drops of CookTop Cleaning Creme directly to the soiled area Rub the soiled area using a non abrasive plastic type no scratch clean...

Страница 34: ...il as recommended in this manual Improper installation of these liners may result in risk of electric shock or fire Aluminum foil Use of aluminum foil on a hot cooktop can damage the cooktop Do not use thin aluminum cooking utensils or allow aluminum foil to touch the surface elements under ANY circumstances Aluminum utensils The melting point of aluminum is much lower than that of other metals Ca...

Страница 35: ...e roller pins located on each side of the oven frame Fig 4 t Fig 1 Oven door hinge locations To replace oven door 1 Firmly grasp both sides of oven door along the door sides Do not use the oven door handle Fig 3 2 Holding the oven door at the same angle as the removal position seat the hook of the hinge arm over the roller pins located on each side of the oven door frame Fig 4 The hook of the hing...

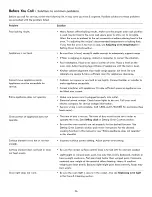
Страница 36: ...ble Carpet interferes with appliance Provide sufficient space so appliance can be lifted over carpet Entire appliance does not operate Make sure power cord is plugged properly into outlet Electrical power outage Check house lights to be sure Call your local electric company for service outage information Service wiring is not complete Call 1 800 4 MY HOME for assistance See back cover Oven portion...

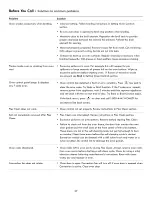
Страница 37: ...rror repeats remove power from appliance wait 5 minutes and then repower appliance and set clock with the correct time of day Try Bake or Broil function again If the fault recurs press stop to clear and call 1 800 4 MY HOME for assistance See back cover Flex Clean does not work Oven control not set properly Review instructions in Flex Clean section Soil not completely removed after Flex Flex Clean...

Страница 38: ...kware Metal marks on the cooktop Sliding or scraping of metal utensils on cooktop surface Do not slide metal utensils on cooktop surface Apply the recommended CookTop Cleaning Creme to the ceramic surface on the web visit www sears com for replacement cooktop cleaner item number 40079 Buff with a non abrasive cloth or no scratch cleaning pad For more information see Cooktop maintenance and Cooktop...

Страница 39: ...prolongar la durabilidad de su nuevo producto El acuerdo incluye Io siguiente Piezas y mano de obra necesarias para contribuir a mantener el funcionamiento adecuado de los productos utilizados en condiciones normales de uso no s61o en caso de defectos de los productos Nuestra cobertura va mucho m_s all_ que la garantfa del producto No se aplican deducibles ni exclusiones per fallas del funcionamie...

Страница 40: ...ent iiiiiiii and electronics call anytime for the location of your nearest iiiiiiii iiiiiiii Sears Parts Repair Service Center iiiiiiii 1 800 488 1222 U S A 1 800 469 4663 Canada iiiiiiii www soars_com www_soars ca iiiiiiii iiiiiiii To purchase a protection agreement can product serviced by Sears iiiiiiii iiiiiiii 1 800 827 6655 u s A 1 800 361 6665 Canada Para pedir servicio de reparaci6n Au Cana...

Страница 41: ... uso y cuidada English Espafiol Model Modelos 790 9270 9280 9290 I enmoreo El collor nur_ _llo _ c6di _9o de cdor P N 316902018 Sears Brands Management Corporation Hoffman Estates IL 60179 U S A www kenmore com www sears com ...

Страница 42: ... Sears will NOT pay for 1 Cracks in a ceramic glass cooktop that are not a result of thermal shock 2 Stains and scratches on a ceramic glass cooktop resulting from failure to maintain it properly according to all instructions supplied with the product 3 Expendable items that can wear out from normal use including but not limited to filters belts light bulbs and bags 4 A service technician to instr...

Страница 43: ...d technician This may reduce the risk of personal injury and damage to the range Ask your dealer to recommend a qualified technician and an authorized repair service Know how to disconnect the power to the range at the circuit breaker or fuse box in case of an emergency Tip Over Hazard A child or adult can tip the range and be killed Verify the anti tip device has been installed to floor or wall E...

Страница 44: ...rfaces may result in burns from steam Do not let potholders touch hot heating elements Do not use a towel or other bulky cloth instead of a potholder Do not heat unopened food containers buildup of pressure may cause container to burst and result in injury Important Safety Notice The California Safe Drinking Water and Toxic Enforcement Act requires the Governor of California to publish a list of s...

Страница 45: ... be positioned so that it is turned inward and does not extend over adjacent surface units Never leave surface elements unattended at high heat settings _ Boilovers cause smoking and greasy spillovers that may ignite or a pan that has boiled dry may melt Glazed cooking utensils _ Only certain types of glass glass ceramic ceramic earthenware or other glazed utensils are suitable for cook top servic...

Страница 46: ...ded directions for use Be aware that excess residue from cleaners and aerosols may ignite causing damage and iniury Clean ventilating hoods frequently m Grease should not be allowed to accumulate on the hood or filter Follow the manufacturer s instructions for cleaning hoods Do Not Clean Door Gasket The door gasket is essential for a good seal Care should be taken not to rub damage or move the gas...

Страница 47: ...n Broiling Cookies cakes pies biscuits muffins Frozen pies angel food cake yeast bread and casseroles Small cuts of meat or poultry Turkey roast or ham See broil 4or5 2or3 lor2 lor2 Types of oven racks ___ flat handle rack oven rack ffset _ oven rack oven rack The flat oven rack some models or flat handle oven rack some models may be used for most cooking needs The offset oven rack some models is ...

Страница 48: ...t Iron A slow heat conductor however will retain heat very well Cooks evenly once cooking temperature is reached Not recommended for use on ceramic cooktops W liiiliiiilililiiiiiiiii i ii_ i iiii_ii iiii ili Flat bottom and straight sides Tight fitting lids Weight of handle does not tilt pan Pan is well balanced Pan sizes match the amount of food to be prepared and the size of the surface element ...

Страница 49: ...will glow when a surface element is turned ON A quick glance at this indicator light after cooking is an easy check to be sure ALL surface controls are turned OFF The Hot Surface indicator lights are located on the control panel just above each surface control knob They will glow when any surface cooking area heats up and will remain on until the cooktop has cooled to a MODERATE level Hot Surface ...

Страница 50: ...hen bringing larger quantities of liquid to temperature and when preparing larger quantities of food Home Canning Be sure to read and observe all the following points when home canning with your appliance Check with the USDA United States Department of Agriculture website and be sure to read all the information they have available as well as follow their recommendations for home canning procedures...

Страница 51: ... melt to make contact with the ceramic cooktop If these items melt on the cooktop they may damage the ceramic cooktop Fig 2 Single radiant surface elements all models To operate the single radiant element 1 Place correctly sized cookware on single radiant surface element 2 Push in and turn the surface control knob in either direction to the desired setting See Fig 2 3 When cooking is complete turn...

Страница 52: ...ns on a higher setting and then turn to a lower setting to finish cooking Radiant elements have a limiter that allows the radiant heating element to cycle ON and OFF even at the HI setting This helps prevent damage to the ceramic smoothtop Cycling at the HI setting is normal and will occur more often if the cookware is too small for the radiant element or if the cookware bottom is not flat A glowi...

Страница 53: ...nt amount of heat at each setting Refer to the Suggested radiant surface element settings table for suggested power level settings Start most cooking operations on a higher setting and then turn to a lower setting to finish cooking Radiant elements have a limiter that allows the radiant heating element to cycle ON and OFF even at the HI setting This helps prevent damage to the ceramic smoothtop Cy...

Страница 54: ...recommended for oven and ceramic cooktop use Do not use plastic wrap or aluminum foil to cover food Plastic or aluminum foil can melt onto the cooktop Temperature selection Refer to the warmer zone recommended food settings See Fig 3 If a particular food is not listed start with the medium level and adjust as needed Most foods can be kept at serving temperatures by using the medium level Warmer zo...

Страница 55: ...l Timer 15 AirGuard Use to freshen kitchen air during cooking 16 Add 1 Minute Use to add additonal minutes to Timer 17 Clock Use to set the time of day 18 STOP Use to cancel any oven mode previously entered except clock and timer Press STOP to stop cooking Use to activate or cancel OVEN LOCI OUT 19 START Use to start oven functions except oven light 0 9 keypads Use to enter temperatures and times ...

Страница 56: ...ring a cooking process the minute timer will show in the display To view the information of any other active oven function press the key pad once for the other function to view the status Add 1 Minute Use the Add 1 Minute to set additional minutes to the timer Each press of the key pad will add 1 additional minute If Add 1 Minute key pad is pressed when the timer is not active the timer will activ...

Страница 57: ... oc will appear in the display See Fig 6 Fig 1 Fig 2 Setting silent or audible control mode Silent mode allows the oven control to operate without audible tones The control may be programmed for silent operation and later returned to operating with all the normal audible tones Example to set for silent or audible mode 1 Press and hold Delay Start key pad for 6 seconds 2 Press Flex Clean key pad to...

Страница 58: ...und indicating when the set bake temperature is reached and to place the food in the oven Bake may be set for any oven temperature between 170 F 77 C to 550 F 288 C Always use pot holders or oven mitts when using the oven When cooking the oven interior oven racks and cooktop will become very hot which can cause burns Example to set Bake with default oven temperature of 350 F 1 Press Bake key pad 2...

Страница 59: ...uce the oven temperature or cook time to prevent overbrowning of some foods Dark pans are recommended for pies Shiny pans are recommended for cakes cookies and muffins Setting Delay Start Delay Start sets a delayed starting time to oven cooking or cleaning functions Prior to setting a delay start be sure the time of day is set correctly FOOD POISONING HAZARD Do not let food sit for more than one h...

Страница 60: ...scuits and breads Reduce oven temperature 25 F from recipe s recommended oven temperature Follow the remainder of the recipe s instructions using the minimum recommended cook time Example to set Conv Convection Bake with a default oven set temperature of 350 F 1 Press Conv Bake key pad some models or Press Convection Bake key pad some models 2 Press START Air movement using convection Fig 1 some m...

Страница 61: ... the food at this time If necessary increase cook time until the desired doneness is obtained Do not cover foods when dry roasting this will prevent the meat from browning properly Example to set Conv Roast with a default oven set temperature of 350 F 1 Press Conv Roast key pad some models 2 Press START TO cancel Conv Roast at anytime press sToP Important notes The convection fan will begin rotati...

Страница 62: ... occur close the oven door and turn the oven OFF If the fire continues use a fire extinguisher DO NOT put water or flour on the fire Flour may be explosive Always use pot holders or oven mitts when using the oven When cooking the oven interior exterior oven racks and cooktop will become very hot which can cause burns Important notes Always arrange oven racks when the oven is cool For best results ...

Страница 63: ...e sauces during the last hour of cooking FOOD POISONING HAZARD Do not let food sit for more than one hour before or after cooking Doing so can result in food poisoning or sickness Foods that can easily spoil such as milk eggs fish meat or poultry should be chilled in the refrigerator first Even when chilled they should not stand in the oven for more than 1 hour before cooking begins and should be ...

Страница 64: ...77 C for 3 hours Warm Hold may be set when finished cooking or may be added to automatically turn on after cooking using Cook Time Delay Start may also be added Recipe Recall Use the Recipe Recall feature to record and recall your favorite baking recipe settings This feature may store and recall up to 3 different recipe settings using the numeric key pads 1 2 and 3 Recipe Recall may be programmed ...

Страница 65: ...0 using numeric key pad 3 Press Flex Clean key pad to toggle between plus if increasing temperature or minus if decreasing the temperature These symbols will show in the display 4 Press START to accept change Important notes Oven temperature adjustments made will not change the Broil or Flex Clean function temperatures If the temperature shows an adjustment of 20 F and a 20 F adjustment is needed ...

Страница 66: ...g 1 will appear in the display indicating the oven is properly set for the Sabbath feature Fig 1 Important notes It is not advised to attempt to activate any other oven function except Bake while the Sabbath feature is active ONLY the following key pads will function correctly when the Sabbath feature is active 0 9 number key pads Bake START and sToP ALL OTHER KEYPADS should not be used once the S...

Страница 67: ...bath feature What to do during a power failure or power interruption after the Sabbath feature was activated Should you experience a power failure or interruption the oven will shut off When power is restored the oven will not turn back on automatically The oven will remember that it is set for the Sabbath The food may be safely removed from the oven while still in the Sabbath feature however the ...

Страница 68: ...h as cookbooks plasticware and towels as well as flammable liquids Do not store explosives such as aerosol cans on or near the range DO NOT LEAVE CHILDREN ALONE children should nat be left alone or unattended in the area where appliance is in use They should never be allowed to sit or stand on any part of the appliance including the warmer drawer Always use potholders or oven mitts when removing f...

Страница 69: ...ates will be hot and you can be burned To set warmer drawer 1 Open warmer drawer when cool and arrange warmer drawer rack as needed For best results close the warmer drawer and preheat the drawer before adding food or plates An empty warmer drawer will fully preheat in approximately 15 minutes 3 Place food in warmer drawer that is already at serving temperature on warmer drawer rack Dinner plates ...

Страница 70: ...e utensils and ANY ALUMINUM FOIL Aluminum foil will not withstand high temperatures from a self clean cycle and will melt DO NOT use oven cleaners or oven protective coatings in or around any part of the oven interior Clean any soil from the oven frame the door liner outside the oven door gasket and the small area at the front center of the oven bottom See Fig 1 These areas heat sufficiently to bu...

Страница 71: ...ou must allow about 1 additional hour for the oven to cool before you will be able to open the oven door The Flex Clean function will not operate whenever a radiant surface element is ON or the oven lockout is active Delayed Start Flex Clean Example to start a delay Flex Clean with default clean time of 3 hours and a start time of 9 00 o clock 1 Be sure the clock is set with the correct time of da...

Страница 72: ...ch cleaning pad Rinse and wipe dry with a clean cloth Do not allow food spills with high sugar or acid content milk tomatoes sauerkraut fruit juices or pie filling to remain on the surface they may cause a dull spot even after cleaning Oven interior For oven interior remove excessive spillovers from oven cavity bottom before starting Flex Clean Clean any soils from oven frame and door liner outsid...

Страница 73: ... drops of CookTop Cleaning Creme directly to the cooktop Use a paper towel or use a non abrasive plastic type no scratch cleaning pad to clean the entire cooktop surface Make sure the cooktop is cleaned thoroughly leaving no residue For heavy burned on soil Apply a few drops of CookTop Cleaning Creme directly to the soiled area Rub the soiled area using a non abrasive plastic type no scratch clean...

Страница 74: ...il as recommended in this manual Improper installation of these liners may result in risk of electric shock or fire Aluminum foil Use of aluminum foil on a hot cooktop can damage the cooktop Do not use thin aluminum cooking utensils or allow aluminum foil to touch the surface elements under ANY circumstances Aluminum utensils The melting point of aluminum is much lower than that of other metals Ca...

Страница 75: ...e roller pins located on each side of the oven frame Fig 4 t Fig 1 Oven door hinge locations To replace oven door 1 Firmly grasp both sides of oven door along the door sides Do not use the oven door handle Fig 3 2 Holding the oven door at the same angle as the removal position seat the hook of the hinge arm over the roller pins located on each side of the oven door frame Fig 4 The hook of the hing...

Страница 76: ...ble Carpet interferes with appliance Provide sufficient space so appliance can be lifted over carpet Entire appliance does not operate Make sure power cord is plugged properly into outlet Electrical power outage Check house lights to be sure Call your local electric company for service outage information Service wiring is not complete Call 1 800 4 MY HOME for assistance See back cover Oven portion...

Страница 77: ...rror repeats remove power from appliance wait 5 minutes and then repower appliance and set clock with the correct time of day Try Bake or Broil function again If the fault recurs press stop to clear and call 1 800 4 MY HOME for assistance See back cover Flex Clean does not work Oven control not set properly Review instructions in Flex Clean section Soil not completely removed after Flex Flex Clean...

Страница 78: ...kware Metal marks on the cooktop Sliding or scraping of metal utensils on cooktop surface Do not slide metal utensils on cooktop surface Apply the recommended CookTop Cleaning Creme to the ceramic surface on the web visit www sears com for replacement cooktop cleaner item number 40079 Buff with a non abrasive cloth or no scratch cleaning pad For more information see Cooktop maintenance and Cooktop...

Страница 79: ...prolongar la durabilidad de su nuevo producto El acuerdo incluye Io siguiente Piezas y mano de obra necesarias para contribuir a mantener el funcionamiento adecuado de los productos utilizados en condiciones normales de uso no s61o en caso de defectos de los productos Nuestra cobertura va mucho m_s all_ que la garantfa del producto No se aplican deducibles ni exclusiones per fallas del funcionamie...

Страница 80: ...ent iiiiiiii and electronics call anytime for the location of your nearest iiiiiiii iiiiiiii Sears Parts Repair Service Center iiiiiiii 1 800 488 1222 U S A 1 800 469 4663 Canada iiiiiiii www soars_com www_soars ca iiiiiiii iiiiiiii To purchase a protection agreement can product serviced by Sears iiiiiiii iiiiiiii 1 800 827 6655 u s A 1 800 361 6665 Canada Para pedir servicio de reparaci6n Au Cana...

Страница 81: ... uso y cuidada English Espafiol Model Modelos 790 9270 9280 9290 I enmoreo El collor nur_ _llo _ c6di _9o de cdor P N 316902018 Sears Brands Management Corporation Hoffman Estates IL 60179 U S A www kenmore com www sears com ...

Страница 82: ... Sears will NOT pay for 1 Cracks in a ceramic glass cooktop that are not a result of thermal shock 2 Stains and scratches on a ceramic glass cooktop resulting from failure to maintain it properly according to all instructions supplied with the product 3 Expendable items that can wear out from normal use including but not limited to filters belts light bulbs and bags 4 A service technician to instr...

Страница 83: ...d technician This may reduce the risk of personal injury and damage to the range Ask your dealer to recommend a qualified technician and an authorized repair service Know how to disconnect the power to the range at the circuit breaker or fuse box in case of an emergency Tip Over Hazard A child or adult can tip the range and be killed Verify the anti tip device has been installed to floor or wall E...

Страница 84: ...rfaces may result in burns from steam Do not let potholders touch hot heating elements Do not use a towel or other bulky cloth instead of a potholder Do not heat unopened food containers buildup of pressure may cause container to burst and result in injury Important Safety Notice The California Safe Drinking Water and Toxic Enforcement Act requires the Governor of California to publish a list of s...

Страница 85: ... be positioned so that it is turned inward and does not extend over adjacent surface units Never leave surface elements unattended at high heat settings _ Boilovers cause smoking and greasy spillovers that may ignite or a pan that has boiled dry may melt Glazed cooking utensils _ Only certain types of glass glass ceramic ceramic earthenware or other glazed utensils are suitable for cook top servic...

Страница 86: ...ded directions for use Be aware that excess residue from cleaners and aerosols may ignite causing damage and iniury Clean ventilating hoods frequently m Grease should not be allowed to accumulate on the hood or filter Follow the manufacturer s instructions for cleaning hoods Do Not Clean Door Gasket The door gasket is essential for a good seal Care should be taken not to rub damage or move the gas...

Страница 87: ...n Broiling Cookies cakes pies biscuits muffins Frozen pies angel food cake yeast bread and casseroles Small cuts of meat or poultry Turkey roast or ham See broil 4or5 2or3 lor2 lor2 Types of oven racks ___ flat handle rack oven rack ffset _ oven rack oven rack The flat oven rack some models or flat handle oven rack some models may be used for most cooking needs The offset oven rack some models is ...

Страница 88: ...t Iron A slow heat conductor however will retain heat very well Cooks evenly once cooking temperature is reached Not recommended for use on ceramic cooktops W liiiliiiilililiiiiiiiii i ii_ i iiii_ii iiii ili Flat bottom and straight sides Tight fitting lids Weight of handle does not tilt pan Pan is well balanced Pan sizes match the amount of food to be prepared and the size of the surface element ...

Страница 89: ...will glow when a surface element is turned ON A quick glance at this indicator light after cooking is an easy check to be sure ALL surface controls are turned OFF The Hot Surface indicator lights are located on the control panel just above each surface control knob They will glow when any surface cooking area heats up and will remain on until the cooktop has cooled to a MODERATE level Hot Surface ...

Страница 90: ...hen bringing larger quantities of liquid to temperature and when preparing larger quantities of food Home Canning Be sure to read and observe all the following points when home canning with your appliance Check with the USDA United States Department of Agriculture website and be sure to read all the information they have available as well as follow their recommendations for home canning procedures...

Страница 91: ... melt to make contact with the ceramic cooktop If these items melt on the cooktop they may damage the ceramic cooktop Fig 2 Single radiant surface elements all models To operate the single radiant element 1 Place correctly sized cookware on single radiant surface element 2 Push in and turn the surface control knob in either direction to the desired setting See Fig 2 3 When cooking is complete turn...

Страница 92: ...ns on a higher setting and then turn to a lower setting to finish cooking Radiant elements have a limiter that allows the radiant heating element to cycle ON and OFF even at the HI setting This helps prevent damage to the ceramic smoothtop Cycling at the HI setting is normal and will occur more often if the cookware is too small for the radiant element or if the cookware bottom is not flat A glowi...

Страница 93: ...nt amount of heat at each setting Refer to the Suggested radiant surface element settings table for suggested power level settings Start most cooking operations on a higher setting and then turn to a lower setting to finish cooking Radiant elements have a limiter that allows the radiant heating element to cycle ON and OFF even at the HI setting This helps prevent damage to the ceramic smoothtop Cy...

Страница 94: ...recommended for oven and ceramic cooktop use Do not use plastic wrap or aluminum foil to cover food Plastic or aluminum foil can melt onto the cooktop Temperature selection Refer to the warmer zone recommended food settings See Fig 3 If a particular food is not listed start with the medium level and adjust as needed Most foods can be kept at serving temperatures by using the medium level Warmer zo...

Страница 95: ...l Timer 15 AirGuard Use to freshen kitchen air during cooking 16 Add 1 Minute Use to add additonal minutes to Timer 17 Clock Use to set the time of day 18 STOP Use to cancel any oven mode previously entered except clock and timer Press STOP to stop cooking Use to activate or cancel OVEN LOCI OUT 19 START Use to start oven functions except oven light 0 9 keypads Use to enter temperatures and times ...

Страница 96: ...ring a cooking process the minute timer will show in the display To view the information of any other active oven function press the key pad once for the other function to view the status Add 1 Minute Use the Add 1 Minute to set additional minutes to the timer Each press of the key pad will add 1 additional minute If Add 1 Minute key pad is pressed when the timer is not active the timer will activ...

Страница 97: ... oc will appear in the display See Fig 6 Fig 1 Fig 2 Setting silent or audible control mode Silent mode allows the oven control to operate without audible tones The control may be programmed for silent operation and later returned to operating with all the normal audible tones Example to set for silent or audible mode 1 Press and hold Delay Start key pad for 6 seconds 2 Press Flex Clean key pad to...

Страница 98: ...und indicating when the set bake temperature is reached and to place the food in the oven Bake may be set for any oven temperature between 170 F 77 C to 550 F 288 C Always use pot holders or oven mitts when using the oven When cooking the oven interior oven racks and cooktop will become very hot which can cause burns Example to set Bake with default oven temperature of 350 F 1 Press Bake key pad 2...

Страница 99: ...uce the oven temperature or cook time to prevent overbrowning of some foods Dark pans are recommended for pies Shiny pans are recommended for cakes cookies and muffins Setting Delay Start Delay Start sets a delayed starting time to oven cooking or cleaning functions Prior to setting a delay start be sure the time of day is set correctly FOOD POISONING HAZARD Do not let food sit for more than one h...

Страница 100: ...scuits and breads Reduce oven temperature 25 F from recipe s recommended oven temperature Follow the remainder of the recipe s instructions using the minimum recommended cook time Example to set Conv Convection Bake with a default oven set temperature of 350 F 1 Press Conv Bake key pad some models or Press Convection Bake key pad some models 2 Press START Air movement using convection Fig 1 some m...

Страница 101: ... the food at this time If necessary increase cook time until the desired doneness is obtained Do not cover foods when dry roasting this will prevent the meat from browning properly Example to set Conv Roast with a default oven set temperature of 350 F 1 Press Conv Roast key pad some models 2 Press START TO cancel Conv Roast at anytime press sToP Important notes The convection fan will begin rotati...

Страница 102: ... occur close the oven door and turn the oven OFF If the fire continues use a fire extinguisher DO NOT put water or flour on the fire Flour may be explosive Always use pot holders or oven mitts when using the oven When cooking the oven interior exterior oven racks and cooktop will become very hot which can cause burns Important notes Always arrange oven racks when the oven is cool For best results ...

Страница 103: ...e sauces during the last hour of cooking FOOD POISONING HAZARD Do not let food sit for more than one hour before or after cooking Doing so can result in food poisoning or sickness Foods that can easily spoil such as milk eggs fish meat or poultry should be chilled in the refrigerator first Even when chilled they should not stand in the oven for more than 1 hour before cooking begins and should be ...

Страница 104: ...77 C for 3 hours Warm Hold may be set when finished cooking or may be added to automatically turn on after cooking using Cook Time Delay Start may also be added Recipe Recall Use the Recipe Recall feature to record and recall your favorite baking recipe settings This feature may store and recall up to 3 different recipe settings using the numeric key pads 1 2 and 3 Recipe Recall may be programmed ...

Страница 105: ...0 using numeric key pad 3 Press Flex Clean key pad to toggle between plus if increasing temperature or minus if decreasing the temperature These symbols will show in the display 4 Press START to accept change Important notes Oven temperature adjustments made will not change the Broil or Flex Clean function temperatures If the temperature shows an adjustment of 20 F and a 20 F adjustment is needed ...

Страница 106: ...g 1 will appear in the display indicating the oven is properly set for the Sabbath feature Fig 1 Important notes It is not advised to attempt to activate any other oven function except Bake while the Sabbath feature is active ONLY the following key pads will function correctly when the Sabbath feature is active 0 9 number key pads Bake START and sToP ALL OTHER KEYPADS should not be used once the S...

Страница 107: ...bath feature What to do during a power failure or power interruption after the Sabbath feature was activated Should you experience a power failure or interruption the oven will shut off When power is restored the oven will not turn back on automatically The oven will remember that it is set for the Sabbath The food may be safely removed from the oven while still in the Sabbath feature however the ...

Страница 108: ...h as cookbooks plasticware and towels as well as flammable liquids Do not store explosives such as aerosol cans on or near the range DO NOT LEAVE CHILDREN ALONE children should nat be left alone or unattended in the area where appliance is in use They should never be allowed to sit or stand on any part of the appliance including the warmer drawer Always use potholders or oven mitts when removing f...

Страница 109: ...ates will be hot and you can be burned To set warmer drawer 1 Open warmer drawer when cool and arrange warmer drawer rack as needed For best results close the warmer drawer and preheat the drawer before adding food or plates An empty warmer drawer will fully preheat in approximately 15 minutes 3 Place food in warmer drawer that is already at serving temperature on warmer drawer rack Dinner plates ...

Страница 110: ...e utensils and ANY ALUMINUM FOIL Aluminum foil will not withstand high temperatures from a self clean cycle and will melt DO NOT use oven cleaners or oven protective coatings in or around any part of the oven interior Clean any soil from the oven frame the door liner outside the oven door gasket and the small area at the front center of the oven bottom See Fig 1 These areas heat sufficiently to bu...

Страница 111: ...ou must allow about 1 additional hour for the oven to cool before you will be able to open the oven door The Flex Clean function will not operate whenever a radiant surface element is ON or the oven lockout is active Delayed Start Flex Clean Example to start a delay Flex Clean with default clean time of 3 hours and a start time of 9 00 o clock 1 Be sure the clock is set with the correct time of da...

Страница 112: ...ch cleaning pad Rinse and wipe dry with a clean cloth Do not allow food spills with high sugar or acid content milk tomatoes sauerkraut fruit juices or pie filling to remain on the surface they may cause a dull spot even after cleaning Oven interior For oven interior remove excessive spillovers from oven cavity bottom before starting Flex Clean Clean any soils from oven frame and door liner outsid...

Страница 113: ... drops of CookTop Cleaning Creme directly to the cooktop Use a paper towel or use a non abrasive plastic type no scratch cleaning pad to clean the entire cooktop surface Make sure the cooktop is cleaned thoroughly leaving no residue For heavy burned on soil Apply a few drops of CookTop Cleaning Creme directly to the soiled area Rub the soiled area using a non abrasive plastic type no scratch clean...

Страница 114: ...il as recommended in this manual Improper installation of these liners may result in risk of electric shock or fire Aluminum foil Use of aluminum foil on a hot cooktop can damage the cooktop Do not use thin aluminum cooking utensils or allow aluminum foil to touch the surface elements under ANY circumstances Aluminum utensils The melting point of aluminum is much lower than that of other metals Ca...

Страница 115: ...e roller pins located on each side of the oven frame Fig 4 t Fig 1 Oven door hinge locations To replace oven door 1 Firmly grasp both sides of oven door along the door sides Do not use the oven door handle Fig 3 2 Holding the oven door at the same angle as the removal position seat the hook of the hinge arm over the roller pins located on each side of the oven door frame Fig 4 The hook of the hing...

Страница 116: ...ble Carpet interferes with appliance Provide sufficient space so appliance can be lifted over carpet Entire appliance does not operate Make sure power cord is plugged properly into outlet Electrical power outage Check house lights to be sure Call your local electric company for service outage information Service wiring is not complete Call 1 800 4 MY HOME for assistance See back cover Oven portion...

Страница 117: ...rror repeats remove power from appliance wait 5 minutes and then repower appliance and set clock with the correct time of day Try Bake or Broil function again If the fault recurs press stop to clear and call 1 800 4 MY HOME for assistance See back cover Flex Clean does not work Oven control not set properly Review instructions in Flex Clean section Soil not completely removed after Flex Flex Clean...

Страница 118: ...kware Metal marks on the cooktop Sliding or scraping of metal utensils on cooktop surface Do not slide metal utensils on cooktop surface Apply the recommended CookTop Cleaning Creme to the ceramic surface on the web visit www sears com for replacement cooktop cleaner item number 40079 Buff with a non abrasive cloth or no scratch cleaning pad For more information see Cooktop maintenance and Cooktop...

Страница 119: ...prolongar la durabilidad de su nuevo producto El acuerdo incluye Io siguiente Piezas y mano de obra necesarias para contribuir a mantener el funcionamiento adecuado de los productos utilizados en condiciones normales de uso no s61o en caso de defectos de los productos Nuestra cobertura va mucho m_s all_ que la garantfa del producto No se aplican deducibles ni exclusiones per fallas del funcionamie...

Страница 120: ...ent iiiiiiii and electronics call anytime for the location of your nearest iiiiiiii iiiiiiii Sears Parts Repair Service Center iiiiiiii 1 800 488 1222 U S A 1 800 469 4663 Canada iiiiiiii www soars_com www_soars ca iiiiiiii iiiiiiii To purchase a protection agreement can product serviced by Sears iiiiiiii iiiiiiii 1 800 827 6655 u s A 1 800 361 6665 Canada Para pedir servicio de reparaci6n Au Cana...

Страница 121: ... uso y cuidada English Espafiol Model Modelos 790 9270 9280 9290 I enmoreo El collor nur_ _llo _ c6di _9o de cdor P N 316902018 Sears Brands Management Corporation Hoffman Estates IL 60179 U S A www kenmore com www sears com ...

Страница 122: ... Sears will NOT pay for 1 Cracks in a ceramic glass cooktop that are not a result of thermal shock 2 Stains and scratches on a ceramic glass cooktop resulting from failure to maintain it properly according to all instructions supplied with the product 3 Expendable items that can wear out from normal use including but not limited to filters belts light bulbs and bags 4 A service technician to instr...

Страница 123: ...d technician This may reduce the risk of personal injury and damage to the range Ask your dealer to recommend a qualified technician and an authorized repair service Know how to disconnect the power to the range at the circuit breaker or fuse box in case of an emergency Tip Over Hazard A child or adult can tip the range and be killed Verify the anti tip device has been installed to floor or wall E...

Страница 124: ...rfaces may result in burns from steam Do not let potholders touch hot heating elements Do not use a towel or other bulky cloth instead of a potholder Do not heat unopened food containers buildup of pressure may cause container to burst and result in injury Important Safety Notice The California Safe Drinking Water and Toxic Enforcement Act requires the Governor of California to publish a list of s...

Страница 125: ... be positioned so that it is turned inward and does not extend over adjacent surface units Never leave surface elements unattended at high heat settings _ Boilovers cause smoking and greasy spillovers that may ignite or a pan that has boiled dry may melt Glazed cooking utensils _ Only certain types of glass glass ceramic ceramic earthenware or other glazed utensils are suitable for cook top servic...

Страница 126: ...ded directions for use Be aware that excess residue from cleaners and aerosols may ignite causing damage and iniury Clean ventilating hoods frequently m Grease should not be allowed to accumulate on the hood or filter Follow the manufacturer s instructions for cleaning hoods Do Not Clean Door Gasket The door gasket is essential for a good seal Care should be taken not to rub damage or move the gas...

Страница 127: ...n Broiling Cookies cakes pies biscuits muffins Frozen pies angel food cake yeast bread and casseroles Small cuts of meat or poultry Turkey roast or ham See broil 4or5 2or3 lor2 lor2 Types of oven racks ___ flat handle rack oven rack ffset _ oven rack oven rack The flat oven rack some models or flat handle oven rack some models may be used for most cooking needs The offset oven rack some models is ...

Страница 128: ...t Iron A slow heat conductor however will retain heat very well Cooks evenly once cooking temperature is reached Not recommended for use on ceramic cooktops W liiiliiiilililiiiiiiiii i ii_ i iiii_ii iiii ili Flat bottom and straight sides Tight fitting lids Weight of handle does not tilt pan Pan is well balanced Pan sizes match the amount of food to be prepared and the size of the surface element ...

Страница 129: ...will glow when a surface element is turned ON A quick glance at this indicator light after cooking is an easy check to be sure ALL surface controls are turned OFF The Hot Surface indicator lights are located on the control panel just above each surface control knob They will glow when any surface cooking area heats up and will remain on until the cooktop has cooled to a MODERATE level Hot Surface ...

Страница 130: ...hen bringing larger quantities of liquid to temperature and when preparing larger quantities of food Home Canning Be sure to read and observe all the following points when home canning with your appliance Check with the USDA United States Department of Agriculture website and be sure to read all the information they have available as well as follow their recommendations for home canning procedures...

Страница 131: ... melt to make contact with the ceramic cooktop If these items melt on the cooktop they may damage the ceramic cooktop Fig 2 Single radiant surface elements all models To operate the single radiant element 1 Place correctly sized cookware on single radiant surface element 2 Push in and turn the surface control knob in either direction to the desired setting See Fig 2 3 When cooking is complete turn...

Страница 132: ...ns on a higher setting and then turn to a lower setting to finish cooking Radiant elements have a limiter that allows the radiant heating element to cycle ON and OFF even at the HI setting This helps prevent damage to the ceramic smoothtop Cycling at the HI setting is normal and will occur more often if the cookware is too small for the radiant element or if the cookware bottom is not flat A glowi...

Страница 133: ...nt amount of heat at each setting Refer to the Suggested radiant surface element settings table for suggested power level settings Start most cooking operations on a higher setting and then turn to a lower setting to finish cooking Radiant elements have a limiter that allows the radiant heating element to cycle ON and OFF even at the HI setting This helps prevent damage to the ceramic smoothtop Cy...

Страница 134: ...recommended for oven and ceramic cooktop use Do not use plastic wrap or aluminum foil to cover food Plastic or aluminum foil can melt onto the cooktop Temperature selection Refer to the warmer zone recommended food settings See Fig 3 If a particular food is not listed start with the medium level and adjust as needed Most foods can be kept at serving temperatures by using the medium level Warmer zo...

Страница 135: ...l Timer 15 AirGuard Use to freshen kitchen air during cooking 16 Add 1 Minute Use to add additonal minutes to Timer 17 Clock Use to set the time of day 18 STOP Use to cancel any oven mode previously entered except clock and timer Press STOP to stop cooking Use to activate or cancel OVEN LOCI OUT 19 START Use to start oven functions except oven light 0 9 keypads Use to enter temperatures and times ...

Страница 136: ...ring a cooking process the minute timer will show in the display To view the information of any other active oven function press the key pad once for the other function to view the status Add 1 Minute Use the Add 1 Minute to set additional minutes to the timer Each press of the key pad will add 1 additional minute If Add 1 Minute key pad is pressed when the timer is not active the timer will activ...

Страница 137: ... oc will appear in the display See Fig 6 Fig 1 Fig 2 Setting silent or audible control mode Silent mode allows the oven control to operate without audible tones The control may be programmed for silent operation and later returned to operating with all the normal audible tones Example to set for silent or audible mode 1 Press and hold Delay Start key pad for 6 seconds 2 Press Flex Clean key pad to...

Страница 138: ...und indicating when the set bake temperature is reached and to place the food in the oven Bake may be set for any oven temperature between 170 F 77 C to 550 F 288 C Always use pot holders or oven mitts when using the oven When cooking the oven interior oven racks and cooktop will become very hot which can cause burns Example to set Bake with default oven temperature of 350 F 1 Press Bake key pad 2...

Страница 139: ...uce the oven temperature or cook time to prevent overbrowning of some foods Dark pans are recommended for pies Shiny pans are recommended for cakes cookies and muffins Setting Delay Start Delay Start sets a delayed starting time to oven cooking or cleaning functions Prior to setting a delay start be sure the time of day is set correctly FOOD POISONING HAZARD Do not let food sit for more than one h...

Страница 140: ...scuits and breads Reduce oven temperature 25 F from recipe s recommended oven temperature Follow the remainder of the recipe s instructions using the minimum recommended cook time Example to set Conv Convection Bake with a default oven set temperature of 350 F 1 Press Conv Bake key pad some models or Press Convection Bake key pad some models 2 Press START Air movement using convection Fig 1 some m...

Страница 141: ... the food at this time If necessary increase cook time until the desired doneness is obtained Do not cover foods when dry roasting this will prevent the meat from browning properly Example to set Conv Roast with a default oven set temperature of 350 F 1 Press Conv Roast key pad some models 2 Press START TO cancel Conv Roast at anytime press sToP Important notes The convection fan will begin rotati...

Страница 142: ... occur close the oven door and turn the oven OFF If the fire continues use a fire extinguisher DO NOT put water or flour on the fire Flour may be explosive Always use pot holders or oven mitts when using the oven When cooking the oven interior exterior oven racks and cooktop will become very hot which can cause burns Important notes Always arrange oven racks when the oven is cool For best results ...

Страница 143: ...e sauces during the last hour of cooking FOOD POISONING HAZARD Do not let food sit for more than one hour before or after cooking Doing so can result in food poisoning or sickness Foods that can easily spoil such as milk eggs fish meat or poultry should be chilled in the refrigerator first Even when chilled they should not stand in the oven for more than 1 hour before cooking begins and should be ...

Страница 144: ...77 C for 3 hours Warm Hold may be set when finished cooking or may be added to automatically turn on after cooking using Cook Time Delay Start may also be added Recipe Recall Use the Recipe Recall feature to record and recall your favorite baking recipe settings This feature may store and recall up to 3 different recipe settings using the numeric key pads 1 2 and 3 Recipe Recall may be programmed ...

Страница 145: ...0 using numeric key pad 3 Press Flex Clean key pad to toggle between plus if increasing temperature or minus if decreasing the temperature These symbols will show in the display 4 Press START to accept change Important notes Oven temperature adjustments made will not change the Broil or Flex Clean function temperatures If the temperature shows an adjustment of 20 F and a 20 F adjustment is needed ...

Страница 146: ...g 1 will appear in the display indicating the oven is properly set for the Sabbath feature Fig 1 Important notes It is not advised to attempt to activate any other oven function except Bake while the Sabbath feature is active ONLY the following key pads will function correctly when the Sabbath feature is active 0 9 number key pads Bake START and sToP ALL OTHER KEYPADS should not be used once the S...

Страница 147: ...bath feature What to do during a power failure or power interruption after the Sabbath feature was activated Should you experience a power failure or interruption the oven will shut off When power is restored the oven will not turn back on automatically The oven will remember that it is set for the Sabbath The food may be safely removed from the oven while still in the Sabbath feature however the ...

Страница 148: ...h as cookbooks plasticware and towels as well as flammable liquids Do not store explosives such as aerosol cans on or near the range DO NOT LEAVE CHILDREN ALONE children should nat be left alone or unattended in the area where appliance is in use They should never be allowed to sit or stand on any part of the appliance including the warmer drawer Always use potholders or oven mitts when removing f...

Страница 149: ...ates will be hot and you can be burned To set warmer drawer 1 Open warmer drawer when cool and arrange warmer drawer rack as needed For best results close the warmer drawer and preheat the drawer before adding food or plates An empty warmer drawer will fully preheat in approximately 15 minutes 3 Place food in warmer drawer that is already at serving temperature on warmer drawer rack Dinner plates ...

Страница 150: ...e utensils and ANY ALUMINUM FOIL Aluminum foil will not withstand high temperatures from a self clean cycle and will melt DO NOT use oven cleaners or oven protective coatings in or around any part of the oven interior Clean any soil from the oven frame the door liner outside the oven door gasket and the small area at the front center of the oven bottom See Fig 1 These areas heat sufficiently to bu...

Страница 151: ...ou must allow about 1 additional hour for the oven to cool before you will be able to open the oven door The Flex Clean function will not operate whenever a radiant surface element is ON or the oven lockout is active Delayed Start Flex Clean Example to start a delay Flex Clean with default clean time of 3 hours and a start time of 9 00 o clock 1 Be sure the clock is set with the correct time of da...

Страница 152: ...ch cleaning pad Rinse and wipe dry with a clean cloth Do not allow food spills with high sugar or acid content milk tomatoes sauerkraut fruit juices or pie filling to remain on the surface they may cause a dull spot even after cleaning Oven interior For oven interior remove excessive spillovers from oven cavity bottom before starting Flex Clean Clean any soils from oven frame and door liner outsid...

Страница 153: ... drops of CookTop Cleaning Creme directly to the cooktop Use a paper towel or use a non abrasive plastic type no scratch cleaning pad to clean the entire cooktop surface Make sure the cooktop is cleaned thoroughly leaving no residue For heavy burned on soil Apply a few drops of CookTop Cleaning Creme directly to the soiled area Rub the soiled area using a non abrasive plastic type no scratch clean...

Страница 154: ...il as recommended in this manual Improper installation of these liners may result in risk of electric shock or fire Aluminum foil Use of aluminum foil on a hot cooktop can damage the cooktop Do not use thin aluminum cooking utensils or allow aluminum foil to touch the surface elements under ANY circumstances Aluminum utensils The melting point of aluminum is much lower than that of other metals Ca...

Страница 155: ...e roller pins located on each side of the oven frame Fig 4 t Fig 1 Oven door hinge locations To replace oven door 1 Firmly grasp both sides of oven door along the door sides Do not use the oven door handle Fig 3 2 Holding the oven door at the same angle as the removal position seat the hook of the hinge arm over the roller pins located on each side of the oven door frame Fig 4 The hook of the hing...

Страница 156: ...ble Carpet interferes with appliance Provide sufficient space so appliance can be lifted over carpet Entire appliance does not operate Make sure power cord is plugged properly into outlet Electrical power outage Check house lights to be sure Call your local electric company for service outage information Service wiring is not complete Call 1 800 4 MY HOME for assistance See back cover Oven portion...

Страница 157: ...rror repeats remove power from appliance wait 5 minutes and then repower appliance and set clock with the correct time of day Try Bake or Broil function again If the fault recurs press stop to clear and call 1 800 4 MY HOME for assistance See back cover Flex Clean does not work Oven control not set properly Review instructions in Flex Clean section Soil not completely removed after Flex Flex Clean...

Страница 158: ...kware Metal marks on the cooktop Sliding or scraping of metal utensils on cooktop surface Do not slide metal utensils on cooktop surface Apply the recommended CookTop Cleaning Creme to the ceramic surface on the web visit www sears com for replacement cooktop cleaner item number 40079 Buff with a non abrasive cloth or no scratch cleaning pad For more information see Cooktop maintenance and Cooktop...

Страница 159: ...prolongar la durabilidad de su nuevo producto El acuerdo incluye Io siguiente Piezas y mano de obra necesarias para contribuir a mantener el funcionamiento adecuado de los productos utilizados en condiciones normales de uso no s61o en caso de defectos de los productos Nuestra cobertura va mucho m_s all_ que la garantfa del producto No se aplican deducibles ni exclusiones per fallas del funcionamie...

Страница 160: ...ent iiiiiiii and electronics call anytime for the location of your nearest iiiiiiii iiiiiiii Sears Parts Repair Service Center iiiiiiii 1 800 488 1222 U S A 1 800 469 4663 Canada iiiiiiii www soars_com www_soars ca iiiiiiii iiiiiiii To purchase a protection agreement can product serviced by Sears iiiiiiii iiiiiiii 1 800 827 6655 u s A 1 800 361 6665 Canada Para pedir servicio de reparaci6n Au Cana...

Отзывы: