background image

Содержание 7703 - Elite Oasis 7.0 cu. Ft. Capacity Flat Back Gas Dryer

Страница 1: ...L T Oasis Gas Dryer Secadora a gas Models Modelos 110 7703_ 7704_ color number nemero de color W10035210 Sears Roebuck and Co Hoffman Estates IL 60179 U S A www sears com ...

Страница 2: ... it is not installed operated or maintained according to all instructions supplied with the product 5 Damage to or failure of this product resulting from accident abuse misuse or use for other than its intended purpose 6 Damage to or failure of this product caused by the use of detergents cleaners chemicals or utensils other than those recommended in all instructions supplied with the product 7 Da...

Страница 3: ... be followed to minimize the risk of fire or explosion or to prevent property damage personal injury or death Do not store or use gasoline or other flammable vapors and liquids in the vicinity of this or any other appliance WHAT TO DO IF YOU SMELL GAS Do not try to light any appliance Do not touch any electrical switch do not use any phone in your building Clear the room building or area of all oc...

Страница 4: ...eep area around the exhaust opening and adjacent surrounding areas free from the accumulation of lint dust and dirt The interior of the dryer and exhaust vent should be cleaned periodically by qualified service personnel See installation instructions for grounding requirements SAVE THESE INSTRUCTIONS IMPORTANT The gas installation must conform with local codes or in the absence of local codes with...

Страница 5: ... Recommended spacing should be considered for the following reasons Additional spacing should be considered for ease of installation and servicing Additional clearances might be required for wall door and floor moldings Additional spacing should be considered on all sides of the dryer to reduce noise transfer For closet installation with a door minimum ventilation openings in the top and bottom of...

Страница 6: ...hut off valve Securely tighten all gas connections if connected to LP have a qualified person make sure gas pressure does not exceed 13 33 cm water column Examples of a qualified person include licensed heating personnel authorized gas company personnel and authorized service personnel Failure to do so can result in death explosion or fire Gas Type Natural Gas This dryer is equipped for use with N...

Страница 7: ...essures greater than 1 2psi Dryer Gas Pipe The gas pipe that comes out through the rear of your dryer has a male pipe thread A 1 9cm A 3 8 NPTdryer pipe Fire Hazard Use a heavy metal vent Do not use a plastic vent Do not use a metal foil vent Failure to follow these instructions can result in death or fire WARNING To reduce the risk of fire this dryer MUST BE EXHAUSTED OUTDOORS IMPORTANT Observe a...

Страница 8: ...h a magnetic latch Improper venting can cause moisture and lint to collect indoors which may result in Moisture damage to woodwork furniture paint wallpaper carpets etc Housecleaning problems and health problems Choose your exhaust installation type Recommended exhaust installations Typical installations vent the dryer from the rear of the dryer Other installations are possible B A A Dryer E Clamp...

Страница 9: ...elbows needed for best drying performance Use the following Vent system chart to determine type of vent material and hood combinations acceptable to use NOTE Do not use vent runs longer than those specified in the Vent system chart Exhaust systems longer than those specified will Shorten the life of the dryer Reduce performance resulting in longer drying times and increased energy usage The Vent s...

Страница 10: ...sts until it is close to its final location Leave enough room to connect the exhaust vent or gas line For mobile home use Gas dryers must be securely fastened to the floor at the time of installation Mobile home installations require a Mobile Home Installation Kit For more information please call 1 800 4 MY HOME 1 800 469 4663 1 2 Remove the red cap from the gas pipe Using a wrench to tighten conn...

Страница 11: ...he door facing up Remove remaining 2 loose screws from dryer front panel 5 Remove the 4 plastic plugs located outside the dryer door opening 6 Install 4 plastic plugs into screw holes in the dryer left when the hinges were removed in Step 4 Reverse the strike 1 Remove the door strike from the dryer door opening 2 Remove the cosmetic screw opposite the door strike You can change your door swing fro...

Страница 12: ...n screws Leave approximately 1A 5 mm of screw exposed 4 I Install the 2 hinges to the front panel of the dryer using 4 screws Use the non slotted side to attach the hinge to the front panel 6 A Install these screws first Hang door by placing screw heads into top slotted holes of hinges and slide door down Align bottom screw holes in hinge and door Install two bottom screws Tighten all hinge screws...

Страница 13: ...d Read Dryer Use Wipe the dryer drum interior thoroughly with a damp cloth to remove any dust Test dryer operation by selecting a Timed Dry heated cycle and starting the dryer For this test do not select the Air Only modifier If the dryer will not start check the following Dryer is plugged into a grounded 3 prong outlet Electrical supply is connected Household fuse is intact and tight or circuit b...

Страница 14: ... preset settings for Auto Dry Cycles or Timed Cycles will illuminate The estimated Auto Dry Cycles or actual Timed Cycles cycle time in minutes will show in the display NOTE A default time is displayed when an Auto Dry Cycle is selected During the first few minutes of the drying process the cycle time may automatically vary from the default time based on the size and fabric type of the load Toward...

Страница 15: ...nutes If the cycle is interrupted for more than 5 minutes the dryer will shut off Select new cycle settings before restarting the dryer Select the correct cycle and dryness level or temperature for your load If an Auto Dry Cycle is running the display shows the estimated cycle time when your dryer is automatically sensing the dryness level of your load If a Timed Cycle is running the display shows...

Страница 16: ... Modifiers and Cycle Signal settings selected The display shows the estimated or actual time remaining Select the drying cycle that matches the type of load you are drying See Auto or Timed Preset Cycle Settings charts AUTO DRY CYCLES Cotton Towels Normal Heavy Duty _ Casual Timed Delicate Dry Express D_ TIMED CYCLES Auto Dry Cycles allow you to match the cycle to the load you are drying See the f...

Страница 17: ...ycle Timed Dry is also useful for drying heavyweight and bulky items such as blankets and work clothes Lightweight garments such as exercise wear can be dried using Timed Dry on a low temperature setting EXPRESS DRYTM Use this cycle for drying small loads or loads that need a short drying time Timed Preset Cycle Settings Timed Cycles Default Default Time Load Type Temperature Minutes TIMED DRY Hig...

Страница 18: ...d restart the dryer to finish the drying cycle Rearranging the load will aid in the drying process NOTE The Damp Dry Signal is available only with the Auto Dry Cycles WRINKLE GUARD _ 30 60 90 150 minutes WRINKLE GUARD helps smooth out wrinkles that may form when clothes are not removed promptly at the end of a cycle During this option the dryer stops tumbling and then tumbles again for a brief per...

Страница 19: ...but the other settings will flash 4 Press START to save the drying setting 5 The drying setting you selected will become your new preset drying setting for all Auto Dry cycles The dryer rack was shipped in the dryer drum Use the dryer rack for items that you do not want to tumble dry such as sweaters Use Timed Dry to select the desired time NOTE Do not use Auto Dry Cycles with the dryer rack To us...

Страница 20: ...3 Wet a nylon brush with hot water and liquid detergent Scrub lint screen with the brush to remove residue buildup 4 Rinse screen with hot water 5 Thoroughly dry lint screen with a clean towel Replace screen in dryer To clean dryer drum 1 Make a paste with powdered laundry detergent and very warm water 2 Apply paste to a soft cloth OR Apply a liquid nonflammable household cleaner to the stained ar...

Страница 21: ...rician Was a regular fuse used Use a time delay fuse Is the dryer door firmly closed Was the Start button firmly pressed Large loads may require pressing and holding the Start button for 2 5 seconds No heat Has a household fuse blown or has a circuit breaker tripped The drum may be turning but you may not have heat Replace the fuse or reset the circuit breaker If the problem continues call an elec...

Страница 22: ...he door The rear of the dryer requires 5 12 7 cm of airspace See Installation Instructions Has the Air Only modifier been selected Select the right temperature for the types of garments being dried See Modifiers Is the load too large and heavy to dry quickly Separate the load to tumble freely Are all your Auto Dry Cycle loads consistently not as dry as you would like You may change the preset Dryn...

Страница 23: ...nnual Preventive Maintenance Check at your request no extra charge _ Fast help by phone phone support from a Sears technician on products requiring in home repair plus convenient repair scheduling _ Power surge protection against electrical damage due to power fluctuations _ Rental reimbursement if repair of your covered product takes longer than promised Once you purchase the Agreement a simple p...

Страница 24: ...mantener este producto 4 Dar_os a este producto o fallas del mismo en case de no ser instalado operado o mantenido conforme a todas las instrucciones provistas con el producto 5 Dar_os a este producto o fallas del mismo como resultado de accidente abuso uso indebido o un use diferente de aquel para el cual fue creado 6 Dar_os a este producto o fallas del mismo causados per el uso de detergentes li...

Страница 25: ...ual debe ser observada para minimizar el riesgo de incendio o explosibn o para prevenir dahos a propiedades heridas o la muerte No almacene o use gasolina u otros liquidos y vapores inflamables cerca de dste u otro aparato electrodomdstico PASOS QUE USTED DEBE SEGUIR SI HUELE A GAS No trate de encender ningdn aparato electrodomdstico No toque ningdn interruptor eldctrico no use ningdn teldfono en ...

Страница 26: ...de ventilaci6n y las Areas adyacentes a esta apertura sin pelusa polvo o tierra La parte interior de la secadora y el ducto de escape se deben limpiar peri6dicamente Esta limpieza la debe Ilevar a cabo un reparador calificado Vea la instrucciones de instalaci6n para los requisites de conexi6n a tierra GUARDE ESTAS INSTRUCCIONES IMPORTANTE La instalaci6n de gas debe hacerse de acuerdo con los c6dig...

Страница 27: ...et en que se encuentra la secadora Espacios para la Instalacibn La ubicaci6n debe set Io suficientemente grande para poder abrir completamente la puerta de la secadora Dimensiones de la secadora d4 La mayoria de las instalaciones requieren un espacio libre minimo de 5 12 7 cm detras de la secadora para acomodar el ducto de escape con codo Vea Requisites de ventilaci6n Espacio para la instalacibn e...

Страница 28: ...esta secadora Peligro de Exploei6n Use una linea de suminietro de gas nueva con aprobaci6n CSA Internacional Inetale una valvula de cierre Apriete firmemente todae lae conexionee de gas Si ee conecta a un suminietro de gas L P la presion no debe exceder una columna de agua de 33 cm 13 pulg y debe eer verificada pot una persona calificada Ejemploe de una persona calificada incluyen personal de eerv...

Страница 29: ...Gas combustible National Fuel Gas Code ANSI Z223 1 La valvula debera ubicarse en un lugar donde se pueda alcanzar con facilidad para cerrarla y abrirla A C E B D A Conector de gas flexible de _ B Accesorio adaptador abocinado para tube de _ C Derivacidn tapada NPT por lo menos de _ D Lfnea de surninistro de gas NPT de 7 2 E V lvula de cierre del gas Use solamente compuesto para juntas de tuberfa N...

Страница 30: ... 2 cm Los productos de ventilaci6n DURASAFF Mpueden adquirirse en su distribuidor Para obtener mas informaci6n sirvase Ilamar al 1 800 4 MY HOME 1 800 469 4663 o visite nuesto sitio en la internet en www sears com Ducto de escape de metal rigido Para un 6ptimo rendimiento de secado se recomiendan ductos de escape de metal r gido Se recomienda el ducto de escape de metal rfgido para evitar que se a...

Страница 31: ...Pared D Capota de ventilacidn E Abrazaderas F Ducto de metal rfgido o de metal flexible G Longitud necesaria del ducto de escape para conectar los codos H Salida de ventilacidn Instalaciones opcionales de escape Los sistemas de ventilaci6n vienen en una amplia gama Seleccione el tipo mas apropiado para su instalaci6n Peligro de Incendio Cubra el orificio de escape no usado con el juego eiguiente 8...

Страница 32: ...n aumento en el consumo de energia El cuadro del sistema de ventilaci6n indica los requisitos de ventilacidn que le ayudaran a alcanzar el mejor rendimiento de secado Cuadro del sistema de ventilacibn NOTA Para el funcionamiento del ducto de escape inferior debera considerarse como si fueran dos codos Para determinar la Iongitud maxima del ducto de escape agregue dos codes al cuadro NOTA Para el f...

Страница 33: ...de gas Utilizando una Ilave de tuercas conecte el suministro de gas a la secadora Use sellador compuesto para las roscas de todos los accesorios macho no abocinados Si se usa tuberia flexible de metal aseg ese que no hay partes retorcidas A Accesorios macho abocinados B Accesorios macho no abocinados NOTA Para las conexiones de gas LE debe usar un pegamento de uni6n de tubes resistente a la acci6n...

Страница 34: ... secadora esta nivelada Usted puede invertir el oierre de la puerta de la apertura a la dereoha a la apertura a la izquierda si Io desea 1 Ooloque una toalla o un pa_o suave en la parte superior de la secadora o de la superficie de trabajo para proteger la superficie O6mo quitar el ensamblaje de la puerta 1 Abra la puerta de la secadora 2 Quite el tornillo inferior de cada una de las 2 bisagras qu...

Страница 35: ...a de la secadora de donde se quitaron NOTA El tope de la puerta y de los tapones deben estar del mismo lado de la abertura de la puerta de la secadora Vuelva a instalar la puerta 1 Quite los 4 tornillos y las 2 bisagras de la puerta de la secadora 2 Vuelva a colocar los 4 tornillos en los mismos orificios 3 Quite los 4 tornillos del lado opuesto de la puerta 6 A Instale estos tornillos primero Cue...

Страница 36: ...ente con un paso hQmedo para quitar residuos de polvo Pruebe el funcionamiento de la secadora seleccionando un ciclo de secado programado Timed Dry con calory ponga la secadora en marcha Para esta prueba no seleccione el modificador de s61o aire Air Only Si la secadora no funciona revise Io siguiente Que la secadora este conectada en un contacto de 3 terminales con conexi6n a tierra Que el suminis...

Страница 37: ...tro de pelusa antes de cada carga Vea Limpieza del filtro de pelusa 2 Coloque la ropa en la secadora y cierre la puerta 3 Presione el bot6n de suministro de energia POWER 4 Gire la perilla del selector de ciclos hacia el ciclo deseado Los ajustes prefijados para los ciclos de secado automatico o para los ciclos programados se iluminaran El tiempo estimado ciclos de secado automatico o real program...

Страница 38: ...ciclo 7 Presione puesta en marcha START Cerci6rese de que la puerta este cerrada Si no presiona puesta en marcha dentro de los 5 minutos de haber seleccionado el ciclo la secadora se apaga automaticamente Si desea terminar el ciclo de secado despues de presionar puesta en marcha presione Parada STOP dos veces Para detener o hacer una pausa de la secadora en cualquier momento Abra la puerta u oprim...

Страница 39: ...uz indicadora permanece encendida con WRINKLE GUARD Revisar el filtro de pelusa Check Lint Screen La luz de revisar el filtro de pelusa Check Lint Screen le recuerda que debe controlar el filtro de pelusa La luz se enciende cuando el usuario selecciona un ciclo Se apaga cuando se abre la puerta cuando se presiona puesta en marcha Start o despues de que pasen 5 minutos Luces indicadoras Indicator L...

Страница 40: ...o de secado automatico El secado programado es tambien t til para secar articulos pesados y voluminosos como cubrecamas y ropa de trabajo Las prendas de peso liviano tales como ropa de ejercicio pueden secarse usando el secado programado Timed Dry en un ajuste bajo de temperatura Secado expreso EXPRESS DRYTM Use este ciclo para secar cargas pequeSas o cargas que necesitan un tiempo de secado corto...

Страница 41: ...e se sequen en exceso o para quitar articulos parcialmente secos que pudiesen necesitar un planchado La sepal de semi seco DAMP DRY SIGNAL es Qtil cuando seca sabanas artfculos de lino en una carga mixta Cuando suene la sepal abra la puerta para detener la secadora vuelva a arreglar la carga dentro de la secadora cierre la puerta y vuelva a poner la secadora en marcha para terminar el ciclo de sec...

Страница 42: ...siera puede cambiar los ajustes prefijados de nivel de sequedad Dryness Level para aumentar la sequedad Este cambio afectara todos los ciclos de secado automatico Los ajustes de nivel de sequedad pueden ajustarse para adecuarse alas diferentes instalaciones las condiciones del medio ambiente o las preferencias personales Existen 3 ajustes de secado 1 nivel de sequedad prefijado de fabrica 2 prenda...

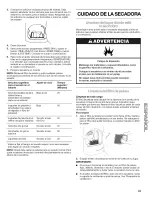
Страница 43: ...esario para Iograr un secado complete NOTA Usted debe quitar el estante para un secado normal Para quitar el estante de secado levantelo directamente hacia arriba y afuera de la secadora CUlDADO DE LA SECADORA L F tezG C_ _ J w _ _ d_ s _ dX Mantenga el area donde esta la secadora despejada y libre de articulos que pudieran obstruir el flujo de aire para la combusti6n y la ventilaci6n Peligro de E...

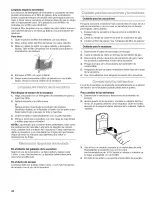
Страница 44: ...es _IIIWIII Ii_ lOlOl I de 1 l i _i _ _ is0 i s lll l _ _ iLll _d En el interior del gabinete de la secadora Seg0n el uso de la secadora se debe quitar la pelusa cada 2 ares o con mas frecuencia La limpieza debera efectuarla una persona calificada En el ducto de escape La pelusa debe ser quitada cada 2 aries o con mas frecuencia de acuerdo con el uso de la secadora __ I _ o IICi l_ l_ _ _ 1 I_I I ...

Страница 45: ...de La secadora puede vibrar si no esta instalada adecuadamente Vea lnstrucciones de instalaci6n Las prendas estan enredadas o hechas un ovillo Si la carga esta hecha un ovillo rebotara haciendo vibrar a la secadora Separe los artfculos de la carga y reinicie la secadora La secadora muestra mensajes codificados PF corte de corriente revise Io siguiente Se ha interrumpido el ciclo de secado per un c...

Страница 46: ...s ajustes prefijados de Nivel de sequedad para aumentar la sequedad de todos los Ciclos de secado automatico Vea Cambio de ciclos modificadores y opciones El tiempo del ciclo es demasiado corto Peligro de Peso Excesivo Use dos o mas personas para mover e instalar la secadora No seguir esta instruccion puede ocasionar una lesi6n en la espalda u otro tipo de lesiones Esta terminando mas rapido el ci...

Страница 47: ...suya sin costo adicional Ayuda rapida por telefono asistencia per telefono a cargo de un tecnico de Sears para productos que deban ser reparados en su hogar ademas de un horario de reparaci6n conveniente Protecci6n de sobrevoltaje contra daSos electricos debido a fluctuaciones de electricidad v Reembolso de la renta si la reparaci6n de su producto protegido tarda mas de Io prometido Una vez adquir...

Страница 48: ...equipment and electronics call or go on line for the location of your nearest Sears Parts Repair Center 1 800 488 1222 Call anytime day or night U S A only www sears com To purchase a protection agreement U S A or maintenance agreement Canada on a product serviced by Sears 1 800 827 6655 U S A 1 800 361 6665 Canada Para pedir servicio de reparaci6n a domicilio y para ordenar piezas 1 888 SU HOGAR ...

Отзывы: