background image

Содержание 362.6112 Series

Страница 1: ...GAS Models Modelos 362 61t12_ 6202_ _ color number nt_mer _ de color 7t3_3 7222_ 7223 7321 _ 7322_ 74225 J r R Z m Z_ o 18305580Pt45 8R85058 363 JR Printed IntheUnffed St_las Soars Roebuck and Co Hoffman Estates IL 60179 U S A www soars com ...

Страница 2: ...he model number and serial number of your gas range can be found on a plate fastened to the front frame behind the broiier drawer storage drawer or kick panel MODEL NUMBER SERIAL NUMBER AWARNING ALL RANGES CAN TIP INJURY TO PERSONS COULD RESULT INSTALL ANTI TIP DEVICES PACKED WITH RANGE SEE INSTALLATION INSTRUCTIONS Sears Roebuck and Co WARNING If the information in this manual is not followed exa...

Страница 3: ...echnician Be sure all packing materials are removed from the range before operating it to prevent fire or smoke damage should the packing material ignite Locate the range out of kitchen traffic path and out of drafty locations to prevent pilot outage on models with standing pilots and poor air circulation After prolonged use of a range high floor temperatures may result and many floor coverings wi...

Страница 4: ...other appliance Do not let cooking grease or other flammable materials accumulate in or near the range Large scratches or impacts to glass doors can lead to broken or shattered glass Cook meat and poultry thoroughly meat to at least an INTERNAL temperature of t60 F and poultry to at least an INTERNAL temperature of 180 t Cooking to these temperatures usuatiy protects against feodborne illness For ...

Страница 5: ...ers and large enough to cover burner grates This wil both save cleaning time and prevent hazardous accumulations of food since heavy spattering or spil overs left on the range can ignite Use pans with handles that can be easily grasped and wil remain cool Keep all plastics away from the top burners Do not leave plastic items on the cooktop they may melt if left too close to the vent Vent appearanc...

Страница 6: ...s in the oven follow the manufacturer s directions Use only glass cookware that is recommended for use in gas ovens o Always remove broiler pan from the oven or the broiler compartment as soon as you finish broiling Grease left in the pan can catch on fire if oven is used without removing the grease from the broiler pan When broiling if meat is too close to the flame the fat may ignite Trim excess...

Страница 7: ...els Oven Shelves Oven Bottom Model and Serial Numbers Broiler Drawer i 11 t Clock and 13met on some models I Lift Up Cooktop on models with standard twin burners Surface Burner Control Knobs OVEN TEMP Knob Oven Shelf Supports Lift Off Oven Door Installation Clearances Label Air Intake Broiler Pan and Grid Your range is equipped with one of the two types of surface burners shown below_ m _J _l ll_ ...

Страница 8: ...s The knobs that turn the surface burners on and off are marked as to which burners they control The two knobs on the left control the left front and left rear burners The two knobs on the right control the right front and right rear burners On ranges with sealed burners The smaller burner right rear position will give the best simmer results It offers precise cooking performance for delicate food...

Страница 9: ...standards This could be dangerous to your health Stove Top Grills onmodels with sealed burners Do not use stove top grills on your sealed gas burner If you use the stove top grill on the sealed gas burner it will cause incomplete combustion and can result in exposure to carbon monoxide levels above allowable standards This can be hazardous to your health Top of Range Cookware Aluminum Medium weigh...

Страница 10: ...minute at a time Pressing and continuing to hold the A pad increases the setting ten minutes at a time 3 Once you have set your timer press the TIMER ON OFF pad to start timing As the timer counts down a signal will indicate when one minute is left After this signal the display will count down in seconds When time runs eut a final signal will sound Press the TIMER ONIOFF pad to stop the signal TO ...

Страница 11: ...atch holder Once the oven pilot is lit continue holding the oven control knob for one minute before re easing No adjustments are required for natural gas If the range is connected to LP gas contact the person who installed your range or made the conversion Proper flame configuration While using the oven burner visually check the burner flame in the broiler compartment tf flame does not burn as des...

Страница 12: ...dels Use the switch on the control panel to turn the oven light on and off Oven Shelves The shelves have stop locks so when placed correctly on the shelf supports A through E they will stop before coming completely out they also will not tilt When placing and removing cookware pull the shelf out to the bump on the shelf supporL To remove a shelf pult it toward you tilt the front end up and pull it...

Страница 13: ...rs be uninterrupted Avoid touching the vent openings and nearby surfaces during oven or broiler operation They may become hot Do not leave plastic or flammable items on the cooktop they may melt or ignite if left too close to the vent Vent appearance and location vary Handles of pots and pans on the cooktop may become hot if left too close to the vent Metal items will become very hot if they are l...

Страница 14: ... putting the food in the oven To preheat set the oven at the correct temperature selecting a higher temperature does not shorten preheat time Preheating is necessary for good results when baking cakes cookies pastry and breads For most casseroles and roasts preheating is not necessary For ovens without a preheat indicator light or tone preheat 10 minutes_ After the oven is preheated place the food...

Страница 15: ...so place a small sheet of foil on a lower shelf several inches betow the food Don t Peek Set the timer for the estimated cooking time and do not open the door to look at your food Most recipes provide minimum and maximum baking times such as bake 30 40 minutes DO NOT open the door to check until the minimum time Opening the oven door frequently during cooking allows heat to escape and makes baking...

Страница 16: ...nge the oven temperature approximately 10 F 6 C Range is plus or minus 60 F 33 C from the arrow We suggest that you make the adjustment one click from the original setting and check oven performance before making any additional adjustments After the adjustment is made retighten screws so they are snug but be careful not to overtighten Reinstall knob on range and check performance 1 Air Adjustment ...

Страница 17: ...d in a shallow pan The melting fat wilt baste the meal Select a pan as close to the size of the meat as possible The broiler pan with grid is a good pan for this 3 Turn the OVEN TEMP knob to the desired temperature you may hear a slight clicking sound indicating the oven is working properly See the Roasting Guide for temperatures and approximate cooking times 4 When roasting is finished turn the O...

Страница 18: ...O 60 66 C t 66 71 C 170 185 F 77 85 C t40 150 F 60 66 C 1 150 160 F 66 71 C t70 185 F 77 85 C 170 180 F 77 82 C 170 180 F 77 82 0 325 F 163 C 325 F 163 C 350 F 177 C 325 F 163 C 18 23 minutes per pound 450 grams any weight 5o Wam_ 3 to 5 lbs Over 5 Ibs 1 4 to 2 3 kg 2 3 kg 115 125 F 46 52_0 Well Done Well Done Well Done 35 40 30 35 35 40 10 to 15 lbs Over 15 Ibs 4 5 to 6 8 kg 6 8 kg 16 22 12 t9 18...

Страница 19: ...ou must mold the foi tightly to the grid and cut slits in it just like the grid_ Without the slits the foil will prevent fat and meat Cut slits in the foil just like the grid juices from draining to the broiler pan The juices could become hot enough to catch on fire If you do not cut the slits you are frying not broiling Never cover the oven bottom with aluminum foil Never entirely cover a shelf w...

Страница 20: ... _ _ Ib 227 g B 4 3 Arrange in single layer about 8 thin slices 1 ib 450 g 4 patties B 10 7 10 Space evenly Up to 8 patties V2 _ 4 13 19 ram thick takeabout same time 1 2 5 cm thick 1 1V_Ibs 450 g 680 gI 1W 3 8 cm Ihick 2 2V_Ibs 907 g 1 13 kg C C B C C B 1 whofe 2 21 Sbs A 907 g 1 13 kg split lengthwise Bone in 4 bone in breasts A 9 12 13 10 12 15 25 30 35 25 30 7 5 6 8 9 6 7 10 12 16 18 15 10 15 ...

Страница 21: ...urners only NOTE Before removing the burner heads and caps remember their size and location Replace them in the same location after cleaning For proper ignition make sure the small hole in the section that fits over the electrode is kept open A sewing needle or bare wire works well to unclog iL The slits in the burner heads of your range must be kept clean at all times for an even unhampered flame...

Страница 22: ...ally lose their shine regardless of the best care you can give them This is due to their continual exposure to high temperatures Do not operate a burner for an extended period of time without cookware on the grate The finish on the grate may chip without cookware to absorb the heat CAUTION Do not clean the grates in a 1 self cleaning oven Drip Pans on some models Remove the grates Left and lift ou...

Страница 23: ... traces of the cleanser that might clog the burner openings Do not use steel wool because it will clog the surface burner openings and scratch the surface burners If the holes become clogged clean them with a sewing needle or bare wire Before putting the surface burner back shake out excess water and then dry it thoroughly by setting it in a warm oven for 30 minutes Then place it back in the range...

Страница 24: ...r and dry with a clean cloth Lower Control Panel Front Manifold Panel and Knobs It s a good idea to wipe the control panel after each use of the oven Use a damp cloth to clean or rinse For cleaning use mild soap and water or a 50 50 solution of vinegar and water For rinsing use clean water Polish dry with a soft cloth Do not use abrasive cleansers strong liquid cleaners plastic scouring pads or ov...

Страница 25: ...ng acids may cause discoloration and shoutd be wiped up immediately When surface is cool clean and rinse Do not use oven cleaners cleansing powders or harsh abrasives such as steel wool pads on the outside of the door Porcelain Oven Interior on all models except continuous cleaning models With proper care the porcelain enamel interior wil retain its attractive finish for many years Soap and water ...

Страница 26: ... _1_ _ _ _l the rear of the oven bottom 2 Grasp the oven _ bottom at the finger _ slots on each side Ovenbottom 3 Lift the rear of the oven bottom enough to clear the lip of the range frame push it back and then pull it up and out Make sure the oven bottom is in place before you turn the oven on for any reason Frequent wipings with mild soap and water particularly after cooking meat will prolong t...

Страница 27: ...e damaging the porous finish on the oven walls Special Cleaning Procedure for the Continuous Cleaning Oven To help remove larger spills perform the following procedure i Let range parts cool before handling We recommend rubber gloves be worn when cleaning 2 Remove shelves and cookware 3 Soil visibility may be reduced by operating the oven at 400 F 204 C Close the door and turn OVEN TEMP knob to 40...

Страница 28: ... appliance after installation is completed CONSUMER Keep this Use and Care Guide and the Installation Instructions for future use This appliance must be properly grounded WARNING Improper installation adjustment alteration service or maintenance can cause injury or property damage Refer to this manual For assistance or additional information consult a qualified installer service agency manufacture...

Страница 29: ...ANCES Provide adequate clearances between the range and adjacent combustible surfaces Minimum to cabinets on either side of range Maximum depth for __ cabinets above countertops 30 _76 2 cm_ i 2 5cm To wall on either Minimum D 4_ side slandard bumermodels _ 33 _m 2 Scm To wall on either _ _ side sealed burner models _ Front edge of range 36 side panel 91 5 cm forward I from cabinet Clearance betwe...

Страница 30: ...Avoid placing cabinets above the range To reduce the hazard caused by reaching into the cabinets over the open flames of operating burners install a ventilation hood over the range that projects forward at least 5 12 7 cm beyond the front of the cabinets The ventilating hood must be constructed of sheet metal not less than 0 0t22 o31 mm thick Install above the cooking top with a clearance of not l...

Страница 31: ...gs around the base of the range that supply fresh air for combustion and ventilation are not obstructed by carpeting or woodwork PROTECT YOUR FLOOR Your range like many other household items is heavy and can settie into soft floor coverings such as cushioned vinyl or carpeting Use care when moving the range on this type of flooring It is recommended that the following simple and inexpensive instru...

Страница 32: ...nifold must remain in the supply line regardless of whether natural or LP gas is being used A flexible metal appliance connector used to connect the range to the gas supply line should have an IoD of 1 2 and be 5 feet 1_5m in length for ease of installation In Canada flexible connectors must be single wall metal connectors no longer than 6 feet 1 8 m in length STEP 2 Connect the Range to Gas Shut ...

Страница 33: ...nstafler Inform the consumer of the location of the gas shut off valve Nipple Gas shut off valve 1 2 or 3 4 Gas pipe Alternate Hookup _ Adapter o Pressure Gas Nipple regulator shut off _ 90 valve _ Elbow 1 1 2 or 3 4 90 EIbow Gas pipe Adapter Installer Inform the 1 consumer of the location o the gas shut off valve Pressure regulator Installer Inform the consumer of the location of the gas shut off...

Страница 34: ... cord However if you still elect to use an extension cord it is absolutely necessary that it be a UL listed 3 wire grounding type appliance extension cord and that the current carrying rating of the cord in amperes be equivalent to or greater than the branch circuit rating Grounding IMPORTANT Please read carefully FOR PERSONAL SAFETY THIS APPLIANCE MUST BE PROPERLY GROUNDED The power cord of this ...

Страница 35: ...happen DO NOT USE the appliance until a proper ground has again been established B Usage Situations where Appliance Power Cord will be Disconnected Frequently Do not use an adapter plug in these situations because disconnecting of the power cord places undue strain on the adapter and leads to eventual failure of the adapter ground terminal The customer should have the two prong wall receptacle rep...

Страница 36: ...er tip is normal If you find pilot adjustment is necessary follow instructions at right Adjust the Surface Burner Pilots if Necessary CAUTION Make sure the surface burner control knobs are in the OFF position before attempting to adjust the pilots 2 Raise the cooktoF Locate the pilot adjustment screw It can be accessed through the small hole near the center of the manifold panel To adjust use a bl...

Страница 37: ...er outage the oven burners on these models cannot be lit manually with a match Gas will not flow unless the glow bar is hot If the oven is in use when a power outage occurs the oven burner will shut off and cannot be re lit until power is restored Adjust Broil Burner Air Adjustment Shutter on Models with a Broiler Drawer if Necessary Determine if the bottom burner flames are burning properly With ...

Страница 38: ...r service B Yellow tips on outer cones Normal for LP gas C Soft blue flames w Normal for natural gas Replace Oven Parts After all adjustments are made replace the broiler drawer oven bottom shelves and oven door STEP 6 Leveling the Range 1 Install the oven shelves in the oven then position the range where it will be installed 2 Check for levelness by Raise placing a spirit level or a partially fil...

Страница 39: ...er the wood or concrete floor set of positions depending on your floor type RearLeveling LegofRange Concrete Floor Holes 3 For wood construction drill a 1 8 pilot hole in the center of each of the pre marked wood floor and wall hole positions a nail or awl may be used if a drill is not available Fasten the Anti Tip device with the 4 screws provided Atlachmenl to wall j Anti TipDevice Wall plate 1 ...

Страница 40: ...ectly Pilot s is are not lit on standing pilot models See the Lighting Instructions for Standing Pilot Models section in Surface Cooking If range is connected to LP gas contact the person who installed your range or made the conversion The oven gas shut off valve may have accidentally been moved during cleaning or moving To check the oven gas shut off valve on standard twin burner models raise the...

Страница 41: ...ds adjustment See the Adjust the Oven Thermostat Do It Yourself section Oven controls no properly seL See the Baking or Roasting section Shelf position is net correct Incorrect cookware or cookware of improper size is being used Oven thermostat needs adjustment See the Adjust the Oven Thermostat Do It Yourself section Aluminum foil used improperly in the oven Oven bottom net securely seated in pos...

Страница 42: ... in the Agreement v Expert service by our 12 000 professional repair specialists v Unlimited service and no charge for parts and labor on all covered repairs v No lemon guarantee replacement of your covered product if four or more product failures occur within twelve months v Product replacement if your covered product can t be fixed v Annual Preventive Maintenance Check at your request no extra c...

Страница 43: ...ocina detr s del cajSn de asador o de alrnacenarniento o del panel de protecci6n NUMERO DE MODELO NUMERO DE SERIE LkADVERTENCIA o rODAS LAS COClNAS SE PUEDEN VOLCAR LESIONES PERSONALES PUEDEN OCURRIR INSTALE LOS DISPOSITIVOS ANTI VOLCADURAS QUE VIENEN CON SU COCINA VEA LAS INSTRUCCIONES PARA LA INSTALACION Sears Roebuck and Co ADVERTENCIA siusted no sigue con exactitud la informaci6n de esta gufa ...

Страница 44: ...todos los materiales de envase de la cocina antes de operaria para evitar incendio o dafios del hume si los materiales de envase se encendieran Sitt_e la cocina fuera de las reas muy transitadas en la cocina y fuera de lugares ventilados para evitar el apagado de los pilotos en modelos con pilotos permanentes y circulaci6n de aire inadecuada Despu_s del use prolongado de una cocina se pueden produ...

Страница 45: ...uarde los materiales inflamables dentro del homo del caj6n del asador o cerca de ta superficie de cocci6n No guarde ni use materiales combustibles gasolina u otros vapores o iiquidos cerca de este o cualquier otro aparato No deje que la grasa de cocina u otros materiales inflamables se acumulen dentro o cerca de la cocina Rayones grandes o impactos a las puertas de vidrio pueden causar que el vidr...

Страница 46: ...spere hasta que se enfrie el aceite AI usar recipientes de vidrio aseg0rese de que est_n diseriados para la cocci6n sobre la cocina Aleje todos los articulos de material pl_stico de los quemadores de superficie No deje articulos de _ pldstico sobre la superficie se pueden derretir si se dejan muy cerca del respiradero Use el tamafio correcto de recipienteo La apariencia y la ubicaci6n Evite usar l...

Страница 47: ... homo siga fas instrucciones del fabricante_ Use s61o los recipientes de vidrio que se recomiendan para uso en los hornos de gas Siempre quite la bandeja del asador del horno o del compartimiento para asar al fuego directo tan pronto como termine de asar La grasa dejada en la bandeja se puede encender si se usa el homo sin quitar la grasa de la bandeja def asador Ai asar al fuego directo si la car...

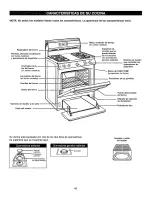
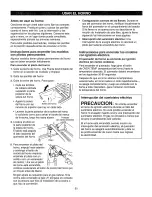
Страница 48: ...sador Retoj y contador de tiempo en ciedos medelos Superficie de cocci6n que se puede levantar en Ios modelos con quemadores gemelos est ndar Botones de mando que controlan los quemadores de superficie Bot6n de OVEN TEMP ternperatura de_ homo Posiciones de las parrillas Puerta desmontable del homo Etiqueta de espacios de instalaci6n Entrada del aire Su cocina est equipada con uno de los dos tipos ...

Страница 49: ...eche le dar los mejores resultados al cocinar a fuego lento_ Ofrece un resultado m s precise al cocinar alimentos delicades tales come satsas o alimentos que necesitan ser cocinados a fuego lento per un largo periodo de tiempo La llama se puede reducir a un nivel bajo para cocinar a fuego lento Et quemador delantero del lade derecho tiene m _s potencia que los otros y hat que Ios liquidos alcancen...

Страница 50: ...dor_ Ponga una cacerola sobre el quemador antes de encenderlo o ajuste la llama para corresponder con el tama_o de la cacerola tan pronto como se encienda y el sonido de soplido se parar Despu_s de encender un quemador Despu_s de encender el quemador haga girar el bot6n para ajustar el tamaSo de la lama_ No deje un quemador funcionando por un per odo largo de tiempo sin poner un recipiente sobre t...

Страница 51: ...ede usar en las cocinas de gas Acero inoxidable Este metal por si mismo no es un buen conductor del calory generalmente se combina con cobre aluminio u otros metales para mejorar la distribuci6n del calor Por to general las sartenes hechas de metal combinado funcionan satisfactoriamente si se usan sobre una llama de tamale mediano como lo recomienda el fabricante No utilice un wok de fondo piano e...

Страница 52: ...ado las instrucciones para fijar el contador de tiempo Para mostrar la hera durante la operaci6n del contador Oprima el botSn CLOCK reloj durante la operaciSn del contador de tiempo no interferir con la operaciSn del contador de tiempo la ventanilla se cambiar para mostrar el retoi pero el contador de tiempo continuar_ haciendo el conteo regresivo sonar despu6s de que se termine et tiempo Vuelva a...

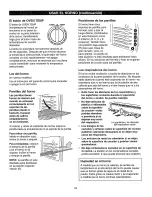
Страница 53: ...luego tira hacia afuera Protector en ciedos modelos 4 Localice el piioto en la parte posterior de E_ la solera del horno El piloto estb pegado al lado izquierdo del quemador def homo Pilolo instrucciones para encender los modelos con ignici6n electrica El quemador del homo se enciende por ignici6n el_ctrica en ciertos modelos Para encender el quemador haga girar el bot6n de OVEN TEMP temperatura d...

Страница 54: ...perior Tambi_n tiene una posici6n baja especial R para asar cosas de gran tamaSo como un pavo grande la parrilla en esta posici6n no est disefiada para deslizarse hacia afuera_ En las secciones de Hornear y Asar se sugieren posiciones de cocci6n para las parrillas Los respirade_os dei homo El homo recibe ventilaci6n a trav_s de aberturas en los conductos de la parte posterior de la cocina No bloqu...

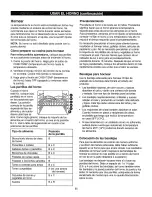
Страница 55: ...ratura m s alta no reducir_ el tiempe requerido para el precalentamiento Es necesario precalentar et homo para obtener buenos resultados al hornear tortas ga letas dulces articulos de pasteleria y pan No es necesario precalentar al cocinar la mayoda de los platillos de carnes y vegetales al homo ni tampoco al asar Para los homos que carecen de un indicador de luz o tono para el precalentamiento pr...

Страница 56: ... de aluminio en una parritla inferior varias pulgadas debajo del alimento No eche miraditas Fije el contador de tiempo para e tiempo estimado de cocci6n y no abra la puerta del homo para mirar a los alimentos La mayoda de las recetas le dan tiempos minimos y m ximos para hornear tal como homee de 30 a 40 minutos NO abra la puerta de homo hasta que haya transcurrido el tiempo minimo Et abrir frecue...

Страница 57: ... flech Sugefimos que haga el ajuste a una muesca det ajuste original y verifique la operaci6n del homo antes de hacer ajustes adicienaleso Despu_s de hacer el ajuste vuelva a apretar los tomiiios hasta que queden sin holgura pero tenga cuidado de no apretarlos excesivamenter Reinstate el botSn sobre la cocina y verifique la operaciSn del home Obturador de ajuste de aire para los quemadores del hor...

Страница 58: ...e los alimentos continuar n cocin ndose en un homo caliente ann despu_s de que haya sido apagado y deber n sacarse cuando hayan alcanzado la temperatura interne que se desee_ 1 Coloque la parrilla t _ en la posiciSn Ben e homo pare las carries _ _ pequeSas 3 a 5 libras t43 a 2 3 kg yen la posici6n R pare asar _ _ las carnes m s grandes I 2 Compruebe el peso de la came Coloque la came con el lado g...

Страница 59: ...e cordero Paleta pernil o Iomo de ternera Lomo o costiltas o paleta de puerco Temperatura Grado de del homo cocci6n 325 F 163 C 325 F 163 C Crudo Medio Bien cocido Crudo Medio Bien cocido Bien cocido Bien cocido 3 a 5 libras 1 4 a 2 3 kg 24 35 35 39 39 45 Tiempo de asar aproximado en minutos por libra kg Temperatura interna 6 a 8 libras 2 7 a 3 6 kg 18 25 140 150 F 60 66_ C t 21 25 25 30 3O 35 35 ...

Страница 60: ... tiene grasa o cartilage alrededor de los bordes haga cortes verticales a trav6s de ambos con una separaci6n de unas 2 5 cm o Si desea la grasa se puede recortar dejando una capa de 1 8 3 ram de espesor aproximadamente 3 Coloque la comida sobre la rejitla del asador y coloque la bandeja del asador sobre la parrilla apropiada en et caj6n del asador Colocando la comida m _s cerca de la llama se quem...

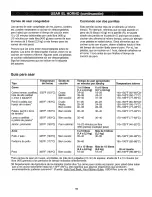
Страница 61: ...osecoeido Medio cocido Bien cocids Polio 1 fibre 450 g 4 hamburguesas I 2 3 4 13 19 ram de espesor I 2 5 cm de espesor 1 I h libras 450 g 680 g 1W 3 8 cm de espesor 2 2_ libras 907 g 1 13 kg 1 enters 2 2V_ libras 907 g 1 I3 kg l separado a Io largo Con hueso 4 trozes de pechuga Pan pastel Pan tostado o 2 4 trozos Paslefesde pan 1 paquete 2 Panecillos ingteses 2 separados Colas de langosta 2 4 6 8 ...

Страница 62: ...ezas de los quemadores en los quemadores sellados solamente NOTA Antes de quitar las cabezas de los quemadores y las tapas recuerde su tamafio y el sitio donde est _n localizadas Despu_s de limpiarlas vueiva a colocarlas en el mismo lugar Para una ignici6n adecuada cerci6rese de que el hueco peque_5o de la secci6n que se ajusta sobre el electrodo se mantenga abierto_ Una aguja de coser o un alambr...

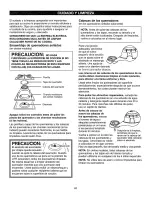
Страница 63: ...n duraderas las parriltas de Ios quemadores gradualmente perder n su brillo pese at mejor cuidade que pueda darles Este se debe a la exposici6n continua a altas temperaturas_ 63 No opere un quemador durante un periodo de tiempo prolongado si no hay un recipiente en la parrilla del quemador El acabado de la parrilla del quemador puede despostillarse si no hay una olla que absorba el caloro PRECAUCI...

Страница 64: ... las aberturas de Ios quemadores de superficie No use estropajos de acero porque obstruir n tas aberturas del quemador de superficie y arafiarb n los quemadores de superficie Si los huecos se obstruyeran Ifmpielos con una aguja de coser o un alambre desnudo Antes de volver a colocar los quemadores de superficie en su lugar sacuda el exceso de agua y s_quelos completamente poni_ndolos en el homo a ...

Страница 65: ...mp arias enjuague las parrillas con agua limpia y s_quelas con un patio limpio Panel de control inferior panel multiple frontal y botones Es una buena idea limpiar el panel de control cada vez que termine de usar el homo Use un patio humedo para limpiar o enjuagar Para limpiar use un jab6n suave y agua o una soluci6n de 50 50 de vinagre y agua Para enjuagar use agua limpia S_quelo con un patio sua...

Страница 66: ...ara rociar que contengan _ cido pueden causar descoloraci6n y deben limpiarse de inmediato Cuando la superficie est_ fria limpie y enjuague 66 No use limpiadores para homes pelves abrasives estropajos de acero o abrasives fuertes en el exterior de la puerta Interior dei horno porcelanizado en todos los modelos menos los modelos de limpieza continua Con limpieza correcta et interior de esmalte porc...

Страница 67: ...r de ta __ 4 solera del homo _ 2 Agarre la solera _ del homo por _ las ranuras de sujeci6n que hay Soleradei homo en cada lado 3 Levante la parte posterior del fondo del horno Io suficiente como para quitar el borde del armaz6n de la cocina empuje el fondo hacia atr_s y luego j_lelo hacia arriba y afuera AsegOrese de que la solera del homo est_ en su sitio antes de encender el homo por cualquier r...

Страница 68: ...ntinua Para remover derrames m s grandes uti_iceel procedimiento siguiente 1 Deje que tas piezas del horno se enfrien antes de tocarlas Recomendamos que se utilicen guantes de goma al limpiarlas 2 Quite todas las parrillas y los recipientes 3 La visibilidad de suciedad se puede reducir operando el homo a 400 F 204 C Cierre la puerta y situe el bot6n de OVEN TEMP temperatura del homo a 400 F 204 C ...

Страница 69: ...li i i i _ i i I _Ui_IOUIVIIIJUR Guarde esta guia de uso y cuidado y las Instrucciones para ta instalaci6n para uso futuro Este aparato electrodom_stico tiene que ser conectado a tierra de manera adecuada ADVERTENCiA La instalaci6n ajuste alteraci6n servicios de reparaci6n o mantenimiento inadecuados pueden causar lesiones o dafios a la propiedad Consulte este manual Para obtener asistencia o info...

Страница 70: ...tJe sean combustibles M rgenes de distancia minima para los gabinetes a ambos lados de la cocina Profundidad m_ima para los gabinetes encima de la superficie de 30 cocciOn_ __ 1 2 5 cn de distancia asta la pared onquemadores z 18 r_ _ 30 76 2 cm estandar gemelos Minima _ 2 5 cm de distancia hasta _ _ la pared modeloscon quemadores 33 cm f 4s o 2L f 36 191 5 cm 16 mm 1 _ _ _ J abinete M rgen de dis...

Страница 71: ...e la cocina de gas puedan resistir el calor generado por la cocina de hasta 200 F 93 C Evite poner gabinetes encima de la cocina Para evitar el peligro que causaria el tratar de alcanzar objetos dentro de los gabinetes cuando los quemadores est_n funcionando instate una campana extractora de aire sobre la cocina que se proyecte hacia adelante por Io menos unas 5 12 7 cm m s all de frente de los ga...

Страница 72: ...ciOn de la toma de corriente el_ctrica y la abertura de la tuberfa del gas yea UbicaciOn de la tuberfa del gas y la toma de corriente el_ctrica para poder satisfacer ciertos requisitos La cocina se puede celocar sin ning_n margen de distancia 0 0 cm con respecto a la pared posterior y las paredes laterales de ta cocinao UBICACION No coloque la cocina en un lugar donde _sta pudiera estar expuesta a...

Страница 73: ...cocina el tipo de gas pare el cual fue disefiada Esta cocina se puede adaptar pare que funcione con gas natural o gas propano Si usted decide user esta cocina con gas propano la conversi6n deber ser hecha por un instalador competente antes de que se intente poner a funcionar esta cocina con ese tipo de gas Para un funcionamiento adecuado ta presi6n del gas natural suministrado al regulador debe se...

Страница 74: ...tuberia del gas _ _ LLU de 6 1 8 m m_ximo O_k_ Adaptad r _ __ Adaptado r Instalador Inf0rmele at consumidor el tugar donde se encuentra la v Nula de cierre del gas _ V lvula de eierre de gas Tubeda del gas I 2 o 3 4 I 3 o 1 crn Opciones de instalacibn con tuberia dura para los modeios equipados con Quemadores Sellados Code de 90 _ __ Tuberia Uni6n de hierro Regulador de presi0n Macho roscado _ _ U...

Страница 75: ...mendamos enf ticamente que no se use ningOn cord6n de extensi6n Sin embargo si usted de todas formas opta por usar un cord6n de extensi6n es absolutamente necesario que sea un cord6n de extensi6n de 3 alambres con conexi6n de toma de tierra para aparatos etectrodom_stieos aprobado por UL y que la capacidad nominal de la intensidad de la corriente del cord6n medida en amperios sea igual a o mayor q...

Страница 76: ...epetido En case de que esto ocurra NO USE el aparato electrodom_stico hasta que se vuelva a conectar a tierra de manera adecuada B Situacionee en las que el cord6n de alimentaci6n del aparato electrodom_stico ser_ desconectado con frecuencia No use un enchufe adaptador en estas situaciones ya que la desconexi6n del cord6n de alimentaci6n hace que el adaptador trabaje forzadamente y esto resuftar e...

Страница 77: ...ntro del panel multiple Para ajustar utilice un destornillador piano con un di metro de eje_ 3 16 5 mm o Haga girar el tornillo de ajuste del piloto hasta que la llama del piloto atcance una altura de 5 16 8 mm No reduzca ta llama a menos de 5 16 8 mm o el piloto puede apagarse Un piloto cuya llama sea m s atta qua la recomendada puede generar hollfn carbSn negro en el fondo de la supefficie de co...

Страница 78: ...erillo El gas no circular a menos que la barra incandescente est_ bien caliente Si el homo estA prendido cuando ocurre una interrupci6n del suministro el_ctrico el quemador del homo se apagar y no se podr encender de nuevo hasta que la electricidad regrese Ajuste el obturador de ajuste de aire del quemador de asado en los modelos con gaveta del asador si es necesario Determine si las liamas del qu...

Страница 79: ...as amariilas Uame a servicio de Sears B Puntas amarillas en los conos externos Normales para e gas LP propano C Llamas azules suaves Normales para el gas natural Si la llama del quemador luce come en la ilustraci6n A Ilame al t_cnico de servicio de Sears La llama normal de un quemador deber_ lucir como B o C dependiendo del tipo de gas que usted use Con et gas LP es normal que las puntas aparezcan...

Страница 80: ...sobre ta pared y 2 posiciones de hoyos sobre el pisoo Use las posiciones indicadas para madera o concreto dependiendo del tipo de su piso 3oPara construcciSn de madera haga un hoyo piloto de I 8 en cada una de las posiciones premarcadas en el piso y la pared puede usar un clavo o una lezna si no tiene un taladro Enganche el sistema contra volcaduras con los 4 tornilios que se proveen Enganche a a ...

Страница 81: ...s en ciertos modeios hayan sido instaladas correctamente El piloto s no est_ n encendido s en modelos con pitotos permanentes Vea tas Instrucciones de encendido para los modelos con pilotos permanentes en la secci6n Cocinando en ta superficie Si ta cocina est _ conectada al gas LP p6ngase en contacto con la persona que instal6 su cocina o que hizo la conversi6n Es posibte que la v_tvula de cierre ...

Страница 82: ...to der hornc H_ galo usted misrno Los controles de homo no se hart fijado de rnanera adecuad Vea la secciSn de Hornear o asar La posici6n de la parrilla no es la correct Se est n usando utensilios de cocina incorrectos o de un tama_o inapropiado Et termostato del homo necesita ajuste Vea la seccibn de Ajustar el terrnostato del horno H galo usted mismo El papel de aluminio no se us0 apropiadamente...

Страница 83: ...por parte de nuestros 124000 especialistas profesionales de reparaci6n V Servicio ilimitado sin costo por partes y mano de obra en todas las reparaciones cubiertas i1 Garantia total reposici6n de su producto cubierto si ocurren cuatro o m s de cuatro fallas del producto dentro de doce meses v Reposici6n det producto si el producto cubierto no se puede reparar v Revisibn anual de mantenimiento prev...

Страница 84: ...ipment and electronics call or go on line for the location of your nearest Sears Parts Repair Center 1 800 488 1222 Call anytime day or night U S A only www sears com i iiiiii i iiiiii To purchase a protection agreement U S A or maintenance agreement Canada on a product serviced by Sears 1 800 827 6655 U S A 1 800 361 6665 Canada Para pedir servicio de reparaci6n a dornicilio y para ordenar piezas...

Отзывы: