background image

Содержание 141.16673

Страница 1: ...injury death or property damage Whether this grill was assembled by you or someone else you must read this entire manual before using your grill to ensure the grill is properly assembled installed and maintained Use your grill at least 3 feet away from any wall or surface Use your grill at least 3 feet away from combustible objects that can melt or catch fire such as vinyl or wood siding fences an...

Страница 2: ...ther rights which vary from state to state Sears Roebuck and Co Hoffman Estates IL 60179 Sears Brands LLC IF YOU SMELL GAS 1 Shut off gas to the appliance 2 Extinguish any open flame 3 Open lid 4 If odor continues keep away from the appliance and immediately call your gas supplier or your fire department 1 Do not store or use gasoline or other flammable liquids in the vicin ity of this or any othe...

Страница 3: ... inside the Burner Tube lighting the Burner may cause explosion and or fire resulting in serious bodily injury and or property damage Gas Vatve Assembty Orifice Burner Tube 1 Do not store spare LP cylinder within 10 feet 3m of this appliance 2 Do not store or use gasoline or other flammable liquids and vapors within 25 feet 8m of this appliance 3 When cooking with oil grease do not allow the oil g...

Страница 4: ...s Side Shelves to Bowl Panel 2 Attaches Tool Holder to Left Side Shelf 1 1 Secures Gas Tank Phillips Head Screw 1 4 x3 4 Qty 10 Part 1 2G04121 Stainless Steel r I Hardware already installed in the Tool Holder Kit I Phillips Head Screw M5x8mm i Qty 2 Part S112M05081 I Stainless Steel L 1 I I I I J Hardware already installed in the Tank Pull Out Tray I 1 Wing Bolt 1 4 x4 3 8 Qty 1 Part 233G04382 Bla...

Страница 5: ...1 4 5 3 14 36 12 38 23 20 24 g18 26 25 16 55 B8B9 A11 52 5O 7 8 10 B2 B6 B5 B4 13 15 29 30 B7 B1 31 11 38 41 67 72 A15 A5 A4 A2 34 76 ...

Страница 6: ...ft Front Right Rear Caster Seat Right Front Left Rear Cart Legs with Side Panel Left Cart Legs with Side Panel Right Cart Rear Panel Cart Rear Panel Support Cart Rear Panel Bracket Cart Rear Panel Bracket Support Cart Bracket Front Door Stop Plate Door Guide Plate Door Left Door Magnet Door Trim Plate Door Spacer Door Right Door Handle Door Hinge Bracket Top Left PART P0014608EA P0011454QJ P055180...

Страница 7: ...trol Knob Seat for Infiared Burner Control Knob P03415263L 1 A13 Infrared Burner Assembly P02006002A 1 A14 Infrared Burner Body Bracket P03306005C 2 A15 Infrared Burner Grease Tray Handle P00213010B 1 B1 Back Burner Assembly P02007066A 1 B2 Back Burner Orifice P06509005A 1 B3 Back Burner Extension Tube P03717017A 1 B4 Back Burner Gas Collector Box P02621001K 1 B5 Back Burner Thermocouple P05305001...

Страница 8: ...Motor AC 11 Rot Thumbscrew 10x1 2 P03308010C Sl12G10121 S362G10121 S411G03081 P05508164A P05508031A S196G04081 P05508032A P05508033A P07101025A S196G10081 1 2 2 2 1 2 2 1 1 1 1 111111111111111111 Rot Thumbscrew Rot Thumbscrew Rot Screw 10 24x3 4 Rot Washer 3 16 1 4 x1 2 10x1 2 UNC Qty 2 Qty 2 Qty 1 Qty 2 Part S411G03081 Part 196G04081 Part 196G10081 Part S112G10121 Rot Hex Nut 10 24 Qty 2 Part 362...

Страница 9: ...ed holes on the Side Shelf and tighten securely Align the 2 holes on under side of Left Side Shelf with the threaded holes on Left Bowl Panel Tighten securely using 2 screws 112G04121 Repeat the same procedure above for mounting the Right Side Shelf Phillips Head Screw MSx8mm Qty 2 Part 112M05081 Stainless Steel Phillips Head Screw 1 4 x3 4 Qty 10 Part 112G04121 Stainless Steel H nstall Regulator ...

Страница 10: ...ting it and sliding to the Right See figure 1 insert the Grease Draining Tray by sliding Side Tabs of Tray over the side rails beneath the Grill Bowl Reposition Rear Upper Bowl Panel See figure 2 install Grease Receptacle under the Grease Draining Tray from the front of grill See figure 3 Figure 1 Figure 2 Figure 3 10 ...

Страница 11: ...arrow gap Return the Gas Collector Box to its original position secure the Inside Nut and try the Electrode Check again If no clicking sound is heard AA Battery may be installed back wards Electric wires may be loose Remove the AA Battery and inspect the ignitor Junction Box found behind the Control Panel and reconnect any loose wires Side Burner and Back Burner Electrode Check Open side burner li...

Страница 12: ...nd store it safely outside LP Gas tanks must be stored outdoors in a well ventilated area and out of the reach of children Disconnected LP Gas tanks must not be stored in a building garage or any other enclosed area The regulator and hose assembly can be seen after opening the doors if applicable and must be inspected before each use of the grill If there is excessive abrasion or wear or if the ho...

Страница 13: ...arrows See diagram If growing bubbles appear do not use or move the LP Gas tank Call an LP Gas Supplier or your Fire Department To Install LP Gas Tank Secure a 201b LP Gas Tank to Gas Grill Unscrew the Wing Bolt and Special Nut to Tank Pull Out Tray Turn your LP Gas Tank Valve clockwise to the closed or OFF positon Place LP Gas tank into tank hole on bottom shelf or on select models slide the Tank...

Страница 14: ...u must check for gas leaks Follow these three steps Make a soap solution by mixing one part liquid detergent and one part water Turn the grill Control Knobs to the full OFF position then turn the gas ON at source Apply the soap solution to all gas connections indicated by the arrows See diagram If bubbles appear in the soap solution the connections are not properly sealed Check each fitting and ti...

Страница 15: ...rn Control Knobs OFF Wait at least 5 minutes for gas to clear then retry If your grill still fails to light turn the Control Knob s and gas source OFF and conduct a leak test as explained in the Use and Care section of this manual If no leaks are detected wait 5 minutes for any gas to clear and repeat the lighting procedure 4 After Burner is lit turn the tank valve SLOWLY one more 1 4 of a turn fo...

Страница 16: ...h for the presence of a spark at the Electrode Disconnected Electric Wires Correction inspect the Electric ignitor see Parts List found behind the Control Panel Connect loose Electric wires to Junction Box and try to light the grill Weak AA battery Correction Unscrew the ignitor Cap and replace the battery If the grill still does not light you may need to purge air from the gas line or reset the r...

Страница 17: ...rain as this may result in an electrical shock Disconnect Rotisserie 4 Careful as all surfaces will be hot both grill and Rotis serie parts Use protective mitts to handle the Rotis serie Unplug the Rotisserie from electrical outlet when not in use and before cleaning Allow to cool before adding or removing parts When Roitsserie cooking place a Cooking Pan under the food to be cooked as this will c...

Страница 18: ... _ Rot Nut 10 24 x2 Rot Screw 10 24x3 4 UNC with washers and nuts Outside of left grill bowl panel Slide a Holding Fork onto each end of the Rotisserie Spit Adjust spacing between Holding Forks to accommodate your food then tighten the Thumbscrews to keep the Holding Forks in position Slide the Collar and Bushing onto the threaded end of the Spit Do not tighten the Collar Thumbscrew until the Roti...

Страница 19: ...will stabilize the Rotisserie during the cooking process and the Bushing allows the Rotisserie Spit to turn smoothly Plug the Rotisserie into an outlet and turn on to test Thumbscrew Motor Holding Forks Thumbscrew Collar Bushing The Bushinq and Collar must always be used with this Rotisserie BEFORE rotisserie cooking you will need to remove the Cooking Grid s and possibly the Savor Plates from you...

Страница 20: ... Stainless Steel Cleaner to polish the stainless steel surfaces of your grill Never use abrasive cleaners or scrubbers because they will scratch and damage your grill Follow these steps for the best results 1 Turn the LP Gas tank valve clockwise to the full OFF position Disconnect the regulator and hose assembly from LP Gas tank 2 Remove dirt or grease using a soft cloth and polish stainless surfa...

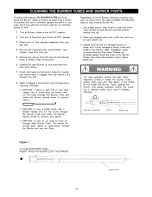
Страница 21: ...e and run the brush through the Burner Tube and inside the Burner several times to remove any debris METHOD 3 Use an air hose to force air through each Burner Tube The forced air should pass debris or obstructions through the Burner and out the Ports Regardless of which Burner cleaning procedure you use we recommend you also complete the following steps to help prolong Burner life 1 Use a fiber pa...

Страница 22: ... low settings including all smoking rotisserie cooking and cooking lean cuts such as fish An Important Note About Cooking Temperatures The suggested heat settings and cooking times shown in the following pages are approximate Unlike the controlled environment inside your kitchen variables including outside temperatures direction and conditions of wind as well as grill location will affect your gri...

Страница 23: ...4 minutes Well done 15 20 minutes Whole Fish and Whole Fillets Preheat your grill on HIGH for 2 3 minutes with the Lid down Raise lid and turn Burners to MEDIUM heat Place fish skin down on grill and cook over direct heat until done Use cooking time as a guide or until fish is opaque but still moist Whole fish Whole fish fillets 10 12 minutes per pound or until fish is opaque Smaller Fish Fillets ...

Страница 24: ...o obtain the desired consistency Once the meat is cooked remove it from your grill and cover with a piece of foil Allow it to stand for 10 15 minutes which allows the juices to settle This will make carving easier and ensure a tender juicy roast Type of Food How Cooked Approximate Cooking Times Beef Rare 18 minutes per pound Medium 23 minutes per pound Well done 27 minutes per pound Lamb Medium 18...

Страница 25: ...brown too quickly cover with pieces of foil Preparing to Smoke Smoking gives food a distinctive delicious flavor You will find a variety of wood chips available for use in smoking grilled foods Pre soaking of wood chips may be re quired so read and follow the manufacturers instructions for preparing smoking chips prior to use Note It is our experience that many smoking chip products do not actuall...

Страница 26: ... grill using a cooking pan or wok over direct heat Fill a cooking pan no more than half full of vegetable or corn oil Start with LOW heat then raise the heat gradu ally Check the temperature of the oil carefully with a frying thermometer or test with a cube of bread The cube of bread should brown in about 30 seconds for most cooking needs A temperature between 350 and 400 degrees is optimal for pr...

Страница 27: ...a feature available on some models Versatile cast iron Pan and Lid set is ideal for preparing deep dish pizza cornbread casseroles and deserts Reversible cast iron Griddle offers a flat side for grilling breakfast fish and fajitas and a ribbed side for cooking bacon sausages and burgers Load this Smoker Box with your favorite chips and add flavor to grilled foods Protect your grill from rain snow ...

Страница 28: ...ight the match and place it over the top opening of the Lighting Tube Turn the nearest main Burner Control Knob to the High setting to release gas The Burner should light immediately Question Sometimes I hear a humming sound coming from my regulator What causes this And My grill has a low flame and sometimes will not light Why Answer The humming sound is gas flowing through the regulator A low vol...

Страница 29: ...wer They all have their advantages For traditional grilling and searing meats cast iron or steel grids offer better heat conductivity To protect against the natural rusting process steel or cast iron cooking grids offer a porcelain finish which requires routine maintenance to keep the grids well seasoned Stainless steel is popular with those who prefer less maintenance A new innovative solution is...

Страница 30: ...call it Rapid Resolution phone support from a Sears representative on all products Think of us as a talking owner s manual Power surge protection against electrical damage due to power fluctuations 250 Food Loss Protection annually for any food spoilage that is the result of mechanical failure of any covered refrigerator or freezer Rental reimbursement if repair of your covered product takes longe...

Страница 31: ...nces lawn and garden equipment or heating and cooling systems no matter who made it no mater who sold it For the replacement pa_s accessories and owners manuals that you need to do it yourself For Sears professiona_ iiinstallation of home appliances and items like garage door openers and water heaters I_00_ M Y HOM E _ 1 800 361 6665 Canada Para pedir sen_ido de reparac_6n a domicil_o y para o rde...

Отзывы: