


11
Programming presets
Presets are used to program defined positions of the camera into a simple, one button
preset. You can switch easily from a zoomed in position on a small document to a zoomed
out position for documents such as blueprints. This saves the hassle of zooming in and out
when presenting documents of a variety of sizes. You can program your Ken-A-Vision
®
IR
remote with six different presets labeled 0-5.
Note:
These presets will only work with the Ken-A-Vision IR remote.
To program a preset
1. Zoom in or out to desired view.
2. Press the Set button once. The on-screen
notification will indicate “Set number”
3. Press the selected preset button (0-5).
Note:
If you want to reset a preset, just program
a new preset using that same number. The new
preset will override the old one.
Installation
PRESETS
0
1
2
3
4
5
SET
Figure 12. Presets
2
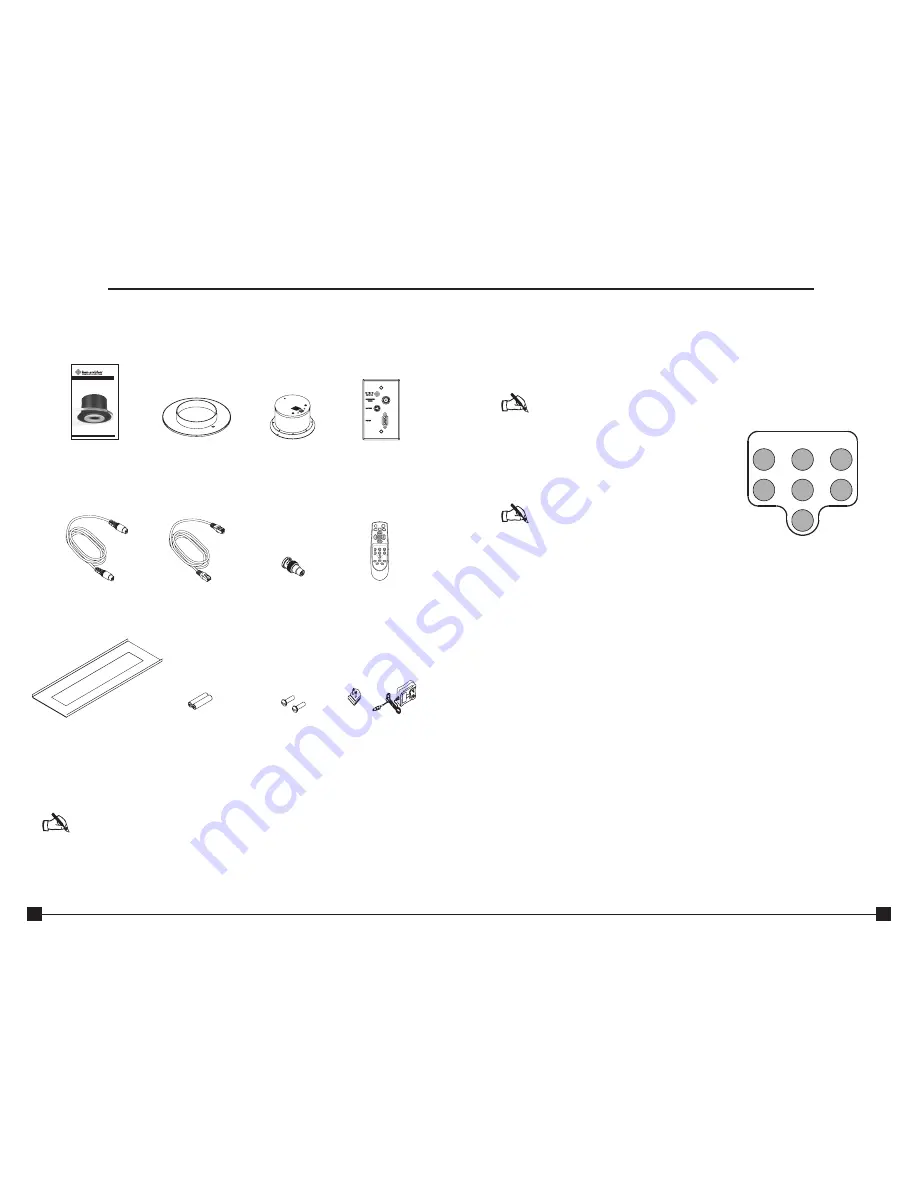
Unpacking Cameras
Ensure that you received the following parts:
Introduction
Trim Ring
Camera Enclosure
Single Wall plate
50' Cat. 5 Cable
with RJ-45 jacks
BNC to RCA
Adapter
CAM
LASER
PWR
FLIP
FREEZE
AUTO
FOCUS
DISPLAY
ZOOM
IN
ZOOM
OUT
PRESETS
0
1
2
3
4
5
SET
NEG/INV
B/W
-
+
AUTO
Remote
Tile Support Rail
Triple-A batteries (2)
6-32 x 1/2 Oval
Head (White)
Power Supply
25' S-Video Cable
Figure 1. Unpacking items
ProfCam by Ken-A-Vision
®
Ceiling DocCam™ II
Installation & Operation Manual
910-171-066
Ceiling DocCam™
Manual
Note:
Ken-A-Vision
®
is not responsible for product damage incurred during
shipment. You must make claims directly with the carrier. Inspect your shipment
carefully for obvious signs of damage. If the shipment appears damaged, retain
the original boxes and packing material for inspection by the carrier. Contact your
carrier immediately.


