5
STEP 6:
PLACING STAIRWAY INTO OPENING
A. While closed, the stairway should now be raised into the
rough opening and positioned on the ledges formed by
the slats. Working above with a helper below, raise the
stairway through the rough opening at an angle so it will
clear the slats. Position the stairway in the rough opening.
DO NOT STAND ON OR OPEN THE STAIRWAY AT THIS
TIME. Make sure you have a helper below who can open
the stairway to allow completion of the installation.
B. Using at least three evenly spaced 8d nails per side,
temporarily affix the stairway in the opening by nailing,
at an angle, the well sides to the adjacent joists. Do not
drive these nails in all the way so they can be removed
later after the permanent nailing is completed.
C. Once the temporary nailing has been completed, have
your helper below open the stairway door panel and lower
the stair sections so that the area for permanent nailing is
exposed.
DO NOT STAND ON THE STAIRWAY AT THIS
TIME.
STEP 7:
PERMANENT MOUNTING OF STAIRWAY
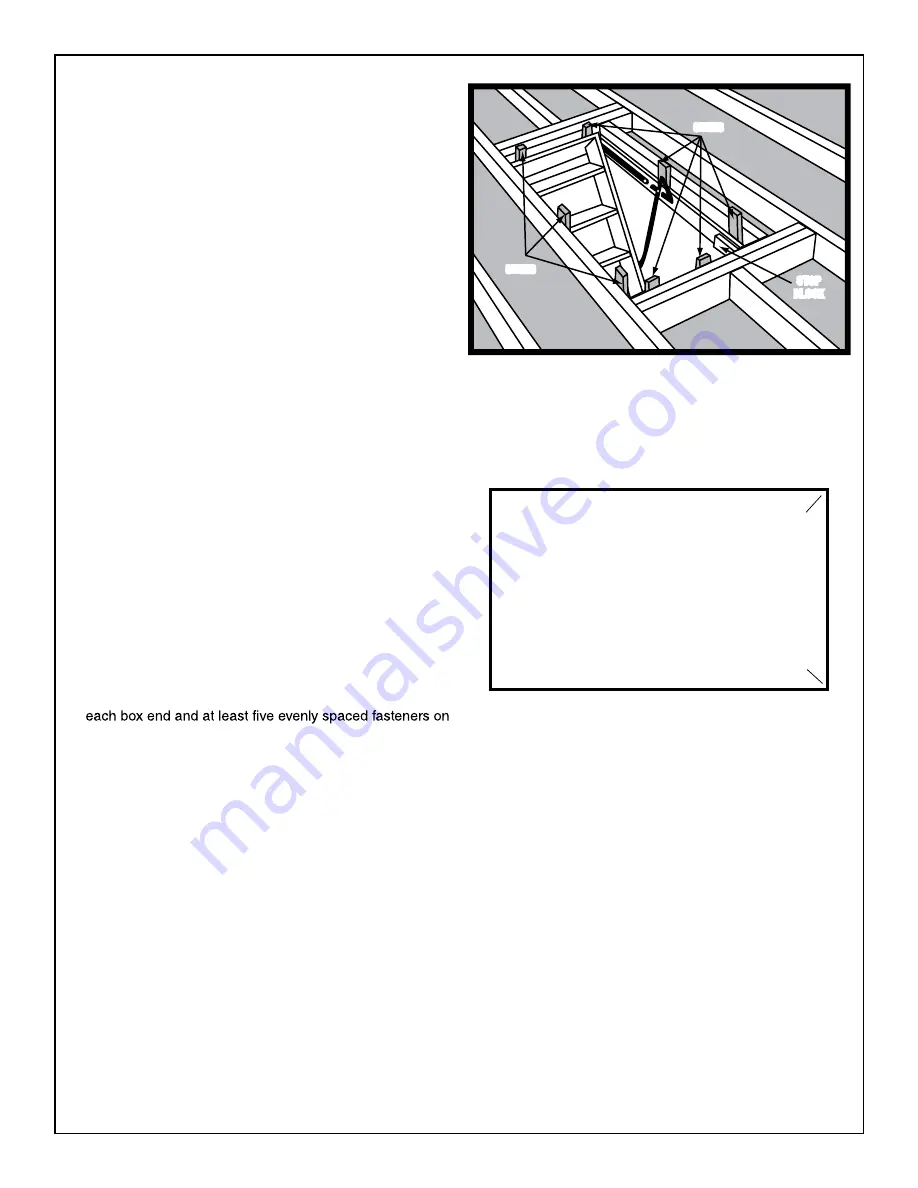
A. Be sure stairway is square and level in the rough opening.
If the stair frame has bowed while the stairway was in
inventory, nails and blocks of wood used as shims will
straighten it. Bowing is normal since wood parts are
subjected to strong spring tension for some time before
purchase and installation (see FIGURE 2).
B. Nail the sides (jambs) of the stairway frame to the rough
opening frame, using 16d nails or 3" lag screws. Holes
are provided in the pivot plates and piano hinge brackets.
Also nail through the end boards into the rough opening
headers. Complete permanent installation by using 16d
nails or 3" lag screws to secure stairway frame on all four
sides of the rough opening according to the diagram in
FIGURE 3. Use at least three evenly spaced fasteners on
each box side. Remove the 8d nails and the slats used
for temporary support.
FIGURE 3
BOX SIDE
BOX SIDE
PIVOT PL
ATE
PIVOT PL
ATE
BOX END
HEADER
CORNER
BRACKET
CORNER
BRACKET
X
- INDICATES RECOMMENDED LOCATION OF 16d NAILS 3" OR LAG SCREWS
X
X
X
X
X
X
X
X
X
X
X
X
X
X
X
X
FIGURE 2
SHIMS
SHIMS
SHIMS
SHIMS
STOP
BLOCK
STOP
BLOCK
Содержание W2200 Series
Страница 2: ......
Страница 17: ......
Страница 32: ......
Страница 47: ......
Страница 50: ...Blank...
Страница 65: ...Blank...
Страница 80: ...Blank...
Страница 95: ...Blank...


