FL-LED-R2B-140PS-8CSB-ST
HIGH-POWER LED FLOODLIGHT
Page 3 of 4
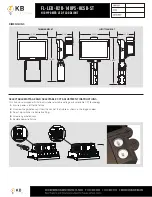
PHOTOCELL INSTRUCTIONS
This fixture comes with a 3-pin twist-lock photocell accessory.
This fixture is compatible with NEMA/ANSI C136.10-2010 3-pin twist-lock photocells.
1.
Ensure power is off to the fixture.
2.
Remove existing twist lock shorting cap from receptacle.
3.
Push the photocell onto the receptacle and twist clockwise to lock into place.
4.
For optimal performance, install the photocell with sensor
director facing north as indicated on the top of the accessory. Adjust if necessary,
while ensuring proper water-tight install.
5.
Restore power to fixture when ready.
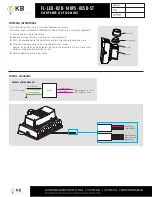
WIRING DIAGRAMS
Pink (Dim−)
White (Neutral)
Purple (Dim+)
Green (Ground)
Black (Live)
120–277V Input
Dimming wires to 0–10V
IEC-compliant control
Black (Line)
White (Neutral)
Purple (Dim+)
Pink (Dim−)
Green (Ground)
Driver
GENERAL WIRING DIAGRAM
Photocell
Shorting cap
Socket
Lamp
FL-LED-R2B-140ps-8CSB-st
high-power led floodlight


