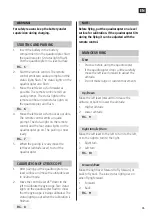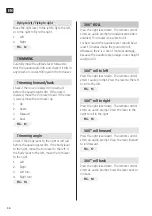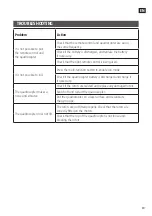
EN
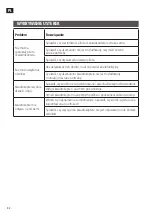
34
5. Power switch
6. Fine-adjust steering forward/back
7. Fine-adjust steering left/right
8. Control lever (forward/back and flying to
left/right)
9. Button for trimming
10. Button to switch between high and low
gear
FIG. 2
ASSEMBLY
INSERTING THE BATTERIES
When inserting the batteries:
1. Open the battery compartment on the
remote control.
2. Insert 2 AA batteries with the correct
polarity as shown by the markings in the
battery compartment. Do not mix old
and new batteries, or different types of
batteries.
3. Close the battery flap.
FIG. 3
USE
CHARGING LITHIUM
POLYMER BATTERY
A charging time of 50–60 minutes enables a
flying time of about 5 minutes.
1. Connect the USB charging cord to a USB
port on a computer or to a USB charger.
2. The status light on the USB charger
connection goes on.
3. Connect the USB charging cord to the
battery.
4. The red status light goes off during the
charging and goes on when battery is fully
charged.
FIG. 4
SYMBOLS
Approved as per
applicable directives.
Recycle discarded product
in accordance with local
regulations.
TECHNICAL DATA
Frequency
2.4 GHz
USB charging time
50-60 min
Charger connection
Micro USB
Battery
Li-Poly (Lithium poly)
Range
25 m
Size
L83 x W83 x H32 mm
DESCRIPTION
PARTS
1. Quadrocopter
2. Rotors A and B
3. USB charging cord
4. Battery
5. Remote control
6. Instructions
FIG. 1
REMOTE CONTROL
Description of remote control
1. Multi-function button (inverted flying/keep
lever pressed, roll/automatic return flying
(in headless mode))
2. Lever for altitude/turning
3. Button for automatic return flying
4. Headless mode
Содержание 005856
Страница 3: ...1 1 2 3 4 5 6 2 1 2 3 4 5 6 7 9 10 8...
Страница 4: ...5 3 4...
Страница 5: ...6 7 8 9 1 2...
Страница 6: ...10 1 2 12 2 1 11 1 2...
Страница 7: ...13 3 4 1 2 14 3 4 2 1 15...
Страница 8: ...18 17 16...
Страница 9: ...1 2 4 3 20 19 2 1...
Страница 10: ...23 22 1 21...
Страница 11: ...25 24 B B A A B...


