background image

19

5) START TIMER (also see pg.10 “Convenient function”).

See pg.10 “Convenient function”.

The Start timer allows you to set a programmable delay between the time you press the PLAY button to start recording and

the time the PR-1 actually begins recording. This is useful to prevent too much blank space at the beginning of a recording

and to allow you time to move your fingers to the keys after you press the PLAY button.

When the Start Timer is active, after pressing the PLAY button when the recording is in standby mode, the display will

automatically show the time until the recording starts.

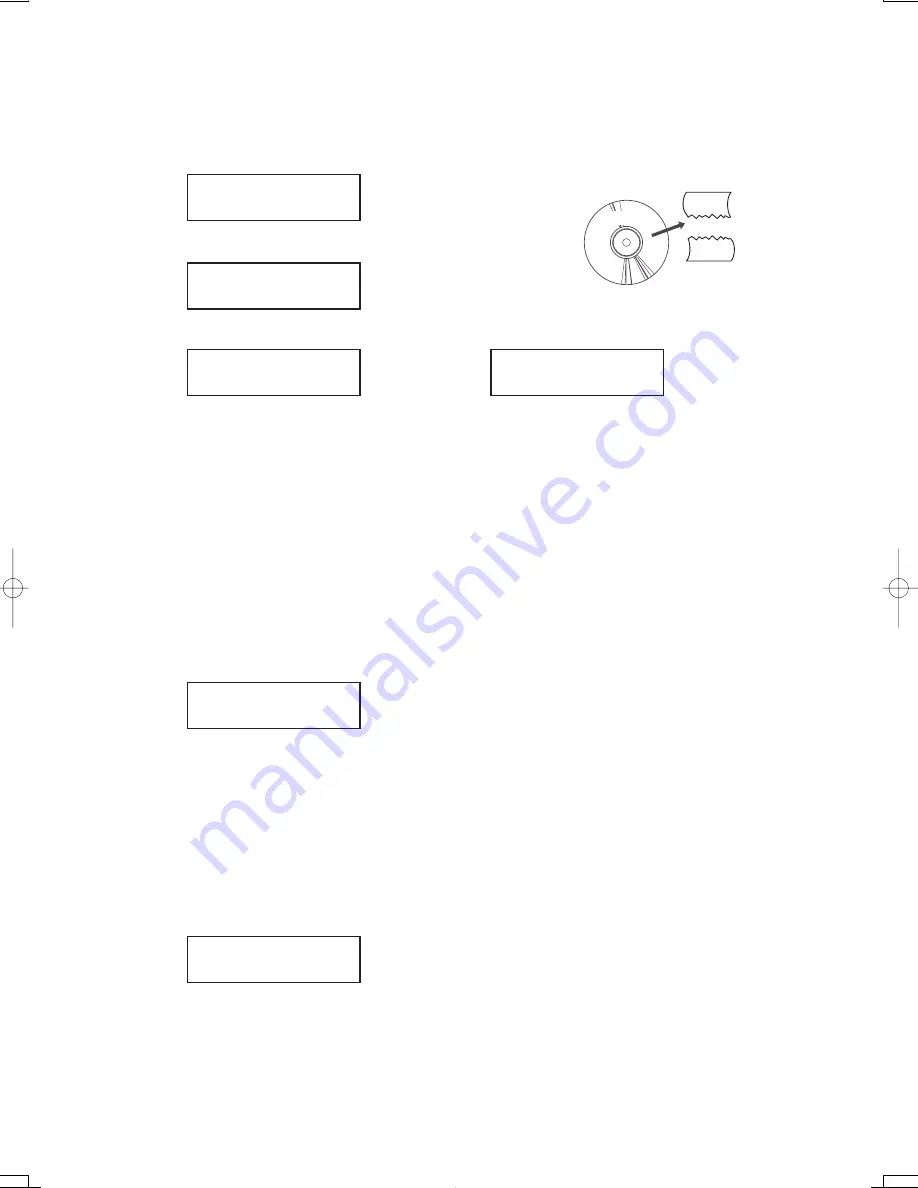
Press the CD button five times. The button will light and the display will show the following information.

Set the value with the “+ YES”, “–NO” buttons. The value will be shown in the bottom right corner of display. The timer

can be set from OFF to 10 seconds.

6) PITCH OF CD (fine tuning of pitch)

There may be times when it is useful to be able to adjust the pitch of the CD. This function is useful to match the tuning of

a pre-recorded CD to the tuning of your piano. The PR-1 allows you to adjust the pitch of a  CD.

Press the CD button six times. The button will light and the display will show the following information.

Set the value with the “+ YES”, “–NO” buttons. The value will be shown in the bottom right corner of display. You can

adjust the pitch of the CD up or down within a range of  –7 to +7.

If you set the pitch to –7, it will be approximately 50 cents lower (half of half note) and +7 will sound approximately 50

cents higher.

In some cases while adjusting the pitch, some noise may occur while listening to a CD.

4) UN-FINALIZE THE  CD-RW

After finalizing a CD-RW disc you may want to add more songs or eliminate some songs. In order to do this you must “un-

finalize” the disc.

Press the CD button four times. The button will light and the display will show the following information.

If you want to un-finalize the disc, press the “+ YES” button.

The PR-1 will ask if you really want to un-finalize the disc,  Press the “+ YES” button to un-finalize.

Display while un-finalizing

Display once un-finalizing is complete

CD-RW


UNFINALIZE


YES/NO

CD-RW


UNFINALIZE

SURE?


YES/NO

CD-RW


UNFINALIZE


EXECUTING

CD-RW


UNFINALIZE


COMPLETED

REC


START


TIMER


OFF

CD


PLAY


PITCH


0

CD-RW

Un-finalize

Release the seal

Note) It will take few minutes to un-finalize.

Содержание PR-1

Страница 1: ...Owner s Manual...

Страница 2: ...t hall 29 5 Recording a Piano using different Reverb settings 30 6 Record a piano along with another instrument and a vocalist using the line and microphone inputs 30 7 Adjusting the sound character o...

Страница 3: ...y if the product is handled incorrectly Read all the instructions before using the product WARNING When using electric products basic precautions should always be followed including the following CAUT...

Страница 4: ...rcord s plug always hold the plug and pull it to remove it Pulling the AC power cord itself may damage the cord causing a fire electric shock or short circuit Please lift up the product when moving it...

Страница 5: ...product An information on Disposal for users If your product is marked with this recycling symbol it means that at the end of its life you must dispose of it separately by taking it to an appropriate...

Страница 6: ...in a variety of other ways The PR 1 can be used to record a piano along with other instruments or a vocalist or as a microphone system in live performances or in a recording studio You can also use th...

Страница 7: ...missing components SUPPLIED COMPONENT LIST PR 1 main unit 1 pc PR 1 custom Piano microphone 2 pcs Piano microphone cable 2 pcs Attachment band for piano microphone 2 pcs AC Adaptor 1 pc CD RW 1 pc Ow...

Страница 8: ...her CD player once the disc has been Finalized 5 The PR 1 can be for used as a live microphone system for piano when connected to a PA system 6 The PR 1 can be used as a piano microphone system in a r...

Страница 9: ...n erasing one song at a time the PR 1 can only erase the last song on the disc You cannot erase songs from the middle of the song list one at a time There are two different sizes of CD R discs The rec...

Страница 10: ...the PR 1 on top of the piano or in a place where you can conveniently operate the PR 1 while sitting on the piano bench Make sure the PR 1 is set horizontally on a flat surface because the PR 1 may n...

Страница 11: ...ed piano microphones to your piano and connect them to the PIANO MIC IN jacks on the rear of the PR 1 main unit See pg 36 to 40 for instructions on how to attach the microphones to the piano and for p...

Страница 12: ...r is counting The display will show the countdown CONVENIENT RECORDING FUNCTIONS Steady light Standby for recording Getting ready Flashing Flashing Steady light Timer moving 1 Start Timer The Start ti...

Страница 13: ...cording Please be aware when you press the REC button there will be a few seconds of blank time Press the REC button The song number will change and the REC and PLAY button will both flash for few sec...

Страница 14: ...es the time display to show remaining time on the disc You can see that 8 minutes remain on this disc This display shows that this disc has 64 minutes and 10 seconds left to record The disc does not m...

Страница 15: ...red LED does not light on the level indicator even with the piano microphone LEVEL knobs set to maximum PR 1 this is the optimum setting and the PR 1 will make a good recording 4 Using reverb when rec...

Страница 16: ...phones and the LINE MIC INPUTS Set the appropriate input levels so that PARTS AND NAMES FRONT PANEL F E D C B 9 8 7 6 5 4 2 1 H 0 A 3 G the first red LED on the indicator lights occasionally with the...

Страница 17: ...ou are fin ished press the BACK button to return to the main screen A A A A A EQ This button has a menu of various parameters related to adjusting the sound character of the piano micro phones and the...

Страница 18: ...ront panel to adjust the signal level for the best sound When you connect a microphone switch the 6 LINE MIC sensitivity switch to MIC When you use CD player pick up guitar or keyboard switch it to LI...

Страница 19: ...r CD RW discs Note 2 Finalizing a disc can take up to several minutes This is normal BUTTON FUNCTIONS All of the parameters and functions used for editing and adjusting the various PR 1 settings have...

Страница 20: ...ton two times The button will light and the display will show the following information If you want to erase the last song on the disc press the YES button The PR 1 will ask you again if you really wa...

Страница 21: ...PR 1 allows you to adjust the pitch of a CD Press the CD button six times The button will light and the display will show the following information Set the value with the YES NO buttons The value wil...

Страница 22: ...rner of display You can select the following repeat settings OFF 1 SONG WHOLE SONG If you select OFF the PR 1 will play the CD from the beginning to the end and then stop REPEAT ONE SONG LANGUAGE YB E...

Страница 23: ...use the YES NO buttons When you are finished making your settings press the BACK button to go back to main screen The EQ button light will turn off The following parameters are assigned to the EQ but...

Страница 24: ...button again to select the BASS MIDDLE TREBLE bands These settings will be memorized even when you turn the power off 1 1 PIANO TREBLE MIDDLE BASS These parameters only appear when you select USER Sel...

Страница 25: ...ositive settings it may cause the signal level to be too high and cause distortion 3 PIANO NOISE GATE The Noise Gate can be set so the PR 1 does not record soft sounds that are below a set volume leve...

Страница 26: ...n Set the value with the YES NO buttons You can select any value between OFF to 10 The higher the value the more noise will be eliminated or cut At higher settings it is possible that the noise gate w...

Страница 27: ...f other frequencies Simply inverting the phase of the outputs can improve or correct these problems Press the EQ button ten times If you selected USER EQ press the EQ button thirteen times The button...

Страница 28: ...buttons You can select the following reverb types HALL L HALL M HALL S ROOM L ROOM M ROOM S HALL L M S simulates the ambiance of a concert hall or theater HALL L is the largest hall simulation HALL M...

Страница 29: ...ording but you would like to hear more reverb from the speakers LINE OUT REVERB allows you adjust the LINE OUT reverb ratio so it can be deeper without affecting your recording Press the REVERB button...

Страница 30: ...a Piano along with another instrument or en semble using the LINE setting for the LINE MIC inputs Make sure that the piano microphones are connected cor rectly see pg 8 36 40 for more detail 1 Connec...

Страница 31: ...panning of MIC1 and MIC2 individually see pg 23 24 for more detail Since a CD player is usually in stereo setting the panning to LINE L L10 LINE R R10 will usually sound best Please feel free to ex p...

Страница 32: ...make getting a good live sound for concerts or other performances very easy The PR 1 can be connected to a PA system using the LINE OUT outputs Both 1 4 and XLR jacks are provided There is also a gro...

Страница 33: ...e song will stop playing If you press the PLAY button again it starts from where you stopped You can fast forward or rewind the song by pressing and holding the appropriate SONG button Press the left...

Страница 34: ...o finalize your CD Remember that once you finalize a CD R disc you cannot record any more on that disc CD RW discs can be unfinalized see pg 7 or pg 17 for more information 2 HOW TO REPEAT ALL SONGS O...

Страница 35: ...8 Connect an amplifier and external speakers to the LINE OUT or connect a set of headphones to PHONES jack to listen Turn the POWER on To adjust the reverb settings See pg 26 REVERB button Menu for mo...

Страница 36: ...do not turn off the piano microphones because you cannot hear your live performance properly without them When using headphones only the player can hear the sound of the CD You must connect an amplifi...

Страница 37: ...g the piano the piano microphones can be used to record other instruments You will have to experi ment to find the best microphone position for each type of instrument When you practice an instrument...

Страница 38: ...ines for various Kawai grand pianos are listed on the following page pg 37 These guidelines will be useful for getting a good balanced record ing Do not wrap the band too tightly If the band is too ti...

Страница 39: ...be aware of this point when you connect the microphones This distance between the microphones and the soundboard should be approximately 7 cm for the left microphone lower keys and 12 cm for the righ...

Страница 40: ...the cable to the microphone 2 When you look at the back side of an upright piano you can see the back posts Attach the supplied Mounting bands to the posts according to the illustration The piano mic...

Страница 41: ...r front panel and attach the microphones to the iron plate struts 1 Connect the attached piano microphones to their respective cables 2 Removing the lower front panel To prevent personal injury and po...

Страница 42: ...e spring snaps into place Most pianos will have a gap on the top of the lower panel for the microphone cables to pass be careful not to pinch the cables when replacing the lower panel If there is not...

Страница 43: ...efore you press the STOP button Make sure the piano microphones or LINE MIC INPUTS connections are correct 3 The rotation speed of the CD drive gets fast and slow This is normal and occurs when the CD...

Страница 44: ...ne microphone independent Anti feedback ON OFF Line out phase invert Master volume CD volume Piano microphone switch Piano microphone recording level control L R independent Input level selection line...

Страница 45: ......

Страница 46: ......

Страница 47: ......

Страница 48: ...Printed in Indonesia 815411 KPSZ 0131...

Отзывы: