background image

13

TIMESHIFT (TIME-SHIFTED VIEWING)

If you cannot catch the beginning of a programme because you are occupied with something else, or if you
have to take a break from watching while a programme is being broadcast, you can watch it in timeshift 

mode. Press the 

 button to activate this mode. The following display will appear:

You can change the following settings for 
timeshifted recording:

Use the 

 buttons to select the set-

tings to be changed. Effect changes using 

the 

 buttons and number keys. 

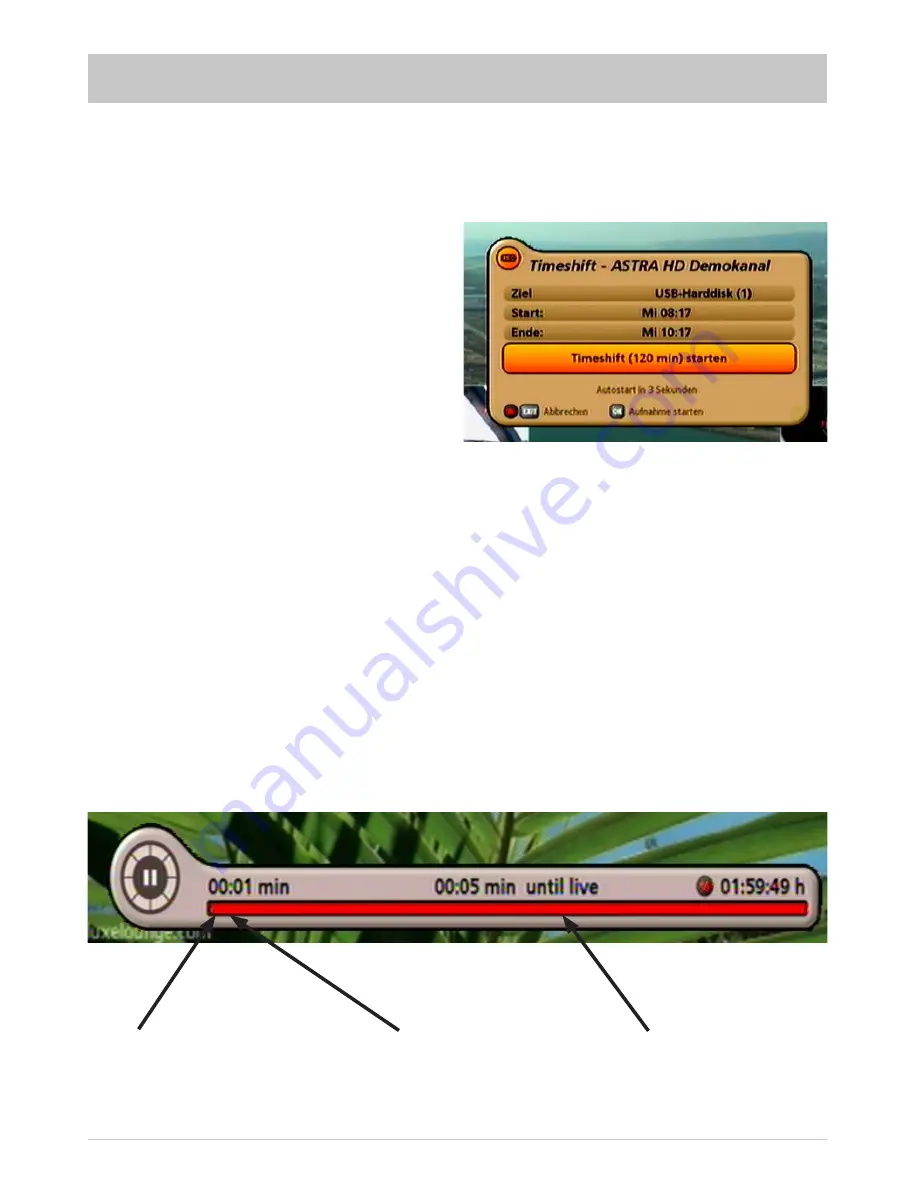
Time-shifted segment
already viewed (see
time display 

02:33

min)

Remaining timeshift
buffer
(see time display  

01:54:18 h)

Difference between the time-shifted
segment and the live broadcast (see 
time display  

03:09 min)

- Target: If more than one storage medium is connected to the receiver or if a storage medium with several  
 

partitions has been connected, you can select the storage medium or partition on which the record   

ings are to be stored.
- Start:  Time of start (can also be entered with the keypad)
- End: 

End time can also be entered with the keypad in case the standard recording time (two hours) is 

not long enough or too long.

Once all settings have been made, use the 

 buttons to access the line “ Start Timeshift (xxx min)”. 

Press 

 to start recording.

The receiver continues recording the programme in the background while you see a freeze-frame.

You can also modify the recording time while recording is being effected, as described in “Save/extend 
timeshift“. The receiver will display “II” and “REC”.

Press the 

 button to start timeshifted viewing. The following display will appear (Example):

Содержание UFS 902

Страница 1: ...Manual UFS 902 910 Application of external USB storage media for recording and playback ...

Страница 2: ...nal hard disk drive with USB connection The device can be connected on one of the two USB 2 0 interfaces on the receiver rear panel see image below The USB interface on the receiver front panel has not been designed for connection of USB storage media it is only intended for firmware uploads GENERAL NOTICE REQUIRED FIRMWARE UFS 902 910 EXTERNAL USB STORAGE MEDIA Please note that the USB 2 0 socket...

Страница 3: ... than one external storage device is connected to the receiver use the buttons to select the storage device to be formatted FORMATTING AND SCANNING AN EXTERNAL USB STORAGE MEDIUM FORMATTING AN EXTERNAL USB STORAGE MEDIUM Your external storage medium must be formatted to FAT32 If your storage medium does not have this format you must first format it in the receiver menu USB Device Management see Me...

Страница 4: ...with the button The following display will appear Formatting leads to permanent deletion of all data saved on the storage medium Confirm message with the button The following display will appear Once formatting has been completed the receiver returns to the TV picture FORMATTING AND SCANNING AN EXTERNAL USB STORAGE MEDIUM ...

Страница 5: ...s likely If more than one external storage medium is connected to the receiver use the to select the storage medium that is to be scanned Use the buttons to choose the selection field Scan and confirm scanning by pressing the but ton The following display appears Confirm by pressing the button The following display will appear After scanning has been completed the receiver automatically switches b...

Страница 6: ...During the recording process only the programme being recorded may be viewed Selected partition Start Time of start can also be entered with the keypad End End time can also be entered with the keypad Once all settings have been made use the buttons to access the last line Recording Press the button to begin recording The external USB storage device connected to the receiver at the time the record...

Страница 7: ...ss the yellow button Use the buttons to choose the programme to be recorded and then press the button The following display appears Example Prior to each recording make sure that there is enough free memory left on the external storage device or partition see image on right In this example the external storage device still has enough memory capacity for approximately 14 hours of standard programme...

Страница 8: ...he recording will be performed on days specified by you at times specified by you Series recording The selected programme will be set up by the EPG for recording every time it is transmitted may even be on different channels This function does however require a daily update of the EPG data the data are updated automatically when switching off into stand by mode Use the cursor buttons to select the...

Страница 9: ...ies from which there are recordings will be displayed Use the buttons to select the desired recording Press to start playback To exit the re cording list press the once more The selected recording can then be viewed in full screen mode Playback continues from the last play position If playback is started with the button the recording can be viewed in full screen mode and from the very beginning RE...

Страница 10: ...ind speeds step by step Press Play to return to normal playback speed Play Press the Play button to exit rewind fast forward mode or pause mode and resume normal playback Stop Playback or fast forward rewind is stopped and the receiver automatically jumps to the recording list Cursor up Each time the cursor button up is pressed the position in the recording from which playback resumes shifts 10 fo...

Страница 11: ... edit Next press the button to call up the Editing menu The following display will appear Use the buttons to select the desired task Delete Once you have confirmed your selection with the button the recording you selected is irrevocably deleted Lock Unlock To lock unlock the recording you have previously selected you must first enter the 4 digit PIN code default 0000 after confirming with the butt...

Страница 12: ...n the tasks Copy to and Move to Before executing any one of these tasks always make sure that there is enough free memory on the desired target location Copy to To copy a recording you have previously selected to another partition or to another connected USB storage device use the buttons to select the target partition or desired USB storage device and confirm with the button The recording is copi...

Страница 13: ... time display 03 09 min Target If more than one storage medium is connected to the receiver or if a storage medium with several partitions has been connected you can select the storage medium or partition on which the record ings are to be stored Start Time of start can also be entered with the keypad End End time can also be entered with the keypad in case the standard recording time two hours is...

Страница 14: ... the hard disk you must proceed as described under Save extend timeshift recording You can activate the recorder functions Fast forward to the point the broadcast has reached at the time Rewind to the point at which you started recording the programme Pause and Playback with the corresponding buttons If you press the button the TV picture freezes but recording continues in the background To resume...

Страница 15: ... has been installed e g the USB device connected to the receiver at the start of recording is not the one which was connected during programming of the recording The receiver is executing a task in the background After the task has been completed the message will disappear and the receiver can be operated as usual If formatting of the USB storage device is confirmed with the OK button all data sav...

Страница 16: ...echnical modifi cations USB device is being formatted The USB storage device is write protected Check and or deactivate the device Recording or deletion is not possible The connected USB storage device is full No recordings can be made on the device Please check the recording list and delete recordings if necessary MESSAGES ERROR MESSAGES ...

Отзывы: