15
Figure:
E1
INSTALLATION AND CONNECTION
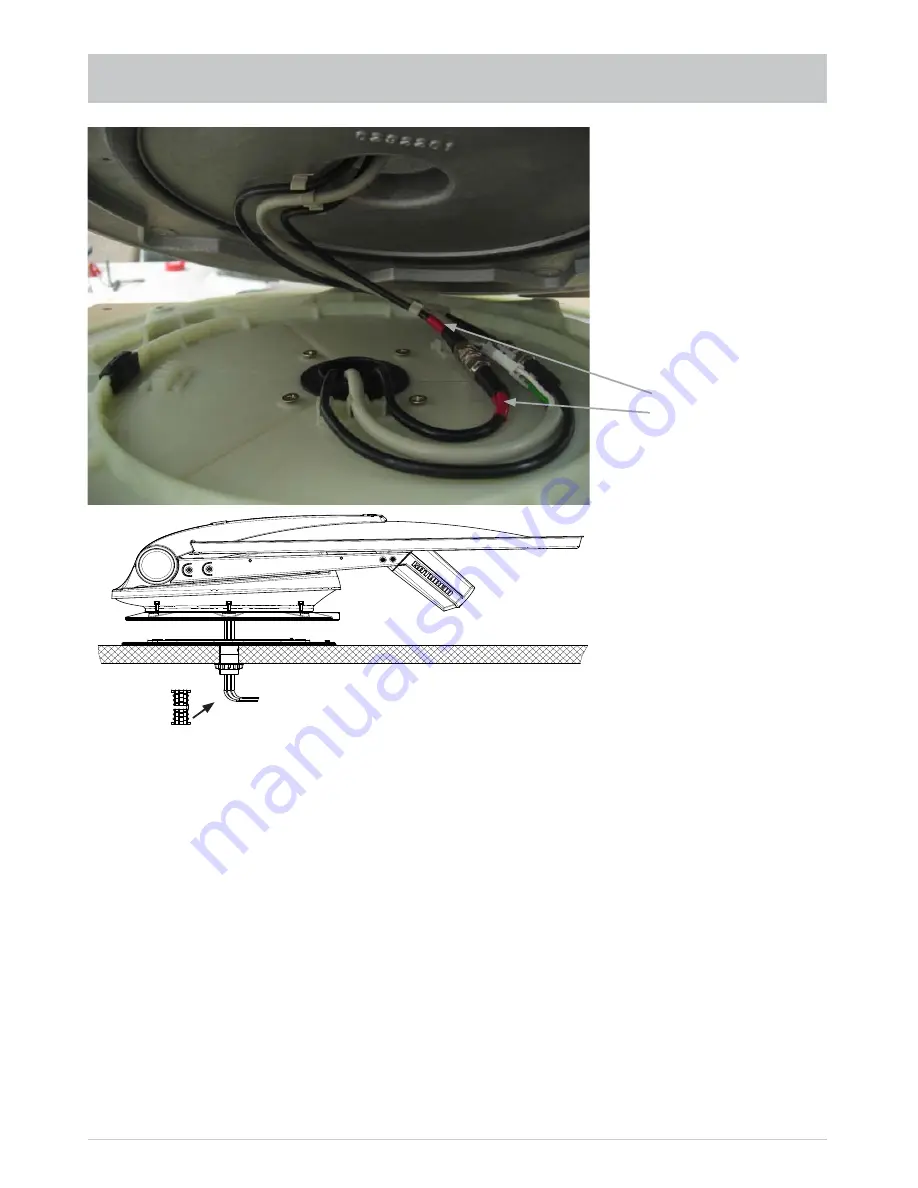
Figure:
E2
Master coaxial cable
(marked red)
• Lift up the turntable and place it carefully on the mounting plate facing in the direction of travel
(see illustrations Fig. E) (do not step on the plug connectors and do not kink/crush the cables!)
The through holes on the turntable must be perfectly aligned with the threaded holes on the
mounting plate.
• Allow the turntable to rest on the front edge of the mounting plate. Keep the turntable supported
at an angle (see Fig. E1) and insert a suitable piece of wood underneath it.
•
Now lay and connect the turntable cables in the mounting plate (as indicated on the mounting plate,
see Fig. E1). Take particular care that the two master coaxial cables, marked red, are connected
to each other. Initially tighten the coaxial cable plugs
fi
nger-tight, using no tools, then tighten them
lightly using an open-ended 11 AF spanner.
•
Now lower the turntable back on to the mounting plate, taking care whilst so doing that the cables
are fed through the cable gland and are not snagged.
• Apply a little adhesive sealant to the six threaded holes in the mounting plate and screw the
fastening screws into the thread. Tighten the screws to a torque of 6 Nm.
Sealing gasket


