background image


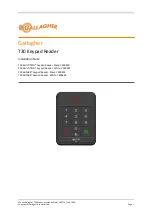
Status LED 

(allows you to check the status of the alarm panel): 

If you press the status button 

 of the keypad, the status LED will display 

the current status of the alarm panel: 

LED lights up red:  

alarm panel is in arm mode 

LED flashes red:  

alarm panel is in home mode 

LED lights up blue:  

alarm panel is in disarm mode 

LED flashes blue:  

an error occurred, e.g.: 

o


Alarm panel does not respond 

o


Incorrect PIN code 

o


Attempted to switch to home mode while the alarm panel is in arm 

mode 

o


Forced activation of arm mode while alarm panel or sensors report an 

error 


Error LED: 

LED flashes orange: system error, e.g.: 

o


No SIM card 

o


GSM not ready 

o


Tamper contact is open 

o


Power failure 

o


Sensor is out of range 

o


Sensor is open 

o


Battery of a sensor is low 

o


When disarming, there is still an alarm in the alarm memory. 


Battery: 

The keypad requires a CR123A 3V lithium battery. The average battery life is 

two years. If the battery is low, the orange status LED flashes. 

Connecting the keypad and putting it into operation 

Installation of the keypad: 

1.


Remove the front cover of the keypad by unscrewing the screw at the bottom. 

2.


At the back cover you find two cavities. They are intended to be pierced – 

thus, you can mark the locations for required drill holes for a wall installation. 

3.


Use screws to install the keypad on a wall. 

4.


Attach the front cover again. 


Содержание 2220000007

Страница 1: ...1 1 User Manual FKP 100 2220000007 Keypad...

Страница 2: ...nual were compiled with the greatest care However KATHREIN Digital Systems GmbH cannot entirely exclude mistakes in this manual Therefore we do not assume any legal responsibility or liability resulti...

Страница 3: ...exposure when operating the device in a commercial environment This product generates uses and may emit radio energy It may in addition interfere with other radio communication systems if not install...

Страница 4: ...ctric power lines or magnetic fields as this may impair the transmission quality significantly Do not install the keypad directly on iron or aluminium surfaces as this may impair the wireless transmis...

Страница 5: ...pment WEEE and therefore must not be disposed of with domestic waste Dispose of the device via your local collection point for waste electronic equipment This product contains software programs subjec...

Страница 6: ...ase note The dual key commands 1 3 12 4 6 11 7 9 10 are disabled by default To use dual key functions only press the two corresponding buttons on the keypad Do not press any other buttons LED indicato...

Страница 7: ...lashes orange system error e g o No SIM card o GSM not ready o Tamper contact is open o Power failure o Sensor is out of range o Sensor is open o Battery of a sensor is low o When disarming there is s...

Страница 8: ...anel menu Sensors Range and press Start 3 Press the 7 4 The sensor and the signal strength should be indicated The higher the indicated number the better the reception 1 9 5 To exit the installation m...

Страница 9: ...llation PIN code 4 digits Press the pound button The new installation PIN code is now saved 8 Enable switching to arm home mode without entering a PIN code 9 Disable switching to arm home mode without...

Страница 10: ...vated After five incorrect PIN code inputs the keypad is locked for 15 minutes Change the standard PIN code 1234 as well as the installation PIN code 0000 of the keypad to ensure that no one else can...

Страница 11: ...______ __________________________________________________ __________________________________________________ __________________________________________________ ________________________________________...

Страница 12: ...______________ __________________________________________________ __________________________________________________ __________________________________________________ ________________________________...

Отзывы: