12
5555----2 How to install the machine
2 How to install the machine
2 How to install the machine
2 How to install the machine
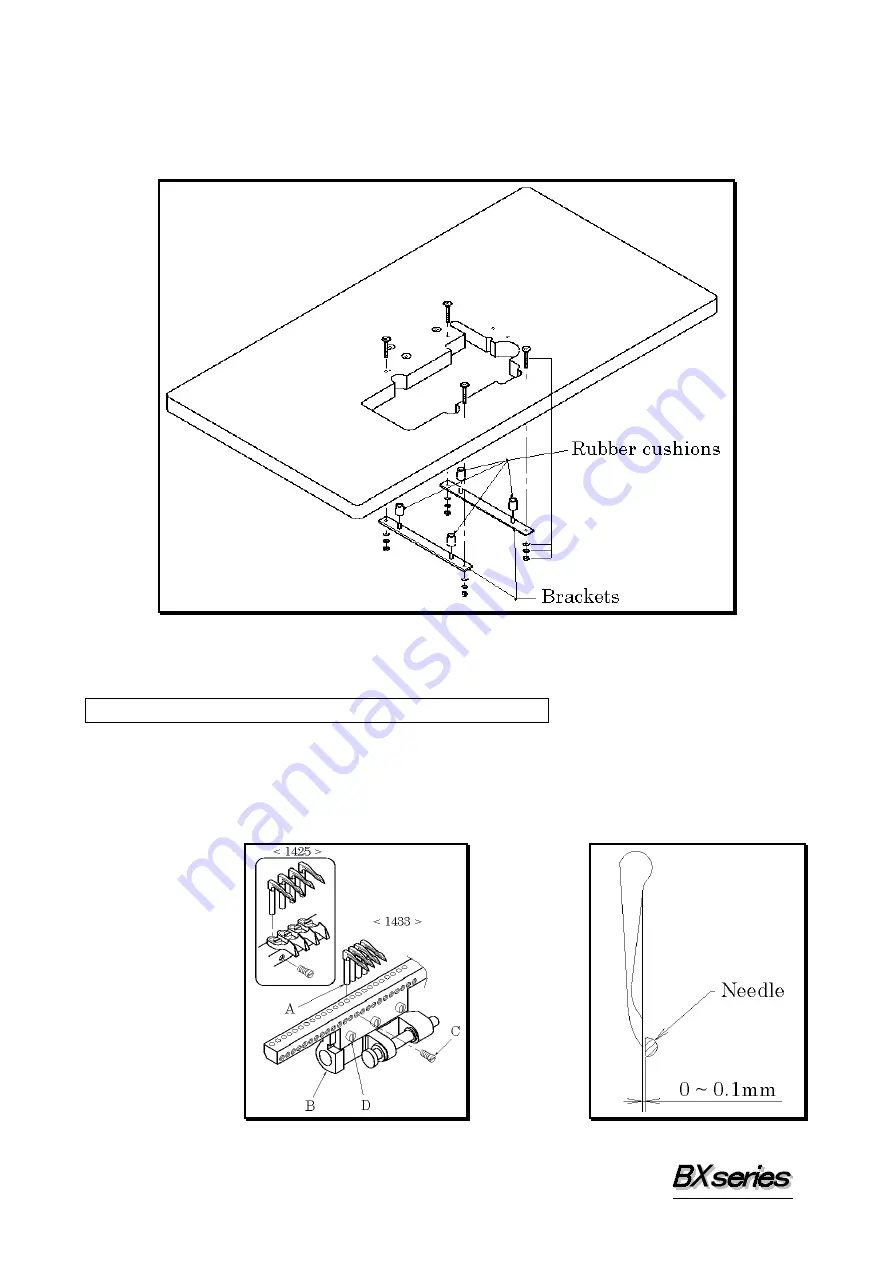
Install the brackets on the underside of the table board (see the illustration below).
Fit the rubber cushions onto the brackets.
Mount the machine head on the rubber cushions.
【
6
】
TIMING OF THE LOOPER TO THE NEEDLES
6666----1 Angle for installing the looper and position of the looper holder bracket
1 Angle for installing the looper and position of the looper holder bracket
1 Angle for installing the looper and position of the looper holder bracket
1 Angle for installing the looper and position of the looper holder bracket
Insert the looper into the looper holder until bottom A of the looper touches looper holder
bracket B. Then tighten screw C. When the looper passes the needle, there should be a
clearance of 0~0.1mm between the point of the looper and the scarf of the needle.
Adjustment is made by loosening screw D and moving the looper holder bracket left or
right.
Содержание BX Series
Страница 6: ...3 Threading diagram for BX1425P...
Страница 7: ...4 Threading diagram for BX1433P...
Страница 8: ...5 Threading diagram for BX1025...
Страница 9: ...6 Threading diagram for BX1033...
Страница 10: ...7 Threading diagram for BX1425PSM...
Страница 11: ...8 Threading diagram for BX1433PSM...
Страница 23: ...20 No 5 No 5 No 5 No 5 No 6 No 6 No 6 No 6 No 7 No 7 No 7 No 7 No 8 No 8 No 8 No 8 N N N No 9 o 9 o 9 o 9...


