background image

Kanguru 

Slim FC-RW 


- 16 - 

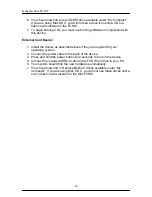
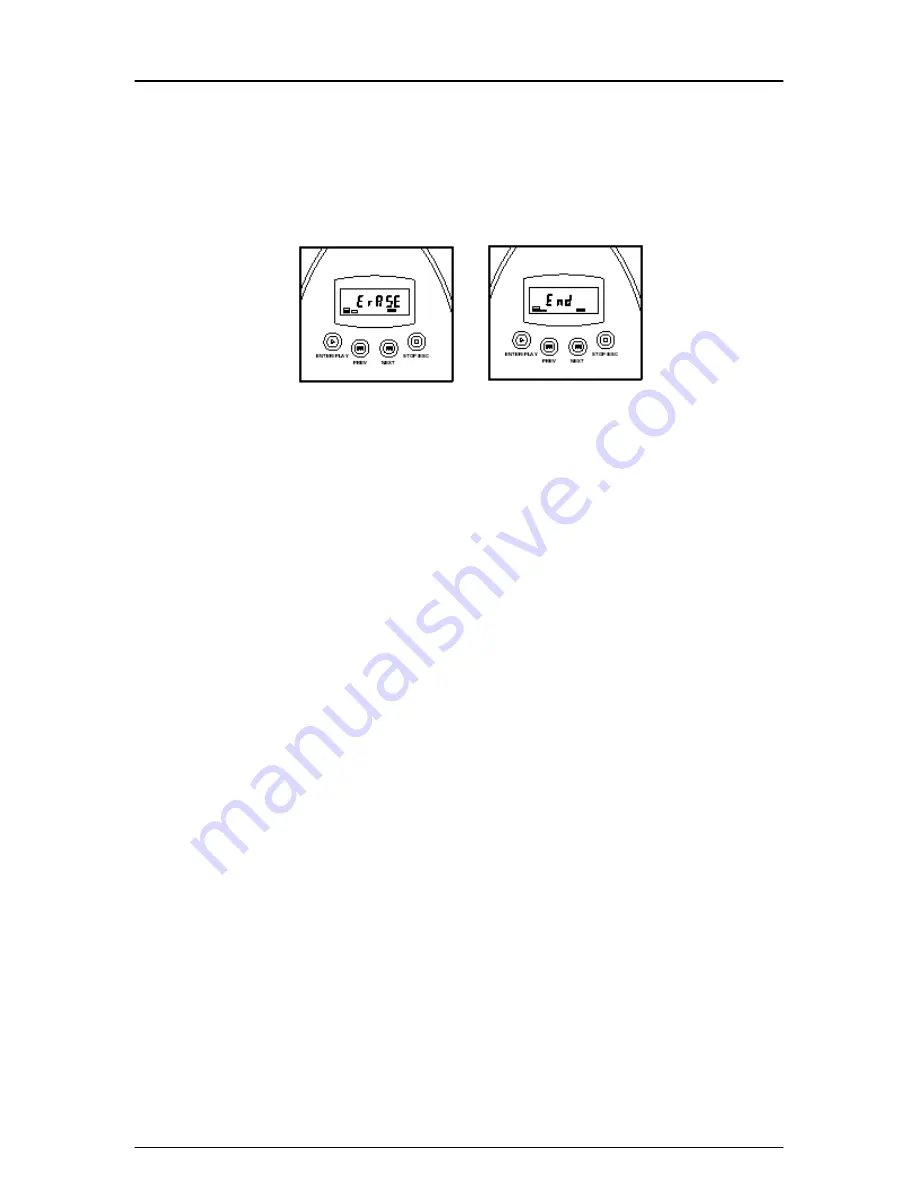
3. Pres the 

PREV

 and 

NEXT

 buttons until 

ERASE

 appears on the screen. 

4. Press the 

ENTER/PLAY

 button to enter this menu and 

GO

 will appear. 

5. Press the 

ENTER/PLAY

 button to begin erasing the CD-RW and 

ERASE


will appear again. Wait until the 

END

 message appears before continuing.  

6. Press the 

STOP/ESC

 button to get back to the main menu and again to 

exit.  


Содержание Slim FC-RW

Страница 1: ...Kanguru Slim FC RW 1 USER S GUIDE Copyright 2004 All Rights Reserved ...

Страница 2: ...s not apply if in the judgment of Kanguru Solutions the product fails due to damage from handling accident abuse misuse or if it has been used in a manner not conforming to the product s instructions has been modified in anyway or the warranty labels have been removed If the product proves defective during this warranty period call Kanguru Solutions Technical Support in order to obtain a RMA requi...

Страница 3: ...l la as sh h C Ca ar rd ds s 1 15 5 Basic Operation Mode 15 Disk Spanning 15 Erasing a CD RW 15 5 5 O Op pe er ra at ti io on n U US SB B2 2 0 0 C CD DR RW W a an nd d C Ca ar rd d R Re ea ad de er r 1 17 7 Driver Installation 17 External CDRW 17 External Card Reader 18 6 6 D DV VD D M Mo ov vi ie e P Pl la ay yb ba ac ck k 1 19 9 Playing a DVD 20 Basic Functions 20 6 6 V Vi ie ew wi in ng g F Fl ...

Страница 4: ...te Flash Cards that are larger than a blank CD 27 Q2 Can I duplicate multiple Flash Cards to the same CD 27 7 7 T Tr ro ou ub bl le es sh ho oo ot ti in ng g 2 28 8 It seems my flash cards do not fit in the card reader 28 Error Codes 28 8 8 W Wa ar rr ra an nt ty y 2 29 9 Tech Support 29 ...

Страница 5: ...t media types including Compact Flash I II IBM Micro Drive Smart Media Secure Digital Memory Stick Memory Stick PRO and Multimedia cards The FC RW also works as a CD RW when plugged into a USB2 0 port backwards compatible with USB1 1 or a portable DVD VCD player Kanguru Slim FCRW Package Contents 1 Kanguru Slim FCRW 1 Rechargeable Battery 1 Audio Cable 1 Video Cable 1 USB Cable 1 Remote Control 1 ...

Страница 6: ...PEG WAV playback Video out for PAL NTSC and stereo audio out Supports disc spanning for duplicating flash cards larger than 1GB USB2 0 connectivity backwards compatible with USB1 1 Works as a 24X CD RW drive when connected to a computer Works as an 8 1 Card Reader when connected to a computer Includes a remote control for media playback and duplication LCD Display with easy to use push button cont...

Страница 7: ...um Ion Rechargeable UL approved 500 Recharge Cycles Playback time approximately 2hrs of continuous usage Dimensions 6 5 W x 8 L x 1 H Weight 520g w o battery 620g w battery Power Adapter 9V 2 5A AC DC DC input jack Interface USB 2 0 for External Card Reader CD RW Video Output Composite and S Video for Pal and NTSC Audio output Stereo and Optical 5 1 out with component video out Supports Operating ...

Страница 8: ...Kanguru Slim FC RW 8 2 Product Description About the Kanguru Slim FCRW ...

Страница 9: ... 7 Audio Optical Out Audio out to a TV stereo or headphones 8 USB Port USB Port for connecting to a computer 9 STOP ESC Button Stops playback of CD 10 NEXT Button Skips to the next track chapter 11 IR Port Signal in for the remote control 12 CD RW Eject Button Ejects the CD 13 LCD Display Displays the status of the FCRW 14 MS SD MMC slot Insert MS SD MMC flash cards here 15 CF MD card slot Insert ...

Страница 10: ...Kanguru Slim FC RW 10 About the Remote Control ...

Страница 11: ...ing of the whole CD DVD and no repeat 17 REP A B Marks the start A and end B points for repeated playback 18 EJECT Ejects the disk 19 TITLE Displays the DVD s title screen where you can set various settings such as language and sound preferences Use the MENU CONTROL buttons 7 to navigate around the screen 20 ANGLE Some DVD movies have images shot at different camera angles Use this to select which...

Страница 12: ...t the battery cover up 3 Insert the battery with the metal contacts aligned with the metal contacts in the battery compartment 4 Close the battery cover Replacing the Remote Control s Battery 1 Press the clip in 1 2 Gently slide the battery holder out 2 3 Replace the battery with a new one as shown in the diagram 4 Gently slide the battery holder back into place ...

Страница 13: ... flashes orange while charging and is a steady green when fully charged Inserting Flash Memory Cards Position the Flash Card in the direction shown in the diagram below Make sure the flash card is inserted in the correct slot and oriented correctly Please note a slight amount of resistance will be felt if the card is inserted correctly To remove a Flash Card grasp the end firmly between your thumb...

Страница 14: ...anguru Slim FC RW 14 Inserting and Removing a CD To insert a CD press the eject button at the front of the Kanguru Slim FCRW Insert or remove a CD DVD from the Kanguru Slim FCRW and gently close the tray ...

Страница 15: ...ce as it may cause damage to the unit Note2 Do not leave CDs in the device while transporting Disk Spanning The Kanguru Slim FCRW supports discs spanning which allows you to copy from flash cards that are larger than the space available on the CD R RW disc When the CD becomes full the Slim FCRW will prompt you to insert a new blank disc After inserting a new disc the burning will automatically con...

Страница 16: ...reen 4 Press the ENTER PLAY button to enter this menu and GO will appear 5 Press the ENTER PLAY button to begin erasing the CD RW and ERASE will appear again Wait until the END message appears before continuing 6 Press the STOP ESC button to get back to the main menu and again to exit ...

Страница 17: ...k on the appropriate selection according to the operating system you are running 3 An installation wizard will appear on your screen 4 Please follow the installation wizard according to your operating system 5 After the installation wizard has finished you may need to restart your PC if prompted External CDRW 1 Install the drivers as described above if they are required for your operating system 2...

Страница 18: ...l the drivers as described above if they are required for your operating system 2 Connect the power cable to the back of the device 3 Press and hold the power button for 2 seconds to turn on the device 4 Connect the included USB2 0 cable to the FCRW and then to your PC 5 Your system should find the new hardware automatically 6 You should now find 3 Removable Disk drives available under My Computer...

Страница 19: ... AV cable yellow plug from the Slim FCRW s Video S Video socket to the Video In or S Video In socket of your TV If your TV has Component In sockets follow these steps 1 Connect the audio cable red and white plugs from the Audio Optical socket to the Audio In socket of your TV 2 Connect the component cable from the Slim FCRW s Component socket to the RGB Component In sockets of your TV ...

Страница 20: ... button to use this feature ZOOM Cycles through three zooms levels 1 5x 2x 3x and Zoom off AUDIO Cycles though the DVD s available audio languages PLAY Starts playing a multimedia file or continues playback after pausing ARROW BUTTONS Selects a menu item in a DVD menu ENTER To choose an item on the DVD menu Begins playback if the main Kanguru Slim FCRW screen is being displayed MUTE Disables the s...

Страница 21: ... NAV and exiting from the setup menu the following screen will appear 2 Navigate through folders and select files using the remote control s arrow buttons Pressing a number on the remote control will also select that file or folder If you are in a subfolder the top right menu item will be which means to go back to the previous folder 3 Use the left and right buttons on the remote control to rotate...

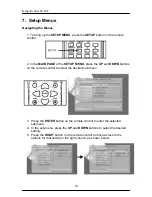
Страница 22: ...U press the UP and DOWN buttons on the remote control to select the desired sub menu 3 Press the ENTER button on the remote control to enter the selected submenu 4 In the sub menu press the UP and DOWN buttons to select the desired setting 5 Press the RIGHT button on the remote control to move across to the options for that setting in the right column as shown below ...

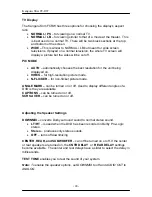
Страница 23: ... MENU and press ENTER to return to the main menu Adjusting the TV Settings 1 Enter the SETUP MENU and enter the PREFERENCES page and select TV Type 2 Select the TV type required Multi NTSC or PAL Your selection must also match the format of the source DVD 3 Return to the main menu and enter the GENERAL SETUP page 4 Scroll down to VIDEO OUTPUT 5 Select the video output S VIDEO or COMPONENT that you...

Страница 24: ...on picture mode N FLICKER for non flicker picture mode ANGLE MARK can be turned on or off Used to display different angles of a DVD is they are available CAPTIONS can be turned on or off SCR SAVER can be turned on or off Adjusting the Speaker Settings DOWNMIX converts Dolby surround sound to normal stereo sound LT RT is used when the DVD has been recorded in Dolby Pro Logic stereo Stereo produces ...

Страница 25: ...slider to adjust this mode PRO LOGIC Can be set to On Off or Auto LPCM OUTPUT Select 48K or 98K as the digitizing speed for LPCM This is an uncompressed format for audio Preferences AUDIO SUBTITLE DISC MENU DVDs may contain a number of different languages for Audio Subtitle and Disc Menu Setting these options automatically selects the languages to be used by the DVD if those languages are containe...

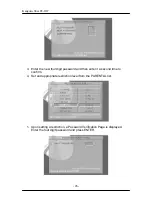
Страница 26: ...our digit password and then enter it a second time to confirm 4 Set and appropriate restriction level from the PARENTAL list 5 Upon setting a restriction a Password Verification Page is displayed Enter the four digit password and press ENTER ...

Страница 27: ... on the CD R RW disc The Flash Cards must be copied individually and must be within the capacity left on the CD Q3 Can I duplicate the same Flash Cards to a CD multiple times A3 Yes as long as the Flash Card s capacity can fit on the space available on the blank CD For example you could duplicate a full 128MB flash card to a 700MB CD 5 separate times Q4 Is there any way to only copy certain portio...

Страница 28: ...alled these drivers and you are still having problems use device manager to update the correct drivers It seems my flash cards do not fit in the card reader Please make sure that you have the cards properly aligned with the card reader s slot Use the images pictured on the front of the drive for guidance Error Codes Code 1 No Disc is detected Code 2 No Flash Card is detected Code 3 Read Flash Card...

Страница 29: ...ons liability exceed the price paid for the product from direct indirect special incidental or consequential software or its documentation Kanguru Solutions offers no refunds for its products after 30 days of purchase Kanguru Solutions makes no warranty or representation expressed implied or statutory with respect to its products or the contents or use of this documentation and all accompanying so...

Отзывы: