Kanguru Clone 12HD Скачать руководство пользователя страница 6

KanguruClone 

12HD


- 6 - 

CHAPTER 2   

Getting to Know Your KanguruClone 

12HD


Hardware Setup 


1.  Before plugging in the AC Power Cable, please make sure that the voltage 

is adjusted to the same as your local voltage.   

 
2.  The unit is designed to hold the Master drive in the bay located on the left 

side of the unit. Before connecting the Master drive, make sure that the 
jumpers are set to either 

MASTER

 or 

CABLE SELECT

. You may now 

connect the Master drive. 


3.  There are four corresponding IDE ribbon cables and power connectors for 

each of the attached Target drives.  Before connecting the Target drives, 
make sure that the jumpers are set to either 

MASTER

 or 

CABLE 

SELECT

.  You may now connect the Target drive(s). 


4.  Note that the drives are not powered until you actually start a copy 

operation. 


5. 

Note:

 The supplied cables are 

NOT

 standard IDE cables like the ones 

found in a PC.  Do not attempt to use these cables in a PC or to use PC 
cables with the KanguruClone

 12HD

.  


6.  You are now ready to begin using your KanguruClone

 12HD.  

To begin, 

turn on the unit with the power switch located on the back panel, select the 
desired copy function, and press select. 


Things to remember: 
 

 The 

KanguruClone

 12HD 

is powered by an internal power supply that is 

controlled by a rocker switch located at the rear of the unit.


 The 

KanguruClone

 12HD 

supplies power to all drive during a cloning 

session.  There is no need to connect an external power source to the 
drives. The unit can supply up to 1.5A at 12V and up to 1A at 5V to each 
drive.


  It is OK to connect and disconnect Master or Target drives while the 

KanguruClone

 12HD 

is powered on. However, do NOT connect or 

disconnect drives during a cloning session. The status light will blink to 
indicate the unit is cloning.


Содержание Clone 12HD

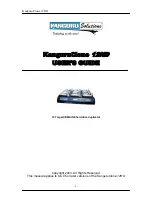
Страница 1: ...KanguruClone 12HD 1 KanguruClone 12HD USER S GUIDE 12 Target UDMA IDE hard drive duplicator Copyright 2003 All Rights Reserved This manual applies to 4 6 05 or later versions of the KanguruClone 12HD ...

Страница 2: ...internal components The warranty does not cover any IDE SATA or Power cables This warranty does not apply if in the judgment of Kanguru Solutions the product fails due to damage from handling accident abuse misuse or if it has been used in a manner not conforming to the product s instructions has been modified in anyway or the warranty labels have been removed If the product proves defective durin...

Страница 3: ...g t to o K Kn no ow w Y Yo ou ur r K Ka an ng gu ur ru uC Cl lo on ne e 1 12 2H HD D 6 6 Hardware Setup 6 Things to remember 6 The User Interface 7 MAIN MENU 7 SETUP MENU 7 FUNCTION MENU 7 Function Diagram 8 C CH HA AP PT TE ER R 3 3 C Cl lo on ni in ng g 9 9 Using your KanguruClone 12HD 9 Verifying Cloned Hard Drives 11 Diagnostic 12 Tool 12 Configuration 13 C CH HA AP PT TE ER R 5 5 F F A A Q Q ...

Страница 4: ...ra fast copy speeds of up to 4GBs min the KanguruClone 12HD is one of the fastest cloning systems available KanguruClone 12HD Package Contents 1 KanguruClone 12HD unit with internal power supply 1 AC power supply 25 3 5 IDE ribbon cables 25 2 5 IDE converters 25 8cm HDD power cables This manual w user registration If any of the above items are missing please call Kanguru Solutions Tech Support dep...

Страница 5: ...are Compares HDDs with different capacities Area Compare Compares a defined Area of the Master HDD Ration Compare Compares a defined Percentage of the Master HDD Agency Approvals UL 1950 FCC Part 15 Class A CE Diagnostic tools Scan a drive for bad sectors Full Erase a drive clean Repair Damaged sectors Advanced Features Supports ATA 6 standards of 48 bit addressing to support drives greater than 1...

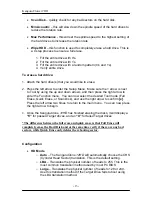
Страница 6: ...opy operation 5 Note The supplied cables are NOT standard IDE cables like the ones found in a PC Do not attempt to use these cables in a PC or to use PC cables with the KanguruClone 12HD 6 You are now ready to begin using your KanguruClone 12HD To begin turn on the unit with the power switch located on the back panel select the desired copy function and press select Things to remember The KanguruC...

Страница 7: ...here are three tiers to the KanguruClone 12HD s user interface MAIN MENU Press the left arrow to enter the Set Up Menu Press the up and down arrows to navigate modes COPY DIAGNOSTIC and TOOL Press the right arrow to start the selected mode SETUP MENU Press the left arrow to enter the Setup Menu Press the up and down arrows to navigate modes Press the right arrow to enter the function menu for that...

Страница 8: ...GURATION Random Seek Seq Seek Write Pattern Read Verify Resize Compare Full Erase Scan Disk Quick Erase HD Mode Power On Wait Power Off Wait Cap Chk Security Set Copy Area Set Copy Ratio HD Info Update Version Ratio Compare Area Compare Area Copy Ratio Copy Min Acoustic Max Performance FREEMID Wipe HDD Set Pattern Wipe Cycles About ...

Страница 9: ...apacities This mode only copies the sectors with information and skips the blank sectors This mode is faster than Disk Copy but slower than Brief copy because it needs a little time to calculate the capacity difference between the Master and Target drives You can only use two different capacities of Master and Target drives E g a Master of 60GB and Target drives of 20GB Area Copy this mode allows ...

Страница 10: ...n press the right arrow to enter the Function menu You can now select the desired Copy mode Disk Copy Brief Copy or Resize Copy and use the right arrow to confirm x Press the left arrow two times to return to the main menu You can now press the right arrow to begin cloning 5 Once the KanguruClone 12HD has finished cloning it will display a V for passed Target drives and an X for failed Target driv...

Страница 11: ...o disable To begin comparing 1 Leave the all drives in place after a cloning session has completed 2 The Compare functions are located under the Copy Mode By default none of the Compare functions are enabled so you will have to enter the Setup Menu to select the desired function Follow Step 3 to do so 3 Press the left arrow to enter the Setup Menu Make sure the arrow is next to Copy by using the u...

Страница 12: ...Attach the hard drive s that you would like to run the diagnostic tests on 2 Press the left arrow to enter the Setup Menu Make sure the arrow is next to Diagnostic by using the up and down arrows and then press the right arrow to enter the Function menu You can now select the desired Diagnostic mode Random Seek Seq Seek Write Zero or Read Verify and use the right arrow to confirm x Press the left ...

Страница 13: ...ion menu You can now select the desired Tool mode Full Erase Quick Erase or Scan Disk and use the right arrow to confirm x Press the left arrow two times to return to the main menu You can now press the right arrow to begin 4 Once the KanguruClone 12HD has finished erasing the disks it will display a V for passed Target drives and an X for failed Target drives The difference between the full erase...

Страница 14: ...ovided o Disable fully operational without any password Set Pattern This is used to define the Pattern you want to write to the destination drives Set Copy Areas This is used to define the beginning and ending of the Area you want to copy Set Copy Ratio This is used to define the beginning and ending of the percentage of the drive you want to copy HD Info Shows the information about the source har...

Страница 15: ...th different RPMs Q5 Do the Diagnostic features check the Source HDD or the Targets A5 The Diagnostic features will check the Target hard drives Q6 How does the duplicator handle multiple partitions on the Master drive A6 The machine will auto detect how many partitions in the source hard disk and then copy it but you are unable to select a partition to copy Q7 How does the duplicator handle multi...

Страница 16: ...l or entity 90 day warranty on labor After 90 days a 20 00 service charge will be applied to all RMAs Shipping back to the customer is covered during the first 90 days of purchase After 90 days the customer is responsible for shipping both ways RMA Procedure All Duplicators being serviced must be packed in the ORIGINAL PACKAGING If you do not have your original packaging you can purchase replaceme...

Страница 17: ...ng your KanguruClone 12HD or have any technical questions regarding any of our products please call our tech support department Our tech support is free and available Monday thru Friday 9am to 5pm EST Call 1 508 376 4245 or Visit our website at www KanguruSolutions com ...

Отзывы: