7
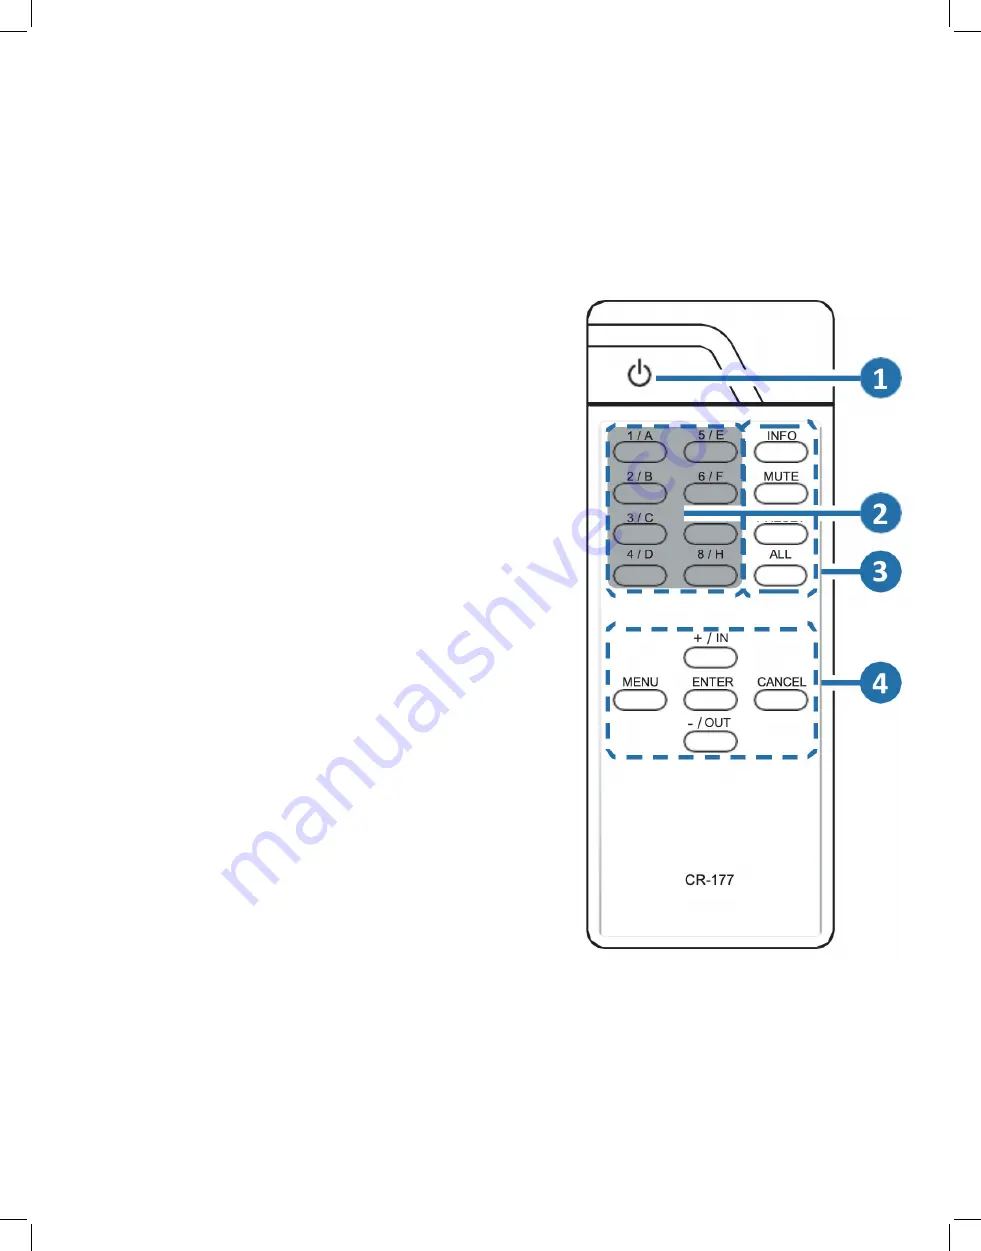
6.3 Remote Control
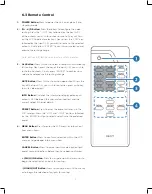
1. POWER Button:
Press to power the unit on or place it into
stand-by mode.
2. 1/A ~ 4/D Button:
Press these keys to configure the video
routing. Press the “-/OUT” key followed by the key (A~D)
of the outputs you wish to route a source to (they will flash
on the LCD to indicate selection). Next, press the “+/IN” key
followed by the input (1~4) you wish to route to the selected
outputs. Finally, press “ENTER” to confirm your selection and
execute the routing change.
Note: Buttons 5/E~8/H have no function with this matrix.
3. ALL Button:
Press this key to select all outputs simultaneously
for routing. Next, press the key of the input (1~4) you wish to
route to all outputs. Finally, press “ENTER” to confirm your
selection and execute the routing change.
MUTE Button:
Press this key to mute video output. Press the
key of the input (1~4) you wish to route then press mute key
to mute video output.
INFO Button:
Switches the information displayed on each
output’s OSD between the user customized text and the
current video/ Ethernet details.
PRESET Button:
Press to enter the preset call menu in the
LCD window. Press the “+/IN” and “-/OUT” buttons followed
by the “ENTER” button to select and activate the preferred
preset.
4. MENU Button:
Press to enter the LCD menu, or to back out
from menu items.
ENTER Button:
Press to confirm a selection within the LCD
menu or to go deeper into a menu item.
CANCEL Button:
Press to cancel newly made input/output/
preset routing selections before they have been confirmed.
+ (PLUS)/IN Button:
Press to navigate up within menus or to
begin the selection of an input for routing.
- (MINUS)/OUT Button:
Press to navigate down within menus
or to begin the selection of outputs for routing.
Содержание HDMX44A-18G
Страница 35: ...35 ...


