6
/
67
working mode, the indicator doesn’t
lights up.
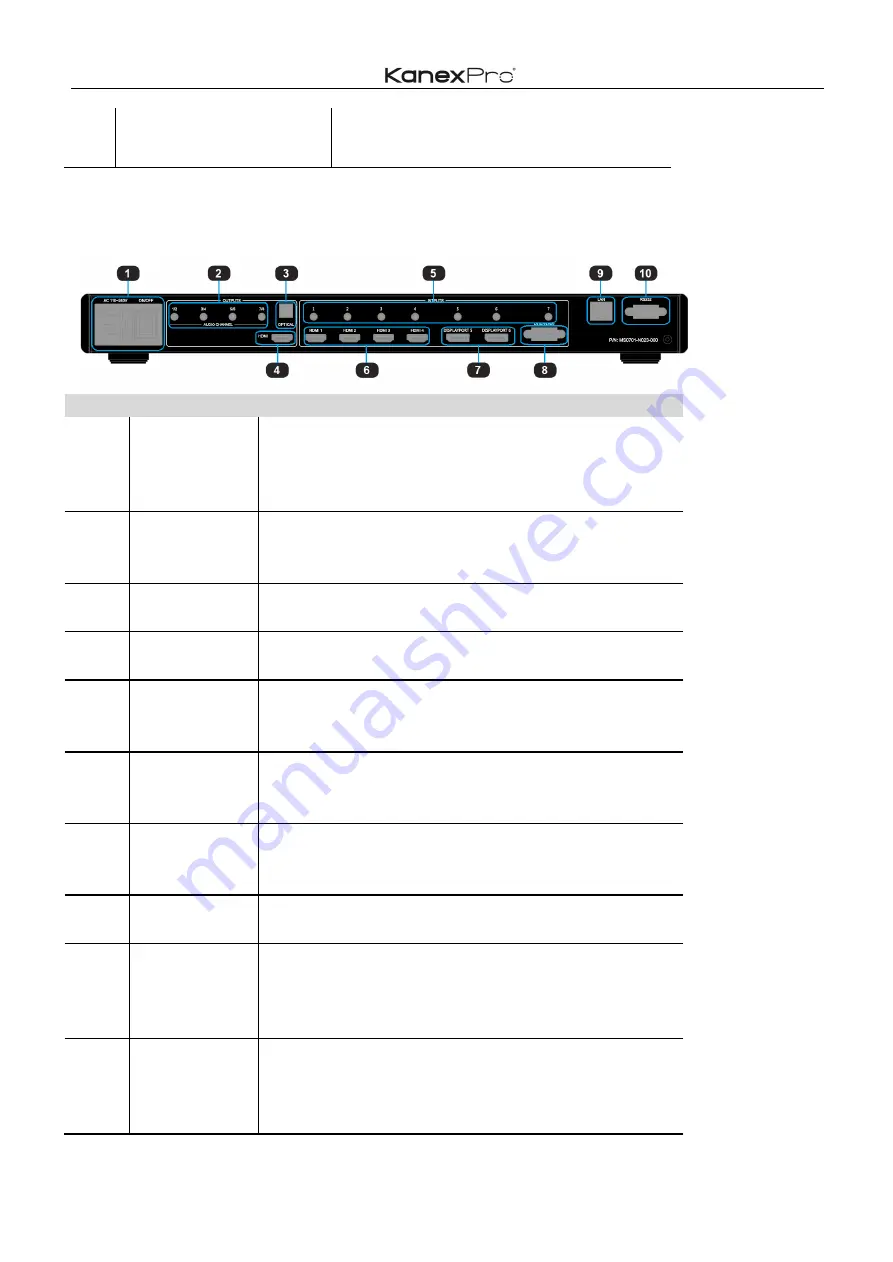
Rear Panel
ID
Name
Description
1
Power Switch
and 110/220
AC Power
Receptacle
Turn the power ON or OFF using this switch, Connect
the included AC power cord to this receptacle and
connect the plug to an available electrical outlet.
2
Analog audio
output
8 channel analog audio output, Connect a 3.5mm
mini-‐stereo cable from this jack to the Line In jack of a
multimedia system.
3
Optical output
Connect the optical output port to the digital audio
input port of your amplifier
4
HDMI output
Connect an HDMI cable from this port to an
HD or 4K displays.
5
Analog audio
input 1~7
7 channel stereo analog audio input, Connect a 3.5mm
mini-‐stereo cable from the Line Out jack on the audio
source to this jack.
6
HDMI input
1
~
4
Connect up to four Hi-‐Def. sources to these inputs
using HDMI cables.
7
DisplayPort
input 1
~
2
Connect up to two Hi-‐Def. sources to these inputs using
DisplayPort cables.
8
RGB/YPbPr
input
Connect up to Hi-‐Def. sources to this input using DB-‐15
cable or YPbPr-‐VGA cable.
9
IP Cont.
Connect an Ethernet cable between
this jack and a LAN to use IP control.
Refer to RS-‐232 and IP Configuration for
more information on setting up IP control.
10
RS-‐232
Connect an RS-‐232 cable from this port
to an RS-‐232 device. See RS-‐232 and
IP Configuration for more information on
setting up RS-‐232 control.
Содержание HDBT-VTSC72-4K
Страница 22: ...22 67 3 Audio Mute indicates 4 Volume adjustment 5 VGA Auto Menu 6 IP address is displayed ...
Страница 23: ...23 67 Advanced Settings RS232 Settings RS 232 port ...
Страница 35: ...35 67 ...
Страница 39: ...39 67 step1 Upload EDID to TEMP RAM ...
Страница 40: ...40 67 ...
Страница 62: ...62 67 EDID Contain the following options 1 EDID Copy 2 EDID Upload 3 EDID Download ...


