


5
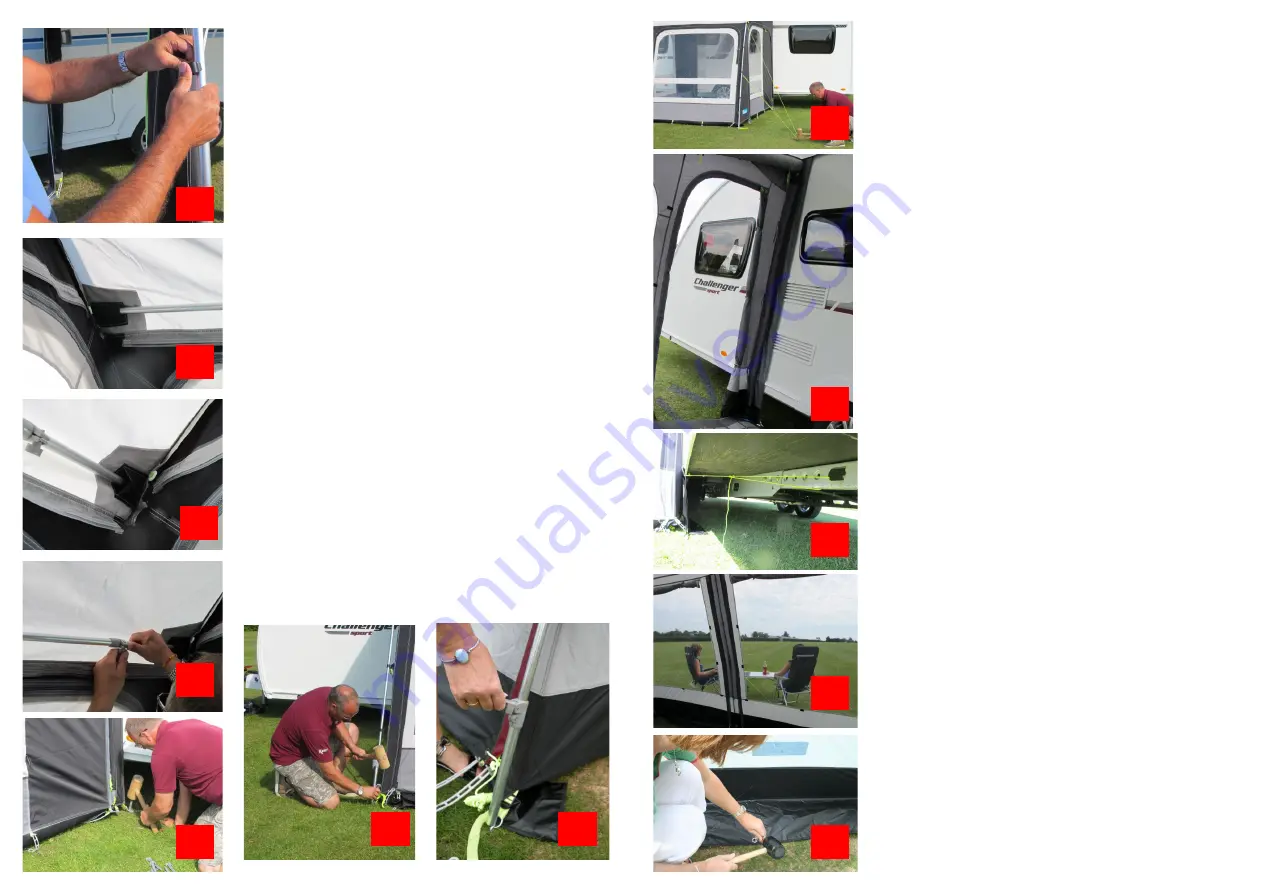
Attach the clips on the awning to the leg pole (7).
Continue with the other poles. It may make assembly
easier if you loosely guy out the two end poles as you
progress. When all the legs are in position take the
two aluminium stretcher poles into the awning. Put
one end in the pocket at the front corner of the
awning, just above the front window (8) and the other
end in the pocket in the opposite corner (9). Tension
and tighten the thumbscrew (10). Repeat with the
stretcher bar in the middle of the roof.
Ensure that
the thumbscrews are positioned in such a way
that the metal screw is not in contact with the
awning material.
Go outside, close all doors and entrances. Peg the
rear corners of the awning. The awning wall should
be vertical and the pegging point should be pulled
slightly under the caravan (11) to ensure a good seal
between awning and caravan. It may be necessary
to shorten the front legs to achieve this. The pegging
points have a range of possible pegging options.
Select a point that puts the awning under tension but
without over stressing. Once the rear corners have
been pegged, peg each front corner (12). It is
necessary to pull each pegging point diagonally to
create tension in the awning. It may also be
necessary to adjust the length of the leg using the
adjusting clamps (13). Peg the intermediate pegging
points, pegging the points either side of doorways
first. These doorways should be cross pegged - the
points should be pulled across each other. Once
completed the awning should look taut without too
many creases - if necessary readjust the pegging and
adjust the height of the legs and the tensioning
straps.
7
8
9
10
11
12
13
6
PEGS
The Rally awning comes complete with general
purpose wire pegs. These will be suitable for many
sites but there will be some instances where different
pegs will be necessary. Your dealer will stock a range
of pegs suitable for different types of ground. For
maximum effectiveness, pegs should be driven into the
ground at a 45°angle away from the pegging point.
CAUTION: Pegs can be sharp. DO NOT allow
children to play around the awning and ensure that
suitable protective footwear is worn.
GUY LINES
The Rally comes with guy lines pre-attached. We
recommend that these guy lines are used at all times
(14). Peg the guy lines so that the awning is under
tension without distorting the shape, they should run in
line with the seams. The guy lines can be adjusted
using the runners. Guy lines should be secured using
suitable pegs - see above. DO NOT allow children to
play around your awning. Guy lines are a trip hazard.
SEALING BUMPER PADS
To help create a seal between caravan and awning the
Rally has sealing bumper pads (15) sewn to the rear
panels. Using the rear pegging points, these bumpers
should be pulled towards the caravan. An improved
seal can be maintained by use of the optional rear
upright pole set. Insert the top of each pole into the
pocket in the top rear corner, adjust the height to bring
the pole under tension and then secure the pole to the
bumper pads using the tie tapes.
DRAUGHT SKIRT
The supplied draught skirt should be pulled through
the awning rail at the bottom of your caravan (16). The
ropes at the top corners can be tied to the caravan
chassis to make the skirt taut. Peg down and tension
the skirt using the webbing straps.
CURTAINS & BLINDS
The Rally has blinds to cover each window. The front
blinds can be rolled upwards and secured using the tie
tapes supplied. The blinds on the side windows roll to
the side.
MUD SKIRT
The Rally comes with an internal mud skirt to keep out
draughts. The mud skirt has eyelets that can be used
with pegs to secure it to the ground (18). DO NOT use
the mud skirt to peg your awning down.
14
15
16
17
18


