background image


20 


www.KALORIK.com 

MAXX Plus Air Fryer 

 200605 

servicing is needed, a Representative can confirm whether the product 
is under warranty and direct you to the nearest service location.  

If this is the case, send the product via your pre-paid postage back to 
Kalorik, along 

with proof of purchase

 and a

 return authorization number


indicated on the outer package, given by our Customer Service 
Representatives. Send to the authorized KALORIK Service Center 
(please visit our website a

www.KALORIK.com 

or call our Customer 

Service Department for the address of our authorized KALORIK Service 
Center).  

When sending the product, please include a letter explaining the 
nature of the claimed defect.  

If you have additional questions, please call our Customer Service 
Department (please see below for complete contact information), 
Monday through Thursday from 9:00am - 5:00pm (EST) and Friday from 
9:00am - 4:00pm (EST). Please note hours are subject to change.  

If you would like to write, please send your letter to:  

KALORIK Customer Service Department 

Team International Group of America Inc. 
16175 NW 49th Avenue  
Miami Gardens, FL 33014 USA 
 
Or call: 

Toll Free: +1 888-521-TEAM / +1 888-KALORIK 

Only letters can be accepted at this address above. Shipments and 
packages that do not have a return authorization number will be 
refused. 


Содержание MAXX PLUS FT 47822 SS MAXX PLUS FT 47824 SS MAXX PLUS FT 50876...

Страница 1: ...AIR FRYER FREIDORA DE AIRE EN 2 ES 21...

Страница 2: ...us a review We d love to hear about what you ve been cooking so tag kalorik on social media with your culinary masterpieces REGISTER YOUR PURCHASE To register your product simply complete the include...

Страница 3: ...t use 7 Using your maxx air fryer 8 Control panel 8 Preparing for use 9 Basket and trivet 9 Using the applianc 10 Using the preset menus 12 Defrost function 13 Egg function and bonus egg tray 14 Setti...

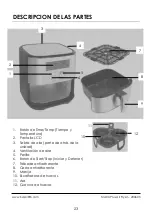
Страница 4: ...DESCRIPTION 1 Time Temperature button 2 LCD screen 3 Air Outlet back of the unit 4 Air intake vent 5 Dial 6 Start Stop button 7 Non stick trivet 8 Non stick basket 9 Handle 10 Egg tray 11 Egg tray ha...

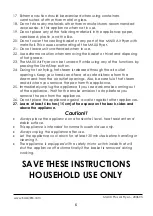
Страница 5: ...st authorized service facility for examination repair or adjustment 7 The use of accessory attachments not recommended by the appliance manufacturer may cause injuries 8 Do not use outdoors 9 Do not l...

Страница 6: ...e air outlet openings Keep your hands and face at a safe distance from the steam and from the air outlet openings Also be careful of hot steam and air when you remove the pan from the appliance 25 Imm...

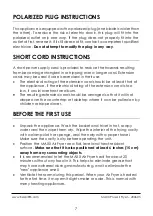
Страница 7: ...it could overheat and burn The resulting extended cord should be arranged so that it will not drape over the countertop or tabletop where it can be pulled on by children or tripped over BEFORE THE FI...

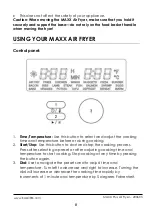
Страница 8: ...and adjust the cooking time and temperature before or during cooking 2 Start Stop Use this button to start and stop the cooking process Press after selecting a preset or after adjusting cooking time...

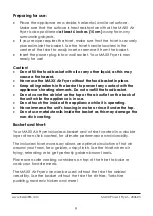
Страница 9: ...e s heating elements Do not overfill the food basket Do not cover the air inlet on the top or the air outlet on the back of the unit while the appliance is in use Do not touch the inside of the applia...

Страница 10: ...handle Always use oven mitts Unit is hot Determine the required preparation time and cooking temperature for the ingredients you are using see section Settings for reference Select a preset by turning...

Страница 11: ...king If you set the timer to half the required cooking time you will hear the timer go off when you have to shake the ingredients Tip If you set the timer to the full cooking time the timer will not g...

Страница 12: ...ps or utensils may scratch the coating of the basket When a batch of food is ready the MAXX Air Fryer is instantly ready for preparing another batch IMPORTANT If you notice the fan is not operating on...

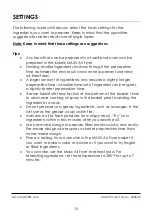
Страница 13: ...min 400 F Shrimp 3 min 400 F Eggs 6 min 325 F Bake 30 min 350 F Veggie 10 min 400 F Potato 25 min 400 F Tofu 10 min 400 F Defrost 60 min 120 F Reheat 7 min 280 F Warm 1 Hour 180 F Defrost Function It...

Страница 14: ...alt pepper For best results we recommend spraying the top of the eggs lightly with a cooking oil spray Use the handles or alternatively use a fork and insert it into any of the holes near the wells to...

Страница 15: ...nts only requires a slightly shorter preparation time If some foodstuffs tend to stick at the bottom of the basket think to add some cooking oil spray in the basket prior to adding the ingredients to...

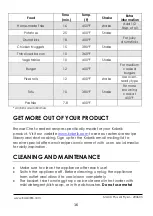
Страница 16: ...ata are indicative GET MORE OUT OF YOUR PRODUCT Browse Chef created recipes specifically made for your Kalorik product Visit our website www kalorik com to see our extensive recipe library and start c...

Страница 17: ...use abrasive products in the cavity Never immerse the appliance in water and make sure that no water or moisture penetrates the upper part of the Maxx Fryer Clean the heating element inside the Maxx F...

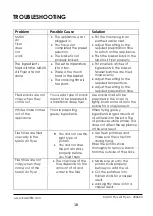
Страница 18: ...nack meant to be prepared in a traditional deep fryer Use snacks made to be prepared in the oven or lightly brush some oil onto the snacks for a crispier result White smoke comes out of the appliance...

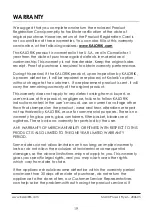
Страница 19: ...ly to any defect arising from a buyer s or user s misuse of the product negligence failure to follow KALORIK instructions noted in the user s manual use on current or voltage other than that stamped o...

Страница 20: ...of our authorized KALORIK Service Center When sending the product please include a letter explaining the nature of the claimed defect If you have additional questions please call our Customer Service...

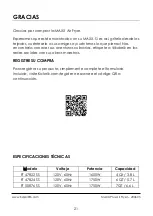
Страница 21: ...a conocer sus aventuras culinarias etiquete a kalorik en las redes sociales con sus obras maestras REGISTRE SU COMPRA Para registrar su producto simplemente complete el formulario incluido visite Kalo...

Страница 22: ...ez 26 Uso De Su Freidora De Aire Maxx 27 Panel De Control 27 Prepar ndose Para El Uso 28 Cesta Y Tr bede 28 Uso Del Aparato 29 Uso De Los Men s Preestablecidos 31 Funci n Para Descongelar 33 Funci n D...

Страница 23: ...mp Tiempo y Temperatura 2 Pantalla LCD 3 Salida de aire parte de atr s de la unidad 4 Ventilaci n de aire 5 Perilla 6 Boton de Start Stop Iniciar y Detener 7 Tr bede antiadherente 8 Cesta antiadherent...

Страница 24: ...cercano para su chequeo reparaci n o ajuste 7 El uso de accesorios no recomendados por el fabricante del aparato puede causar lesiones 8 No utilizarlo en el exterior 9 No deje que el cable cuelgue fue...

Страница 25: ...do de aire caliente el vapor es expulsado a trav s de las aberturas de salida de aire Mantenga las manos y su cara a una distancia prudencial del vapor y de las salidas de aire Tambi n tenga cuidado...

Страница 26: ...to Si la clasificaci n el ctrica del cable de extensi n es demasiado baja este podr a recalentarse e incendiarse El cable extendido resultante debe colocarse de manera que no cuelgue del mostrador o m...

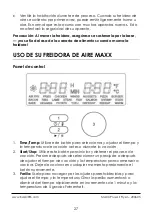
Страница 27: ...X Panel de control 1 Time Temp Utilice este bot n para seleccionar y ajustar el tiempo y la temperatura de cocci n antes o durante la cocci n 2 Start Stop Utilice este bot n para iniciar y detener el...

Страница 28: ...colocada dentro del aparato Mantenga todos los ingredientes en la canasta para evitar que los mismos entren en contacto con los elementos calientes del aparato No llene la canasta de alimentos en exce...

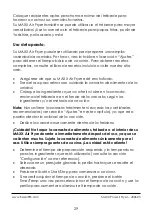
Страница 29: ...l fondo de la canasta seg n los ingredientes y o el m todo de cocci n Nota Nunca llene la canasta totalmente ni exceda las cantidades recomendados ver secci n Ajustes en este cap tulo ya que esto podr...

Страница 30: ...ante la cocci n el exceso de aceite y los jugos de los ingredientes se acumular n en la canasta Esto es de esperarse Algunas recetas requieren agitar los alimentos en la cesta a la mitad del tiempo es...

Страница 31: ...to y cocine por unos minutos m s Cuidado Luego del fre do de aire la canasta y el tr bede como tambi n los ingredientes estar n calientes Dependiendo del tipo de ingredientes que haya dentro de la fre...

Страница 32: ...alquier momento utilizando los men s preestablecidos a continuaci n Preajuste Tiempo Temp F Air Fry 15 min 380 F Fries Papas fritas 16 min 450 F Chicken Pollo 16 min 400 F Wings 20 min 400 F Nuggets 1...

Страница 33: ...el tiempo se puede ajustar de 10 minutos a 60 minutos Funci n de huevo y escalfadora incluida Utilice la funci n de huevo con la escalfadora de huevos incluida con su MAXX Air Fryer Para usar la escal...

Страница 34: ...erde que estos ajustes son s lo sugerencias Consejos Toda comida que puede ser preparada en un horno tradicional puede ser preparada tambi n en la freidora de aire Agitar los ingredientes peque os al...

Страница 35: ...de pollo 18 400 F Si Para patas jugosas Chicken Nuggets 15 380 F Si Tocino rebanado finamente 10 360 F Vegetales 10 400 F Si Burger 12 400 F Para hamburguesas t rmino medio Pizza rolls 12 400 F Si Usa...

Страница 36: ...limpiarlas en el lavabo de la cocina Limpieza dentro de la cavidad Limpie la cavidad con un trapo h medo o esponja Seque con una toalla de papel Nunca use productos abrasivos en la cavidad Nunca sume...

Страница 37: ...a especial para una freidora el ctrica Use comida que se pueda cocinar en el horno o ntele un poco de aceite para mejores resultados Humo blanco est saliendo de la unidad Lo que est preparando contien...

Страница 38: ...n gastos para el consumidor Si se env a un producto de reemplazo se aplicar la garant a que queda del producto original Esta garant a no se aplica a los defectos que surjan del mal uso del producto po...

Страница 39: ...RIK com o llame al Servicio al Consumidor para obtener la direcci n del Servicio post venta KALORIK exclusivo m s cercano Al enviar el producto incluya una carta que explique el defecto reclamado Si t...

Страница 40: ...tenido del manual de usuario y las recetas son cortes a de Team International Group No reproducir sin el consentimiento de los autores Todos los derechos reservados For questions please contact Para p...

Отзывы: