background image

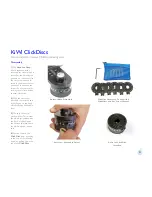
KiWi ClickDiscs

Assembly

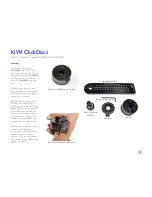
1)


Install the appropriate 

ClickDisc 

into the cavity on 

the top of the barrel. Be sure to 
orient the tab of the 

ClickDisc 

into the notch of the barrel. 
Push the 

ClickDisc 

into posi-

tion.

2)


Place the horizontal plate 

over the barrel and reinsert the 
axle. Make sure that the plastic 
washer is on the axle.

3)


Push down on the knob of 

the axle to compress the as-
sembly and to retract the spring 
plunger fully.  As you apply pres-
sure on the knob, use the set 
screw wrench to tighten and se-
cure the axle in position. There 
should be no discernable play 
between the barrel and plate.

4)


You may find it easier under 

certain circumstances to 
unscrew and retract the spring 
plunger just a bit. It will be 
easier to compress the assembly 
this way. Be sure to readjust the 
plunger afterwards.

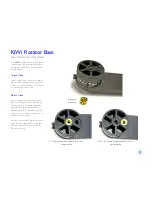
How to install and remove ClickDisc indexing discs

4

Barrel w/ClickDisc Installed

Set Screw Wrench in Barrel

Axle w/Plastic

Washer

Horizontal Plate

Barrel

ClickDisc

Set Screw Wrench

Содержание Tripod

Страница 1: ...User s Guide V1 1 12 Jan 2005 KiWi Panoramic Tripod Head...

Страница 2: ...l be an excellent choice for many photographers just getting started in panoramic photog raphy it will also appeal to profes sionals who require a compact and Welcome to the Kaidan KiWi and Panoramic...

Страница 3: ...otator Base Accessory Pouch The primary component in the KiWi family is the Rotator Base The base uses interchange able indexing discs called ClickDiscs that provide various click stop positions The b...

Страница 4: ...axle by pulling up on the knob which contains the bubble level 3 The axle has a thin plastic washer This washer should always go between the knob of the axle and the horizontal plate Leave the plasti...

Страница 5: ...d to retract the spring plunger fully As you apply pres sure on the knob use the set screw wrench to tighten and se cure the axle in position There should be no discernable play between the barrel and...

Страница 6: ...wn at lower left 3 8 inch Tripod If your tripod has 3 8 inch threaded mount remove the brass bushing by unscrewing it in a counterclockwise direction and screwing it into the adjacent hole in a clockw...

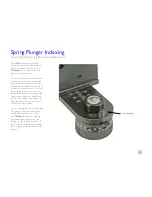
Страница 7: ...plate You can use a wide blade screwdriver or a thin coin to adjust the plunger The more you thread the plunger in clockwise the click stops will be more distinct and rm As you thread the plunger out...

Страница 8: ...turn the outer knob clockwise until the camera is tight on the bracket The Standard Camera Bracket comes with two camera positioning aids There is a at camera shoe and a right angle lug that slide an...

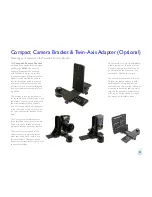
Страница 9: ...pears in the shot with a circular sheye lens is a small semicircular portion of the base The Compact Camera Bracket has three threaded holes for the Camera Knob Use the hole that is most ap propriate...

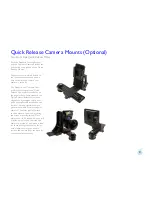
Страница 10: ...era Brackets Based on the popular Arca Swiss standard the Quick Release Brackets provide an elegant and lightweight solution for quick and repeatable installation and removal Arca compatible camera pl...

Страница 11: ...tating your head around your eye s nodal point which is somewhere in the center of your eyeball Instead you re rotating about your spine which is several inches to the rear and off to one side It is t...

Страница 12: ...ehind the brick wall where you look through a separate view nder and not through the actual lens The process is basically the same Locate the Side to Side adjustment as discussed in Step 1 When it com...

Страница 13: ...ealviz Stitcher the issue of leveling is less crucial and primarily involves aestethics and placement of the horizon We ll concentrate primarily on cylindrical or single row panoramas First the camera...

Страница 14: ...ut that might be an artistic choice or something you want to do on purpose As long as the optical axis is parallel to the rotation plane and the camera CCD is not rotated slight variations in level as...

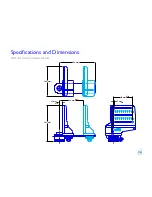
Страница 15: ...Speci cations and Dimensions KiWi with Standard Camera Bracket 14 97 mm 17 mm 120 mm 180 mm 148 mm 178 mm Min Max 7 mm Min Max...

Страница 16: ...Speci cations and Dimensions KiWi with Standard Camera Bracket and Quick Release Mount 15 97 mm 180 mm 148 mm 178 mm Min Max 7 mm Min Max 2 mm 105 mm...

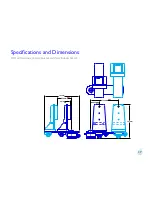
Страница 17: ...Speci cations and Dimensions KiWi withTwin Axis Camera Bracket 16 21 mm 94 mm 190 mm 46 mm 152 mm 187 mm Min Max Min Max...

Страница 18: ...Speci cations and Dimensions KiWi withTwin Axis Camera Bracket and Quick Release Mount 17 190 mm 46 mm 152 mm 187 mm Min Max Min Max 6 mm 79 mm...

Страница 19: ...of the aforementioned items are copyrighted and subject to the laws concerning intellectual property Kaidan will replace defective software videotapes free of charge upon return receipt of defective...

Отзывы: