Version 2014-02-28
Page 26 of 48
Operating instructions 82132/3xxx CB 30
Table of contents
16
Important notes ................................................................................................................................................ 28
17
Glossary of abbreviations and terms ............................................................................................................. 29
18
The icons used in the instructions ................................................................................................................. 30
19
Lock system: Input unit and lock ................................................................................................................... 31
19.1
Operating elements of the input unit ....................................................................................................................... 31
19.2
Lock housing and interfaces .................................................................................................................................... 31
20
Overview of authorizations ............................................................................................................................. 32
21
Overview of the programming commands .................................................................................................... 32
22
Overview of the possible signals ................................................................................................................... 33
23
Start-up of the lock .......................................................................................................................................... 34
23.1
Opening with assembler code.................................................................................................................................. 34
23.2
Activating master ...................................................................................................................................................... 34
24
Programming functions for the master ......................................................................................................... 34
24.1
Changing master code (P) ........................................................................................................................................ 35
24.2
Programming functions for further codes (P3-P6) ................................................................................................. 35
24.2.1
Activating user codes or courier codes (P3) ....................................................................................................... 35
24.2.2
Blocking the user codes or courier codes (P4) ................................................................................................... 36
24.2.3
Releasing the user codes or courier codes (P4) ................................................................................................. 36
24.2.4
Deleting the user codes or courier codes (P5) .................................................................................................... 36
24.2.5
Code status query (P6) ....................................................................................................................................... 37
24.3
Programming opening delay and opening standby time (P2) ............................................................................... 37
24.3.1
Activating opening delay and opening standby time (P2) ................................................................................... 37
24.3.2
Deactivating opening delay and opening standby time (P2) ............................................................................... 37
24.4
Programming the double code (P7) ......................................................................................................................... 38
24.4.1
Activating the double code (P7) .......................................................................................................................... 38
24.4.2
Deactivating double code (P7) ............................................................................................................................ 38
24.5
Programming silent alarm (P8) ................................................................................................................................ 39
24.5.1
Activating the silent alarm (P8) ........................................................................................................................... 39
24.5.2
Deactivating silent alarm (P8) ............................................................................................................................. 39
24.6
Acknowledging take-off contact message (P9) ...................................................................................................... 39
25
Lock functions for all users ............................................................................................................................ 40
25.1
Opening the lock without programmed OD/OST .................................................................................................... 40
25.2
Opening the lock with programmed OD/OST.......................................................................................................... 40
25.3
Opening with double code ....................................................................................................................................... 41
25.4
Opening with silent alarm ......................................................................................................................................... 41
25.5
Guard time (3 or more incorrect code inputs) ........................................................................................................ 42
25.6
Closing the lock ......................................................................................................................................................... 42
25.7
Changing codes (P) ................................................................................................................................................... 42
25.8
Opening with activated additional functions .......................................................................................................... 43
26
Key functions ................................................................................................................................................... 43
26.1
Key opening ............................................................................................................................................................... 43
26.2
Closing using the key ............................................................................................................................................... 44
Страница 1: ...Combi B 30 mit Metall Eingabeeinheit Bedienungsanleitung Version DE EN DE ...
Страница 2: ...nutzercodes oder Kuriercodes löschen P5 12 9 2 5 Codestatus Abfrage P6 13 9 3 Öffnungsverzögerung und Öffnungsbereitschaftszeit programmieren P2 13 9 3 1 Öffnungsverzögerung und Öffnungsbereitschaftszeit aktivieren P2 13 9 3 2 Öffnungsverzögerung und Öffnungsbereitschaftszeit deaktivieren P2 13 9 4 Doppelcode programmieren P7 14 9 4 1 Doppelcode aktivieren P7 14 9 4 2 Doppelcode deaktivieren P7 14...
Страница 3: ...perren 12 Tabelle 11 Code löschen 12 Tabelle 12 Codestatus abfragen 13 Tabelle 13 Codestatusmeldungen 13 Tabelle 14 Öffnungsverzögerung und Öffnungsbereitschaftszeit programmieren 13 Tabelle 15 Öffnungsverzögerung und Öffnungsbereitschaftszeit löschen 14 Tabelle 16 Doppelcode aktivieren 14 Tabelle 17 Doppelcode deaktivieren 14 Tabelle 18 Stillen Alarm aktivieren 15 Tabelle 19 Stillen Alarm deaktiv...
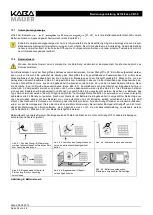
Страница 4: ...ungsanspruch Bei der Inbetriebnahme wird die Seriennummer der Eingabeeinheit im Auditspeicher des Schlosses hinterlegt Ein Wechsel der Eingabeeinheit wird ebenso mit einem Eintrag im Auditspeicher des Schlosses vermerkt Bei jeder Beschreibung von Bedien bzw Programmiervorgängen wird im Folgenden davon ausgegangen dass sich das Schloss und die Eingabeeinheit im Grundzustand befinden Grundzustand be...
Страница 5: ...Stiller Alarm Ist das Schloss an eine externe Alarmanlage Einbruchmeldeanlage angeschlossen und ist diese Funktion am Schloss aktiviert kann ein stiller Bedrohungsalarm für den Aggressor nicht wahrnehmbar ausgelöst werden EMA Einbruchmeldeanlage externe Alarmanlage für die Auswertung Weitergabe des Bedrohungsalarmes oder einer gesicherten Permanentspannungsversorgung nicht im Lieferumfang enthalte...
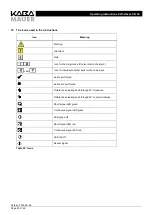
Страница 6: ...ge Code ID siehe auch Kapitel 2 oder Symbol für einzelne Zifferntasten bei der Codeeingabe Aktion durchgeführt Aktion nicht durchgeführt Betätigungsknopf 90 im Uhrzeigersinn drehen Betätigungsknopf 90 gegen den Uhrzeigersinn drehen Kurzsignal LED grün Dauersignal LED grün LED grün aus Kurzsignal LED rot Dauersignal LED rot LED rot aus Signal Summer Tabelle 1 Symbole ...
Страница 7: ...damit im gesicherten Bereich gespeichert 4 1 Bedienelemente der Eingabeeinheit Abbildung 1 Eingabeeinheit Abbildung 2 Mini USB Buchse Sonderschnittstelle nur in Verbindung mit Original Kaba Mauer CB30 PC Kabel verwenden 4 2 Schlossgehäuse und Schnittstellen Abbildung 3 Schlossgehäuse Abbildung 4 Anschlüsse am Schlossgehäuse Betätigungsknopf Tastatur Tastatur 1 rote und 1 grüne LED Zifferntasten P ...
Страница 8: ... auslesen Stillen Alarm aktivieren deaktivieren Zugriff über PC Software 01 30 Benutzercodes Öffnen bei Bedarf mit Stillem Alarm eigenen Code ändern 95 Kuriercode Öffnen ohne ÖV ÖBZ bei Bedarf mit Stillem Alarm eigenen Code ändern Monteurcode Öffnen Nur bis zur echten Inbetriebnahme des Schlosses gültig KEIN ECHTER CODE nicht zur dauerhaften Verwendung geeignet Tabelle 2 Berechtigungen 6 Übersicht...
Страница 9: ...d 1 x dann 1 x und 1 x Sperrzeit Permanent nach Eingabe Enter 1 x dann 0 5s Pause Doppelcode Eingabe des zweiten Codes wird erwartet Permanent nach Eingabe Enter 1 x dann 2s Pause ÖV Permanent nach Eingabe Enter 1 x dann 5s Pause ÖBZ Permanent nach Eingabe Enter 1 x und 1 x dann 5s Pause Unterspannung Nach Eingabe Enter 10 x Programmiermodus Permanent nach Eingabe Enter 1 x und Fernsperre aktivier...
Страница 10: ...5 und auch keine Abhebekontakt Signalmeldung gemäß 9 6 8 2 Master aktivieren Aktivieren Sie nun bei geöffnetem Behältnis um jederzeit Zugriff auf das Behältnis und das Schloss zu haben den Master Beschreibung 1 Drücken Sie und 2x 3x 3x 2 Geben Sie den neuen Mastercode und ein 00 ID X frei gewählte 6 stellige Ziffernkombination 0 9 2x 3x 3x 3 Bestätigen Sie den neuen Mastercode mit und 2x 2x 3x 3x ...
Страница 11: ... Schloss eine Abfrage über den Status der einzelnen Codes durchführen kann Zur korrekten Nutzung des Schlosses muss der Mastercode aktiviert sein siehe Kapitel 8 2 9 2 1 Benutzercodes oder Kuriercodes aktivieren P3 Ein Code ist erst nach einer vorigen Aktivierung nutzbar Bei der Aktivierung eines weiteren Bedieners ist es sinnvoll dass der neue Code ab Punkt 3 der folgenden Beschreibung direkt vom...
Страница 12: ...ültige 6 stellige Ziffernkombination für den Master 2x 3x 3x 2 Drücken Sie und 2x 3x 3x 3 Geben Sie die zu entsperrende ID und ein ID 01 bis 30 für Benutzer bzw 95 für Kurier 2x 2x 3x 3x Tabelle 10 Code entsperren Erscheint nach Schritt 3 das Code Falsch Signal so ist die ID entweder nicht aktiviert oder nicht verfügbar Wiederholen Sie den Vorgang mit einem gültigen und aktivierten Code Erscheint ...
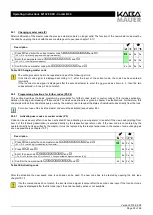
Страница 13: ...eöffnet werden kann Mit diesem Programm werden die ÖV 01 bis 99 Minuten und die ÖBZ 01 bis 19 Minuten eingestellt bzw gelöscht Die eingestellten Zeiten gelten für alle Benutzer und den Master aber nicht für den Kurier 9 3 1 Öffnungsverzögerung und Öffnungsbereitschaftszeit aktivieren P2 Um eine Öffnungsverzögerung ÖV und eine Öffnungsbereitschaftszeit ÖBZ zu programmieren gehen Sie wie folgt vor B...
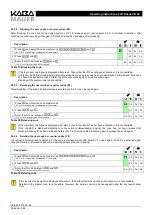
Страница 14: ... 3x 3x 2 Drücken Sie und 2x 2x 3x 3x Tabelle 16 Doppelcode aktivieren Das Schloss kann nun nur noch wie unter 10 3 beschrieben geöffnet werden Um den Doppelcode zu aktivieren müssen mindestens zwei Bediener mit gültigen Codes angelegt sein Andernfalls erfolgt die Fehlermeldung beim Aktivieren des Doppelcodes Der Doppelcode muss deaktiviert sein um ihn aktivieren zu können Erscheint zusätzlich zum ...
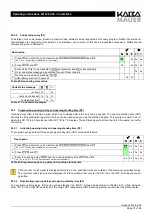
Страница 15: ...en P8 Um den Stillen Alarm zu deaktivieren gehen Sie wie folgt vor Anschließend ist der Stille Alarm deaktiviert die Alarmcodes werden als falsche Codes bestätigt und das Schloss öffnet nicht mehr mit einem Alarmcode Beschreibung 1 Drücken Sie und geben Sie den gültigen Mastercode und ein 00 ID X gültige 6 stellige Ziffernkombination für den Master 2x 3x 3x 2 Drücken Sie und 2x 2x 3x 3x Tabelle 19...
Страница 16: ...ss verfügt über die Möglichkeit weitere durch Fremdsignale ausgelöste Zusatzfunktionen auszuführen Details hierzu entnehmen Sie bitte dem Kapitel 10 8 10 1 Schloss öffnen ohne programmierte ÖV ÖBZ Beschreibung 1 Geben Sie einen gültigen Öffnungscode und ein ID 00 bis 30 bzw 95 X programmierte 6 stellige Ziffernkombination für die jew ID Nummer 2x 2x 3x 3x 2 Drehen Sie den Betätigungsknopf innerhal...
Страница 17: ... siehe dazu 10 2 Erfolgt bereits nach der Eingabe des ersten Codes das Code Falsch Signal muss die Eingabe komplett wiederholt werden Erfolgt erst nach der Eingabe des zweiten Codes das Code Falsch Signal ist der zweite eingegebene Code falsch oder es ist der gleiche wie bei der ersten Eingabe Identische ID In beiden Fällen muss die Eingabe komplett wiederholt werden Nach insgesamt 3 fehlerhaften ...
Страница 18: ... erforderlich In Verbindung mit einem Riegelwerk meist erkennbar durch einen zusätzlichen Drehgriff am Wertbehältnis muss nach dem Schließen der Tür zunächst das Riegelwerk verriegelt werden Erst danach kann das Schloss geschlossen werden Der sichere Verschluss des Schlosses ist durch versuchsweises Drehen des Knopfes an der Eingabeeinheit zu überprüfen Der Knopf darf sich dabei nicht mehr als ca ...
Страница 19: ...bitte zunächst die Stellung des Drehgriffes für den anschließenden Zusammenbau z B mittels eines Klebestreifens auf der Eingabeeinheit der die Position der Markierung auf dem Drehgriff wiedergibt Stecken Sie nun den beiliegenden Inbusschlüssel in das kleine Loch an der Seitenwand der Eingabeeinheit bis zum Anschlag siehe Abb 5 1 ein Den Drehgriff nun nach vorne aus der Eingabeeinheit herausziehen ...
Страница 20: ... 2x 3x 3x 3 Geben Sie den neuen Mastercode und ein 00 ID X frei gewählte 6 stellige Ziffernkombination 0 9 2x 3x 3x 4 Bestätigen Sie den neuen Mastercode und eingeben 2x 2x 3x 3x 5 Das Schloss wieder mit dem Schlüssel verschließen 11 2 Drehgriff montieren 11 1 und den Mastercode bei geöffnetem Behältnis testen 10 1 bis 10 4 Tabelle 27 Mastercode mit dem Schlüssel ändern Stimmen die beiden eingegeb...
Страница 21: ...loss über eine als Zubehör erhältliche PC Software programmiert werden Folgende Funktionen stehen bei Verwendung der zusätzlichen PC Software zur Verfügung a Audit auslesen b Schlosseinstellungen mit der Software programmieren Weitere Details hierzu entnehmen Sie bitte der Bedienungsanleitung für die PC Software 12 2 Zusatzfunktionen über den Signal Eingang Das Schloss bietet die Möglichkeit über ...
Страница 22: ... Oberteil der Eingabeeinheit wie in siehe Abb 6 4 dargestellt verschoben und dann nach vorne abgenommen werden siehe Abb 6 5 Die 2 Batterien befinden sich auf dem Basisteil der Eingabeeinheit und können nun gemäß Abb 6 6 ausgetauscht werden Es dürfen nur Batterien des Typs AAA verwendet werden Es wird dringend empfohlen hochwertige Markenbatterien zu verwenden und diese vorsorglich spätestens alle...
Страница 23: ...der Permanentspannungsversorgung und erschöpfter Batteriekapazität erhält man die Unterspannungsanzeige siehe Kapitel 13 1 Die Batterien und die Permanentspannungsversorgung sollten dann schnellstmöglich überprüft werden 14 Service Bei Störungen oder in dieser Anleitung nicht beschriebenen Serviceaufgaben wird dringend empfohlen auf einen fachkundigen Servicetechniker oder den Tresorlieferanten zu...
Страница 24: ...zer 08 Benutzer 09 Benutzer 10 Benutzer 11 Benutzer 12 Benutzer 13 Benutzer 14 Benutzer 15 Benutzer 16 Benutzer 17 Benutzer 18 Benutzer 19 Benutzer 20 Benutzer 21 Benutzer 22 Benutzer 23 Benutzer 24 Benutzer 25 Benutzer 26 Benutzer 27 Benutzer 28 Benutzer 29 Benutzer 30 Kurier Benutzer 95 Funktion aktiviert deaktiviert Wert ÖV ÖBZ ___ __ Doppelcode Stiller Alarm Zusatzfunktionen aktiviert deaktivi...
Страница 25: ...Combi B 30 with metal input unit Operating Instructions EN ...
Страница 26: ...r codes P4 36 24 2 4 Deleting the user codes or courier codes P5 36 24 2 5 Code status query P6 37 24 3 Programming opening delay and opening standby time P2 37 24 3 1 Activating opening delay and opening standby time P2 37 24 3 2 Deactivating opening delay and opening standby time P2 37 24 4 Programming the double code P7 38 24 4 1 Activating the double code P7 38 24 4 2 Deactivating double code ...
Страница 27: ... the code 36 Table 10 Releasing code 36 Table 11 Deleting code 36 Table 12 Requesting code status 37 Table 13 Code status messages 37 Table 14 Programming opening delay and opening standby time 37 Table 15 Deleting opening delay and opening standby time 38 Table 16 Activating double code 38 Table 17 Deactivating double code 38 Table 18 Activating silent alarm 39 Table 19 Deactivating silent alarm ...
Страница 28: ...serial number of the input unit is saved in the audit memory of the lock Replacement of the input unit is also registered by means of an entry in the audit memory of the lock For every description of operation or programming processes hereafter it is assumed that the lock and the input unit are in the basic state Basic state means that the lock is closed the bolt lock is extended and the lock elec...
Страница 29: ...odes are required to open the lock Silent alarm If the lock is connected to an external alarm system intruder detection system and this function is activated at the lock a silent duress alarm can be triggered not perceivable for the intruder EMA Intruder detection system external alarm system for evaluation forwarding of the duress alarm or secured permanent power supply not included in the scope ...
Страница 30: ...ID also refer to chapter 2 oder Icon for individual number keys for the code input Action performed Action not performed Rotate the actuating knob through 90 clockwise Rotate the actuating knob through 90 counterclockwise Short signal LED green Continuous signal LED green LED green off Short signal LED red Continuous signal LED red LED red off Buzzer signal Table 29 Icons ...
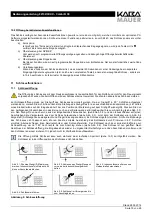
Страница 31: ... in the lock and thus in the secured area 19 1 Operating elements of the input unit Figure 9 Input unit Figure 10 Mini USB socket Special interface only in connection with original Kaba Mauer CB30 Use PC cable 19 2 Lock housing and interfaces Figure 11 Lock housing Figure 12 Connections at the lock housing Actuating knob Keypad Keypad 1 red and 1 green LED Numeric keys P key Enter key Connection t...
Страница 32: ...ke off contact Reading out audit Activating deactivating silent alarm Access via PC software 01 30 User codes Opening if necessary with silent alarm Changing of the own code 95 Courier code Opening without OD OST if necessary with silent alarm Changing of the own code Assembler code Opening Valid only until the real start up of the lock NOT A REAL CODE not suitable for permanent use Table 30 Autho...
Страница 33: ... 1 x and 1 x Guard time Permanentl y after pressing Enter 1 x then 0 5 s break Double code input of the second code is expected Permanentl y after pressing Enter 1 x then 2 s break OD Permanentl y after pressing Enter 1 x then 5 s break OST Permanentl y after pressing Enter 1 x and 1 x then 5 s break Undervoltage After pressing Enter 10 x Programming mode Permanentl y after pressing Enter 1 x and ...
Страница 34: ...correct code inputs according to chapter 10 5 and no take off contact signal message according to either 23 2 Activating master Now activate the master with the storage unit open to have every time access to the storage unit and the lock Description 1 Press and 2x 3x 3x 2 Enter the new master code and 00 ID X freely selected 6 digit combination 0 9 2x 3x 3x 3 Confirm the new master code with and 2...
Страница 35: ...ven in chapter 5 authorizations Furthermore this chapter describes the code status query used by the master code to request the status of individual codes directly from the lock For correct use of the lock the master code must be activated see chapter 8 2 24 2 1 Activating user codes or courier codes P3 Code can be used only after it has been activated When activating a new operator it is useful i...
Страница 36: ...ess and enter the valid master code 00 ID X valid 6 digit combination for the master 2x 3x 3x 2 Press and 2x 3x 3x 3 Enter the ID to be released and ID 01 to 30 for user resp 95 for courier 2x 2x 3x 3x Table 38 Releasing code If the Incorrect code signal is displayed after step 3 then either the ID has not been activated or it is not available If the red LED is displayed additionally to the normal...
Страница 37: ...the time window during which the lock can be opened as soon as the OD has elapsed This program is used to set or delete the OD 01 to 99 minutes and the OST 01 to 19 minutes The set times apply to all users and for the master but not for the courier 24 3 1 Activating opening delay and opening standby time P2 To program opening delay OD and opening standby time OST proceed as follows Description 1 P...
Страница 38: ...2x 3x 3x Table 44 Activating double code The lock can be opened only as described in 10 3 To activate the double code at least two operators with valid codes must be created Otherwise an error message is displayed during activation of the double code The double code must be deactivated in order to be able to activate it If the red LED is displayed additionally to the normal acknowledgment signal t...
Страница 39: ...ivating silent alarm P8 To deactivate the silent alarm proceed as follows After that the silent alarm is deactivated the alarm codes are acknowledged as incorrect codes and the lock can no longer be opened with an alarm code Description 1 Press and enter the valid master code and 00 ID X valid 6 digit combination for the master 2x 3x 3x 2 Press and 2x 2x 3x 3x Table 47 Deactivating silent alarm Th...
Страница 40: ...ed additional functions The lock offers an option to execute further additional functions triggered by external signals For further details refer to chapter 10 8 25 1 Opening the lock without programmed OD OST Description 1 Enter a valid opening code and ID 00 to 30 resp 95 X programmed 6 digit combination for the corresp ID number 2x 2x 3x 3x 2 Turn the actuating knob within 4 seconds through 90 ...
Страница 41: ...then refer to 10 2 If the Incorrect code signal is output after the first code input the entry must be repeated completely If the Incorrect code signal is displayed after the second code input the second entered code is incorrect or identical to the first input identical IDs In both cases the input must be repeated completely After a total of 3 incorrect inputs the lock switches to the guard time ...
Страница 42: ... is not required If there is a boltwork available usually recognized due to an additional rotary handle on the secure storage unit it has to be locked first after the door has been closed Only after that the lock can be closed Secure closing of the lock has to be tested by trying to rotate the knob at the input unit The knob must not be turned through more than approx 45 25 7 Changing codes P Ever...
Страница 43: ...in steps of 90 first always note the position of the rotary handle for the assembly later e g using an adhesive tape on the input unit to mark the position of the mark on the rotary handle Insert the enclosed Allen wrench up to the stop into the small hole on the lateral wall of the input unit see fig 5 1 Pull out the rotary handle to the front from the input unit see fig 5 2 and remove the Allen ...
Страница 44: ...n 1 Open the lock using the key see chapter 11 1 2 Press and 2x 3x 3x 3 Enter the new master code and 00 ID X freely selected 6 digit combination 0 9 2x 3x 3x 4 Confirm the new master code and enter 2x 2x 3x 3x 5 Close the lock using the key again 11 2 mount the rotary handle 11 1 and test the master code with the open safe 10 1 to 10 4 Table 55 Changing master code using the key If both entered c...
Страница 45: ...ce using the PC software available as an accessory The following functions are available when using the additional PC software c Reading out audit d Programming the lock settings using software For further details on this refer to the operating instructions of the PC software 27 2 Additional functions via the signal input The lock has an option which allows implementing one of the additional funct...
Страница 46: ...fig 6 5 The 2 batteries are located on the base part of the input unit and can be replaced now as shown in fig 6 6 Only batteries of type AAA can be used It is highly recommended to use high quality brand batteries and replace them as a precaution every 24 months at the latest After the battery replacement mount the input unit on the base part from the front in the order reverse to the one describ...
Страница 47: ...ermanent power supply The undervoltage indication is displayed in case of the permanent power supply failure and exhausted battery see chapter 13 1 The batteries and the permanent power supply should be checked as soon as possible in this case 29 Service In case of faults or service tasks described in this manual it is highly recommended to consult a professional service technician or the safe man...
Страница 48: ...3 User 04 User 05 User 06 User 07 User 08 User 09 User 10 User 11 User 12 User 13 User 14 User 15 User 16 User 17 User 18 User 19 User 20 User 21 User 22 User 23 User 24 User 25 User 26 User 27 User 28 User 29 User 30 Courier User 95 Function Activated Deactivated Value OD OST ___ __ Double code Silent alarm Additional functions Activated Deactivated Remote disable Override OD OST Override Double ...