background image

11

Condition

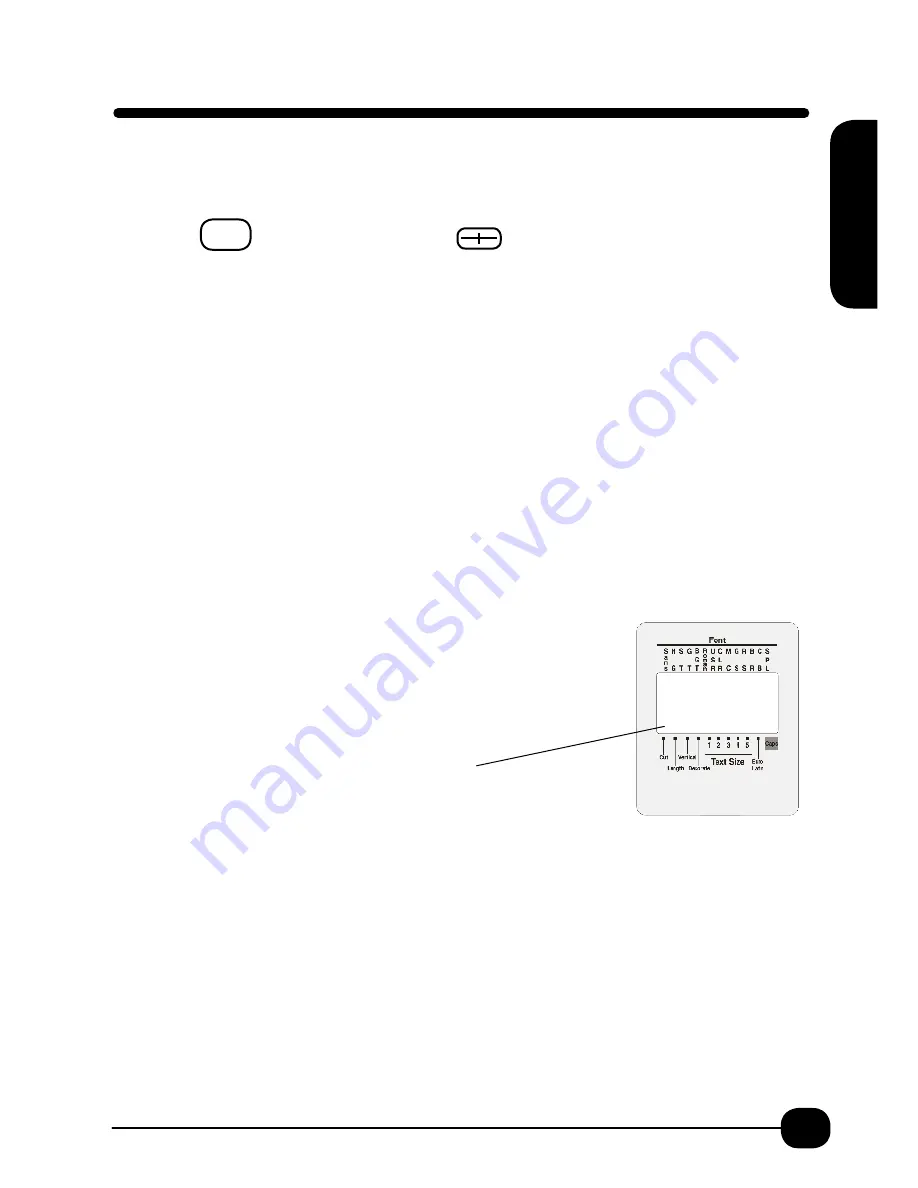
Allows the user to specify display units, display language, display and print density as well 

as turning auto cut on or off. Also can set printer for universal settings for consistent use.

Press Shift 

Preview/Condition Key 

For Display Units:  To change default from inch to cm.
Return at screen display inch:cm.
Arrow down to cm. Return. Unit is now set to cm.

For Display Language:  To change default display language from English to Spanish.

1.  Arrow Down to Prompt. Return. English is highlighted.  

2.  Arrow down to Spanish. Return. Unit is now set to display all prompts in Spanish.

For Display Density:  Default is 0.  “+” selection darkens text in screen while “–“ selection 
lightens text in screen.

1.  Arrow Down to DspDensity. Return.

2.  Use arrows up or down +5,+4,+3,+2, +1, 0 (default), -1,-2,-3,-4,-5

3.  Select setting and Return. Display Density has been adjusted.  

For Printing Density:  Default is 0.  “+” selection darkens printing while “–“ selection lightens printing.

1.  Arrow Down to PrnDensity. Return.

2.  Use arrows up or down +3,+2,+1, 0 (default), -1,-2,-3

3.  Select setting and Return. Printing Density has been adjusted.  

For Auto Cut – On or Off. Default is On.

1.  Arrow Down to Auto Cut. Return.

2.  Arrow Down to Off. Return. Auto Cut is now Off.  
         

(note hash mark on screen display at CUT is now gone).

The BEE3®-EZ and BEE3®-EZ + can be set to have specific or universal settings. This is useful 
if the printer is used for the same task or for consistency among many users. 

You cannot set 

Condition settings if you have text in the display. 

Clear all Text

 first, 

see p. 5

.

Arrow down to Settings. Return.
   
 
Universal settings are available for:  

Length p.19 

Lines p. 30 

Vertical p. 33

Layout p. 18 

Frame p.17 

Font p. 15

Decorate p.19 

Space p.19

Condition

Condition

Shift

Содержание BEE3-EZ

Страница 1: ...Operator s Manual Copyright 2014 K Sun Corporation www ksun com ...

Страница 2: ...he receiving antenna Increase the separation between the equipment and receiver Connect the equipment into an outlet on a circuit different from that to which the receiver is connected Consult the dealer or an experienced radio TV technician for help To ensure compliance with the limits for a Class B digital device the enclosed interface cable should be used If Applicable Modifications or changes ...

Страница 3: ...on 11 Display Screen 12 Euro Latin 13 Feed Feed Cut 14 File 14 Font 15 Frame and Table 16 Frame 17 Joining Lines or Moving Text 18 Layout 18 Length 19 Mode 19 Paragraphs Columns 20 Preview 21 Print 21 Reset Printer Restoring Factory Defaults 22 Safety Precautions 23 24 Sequencing 25 Shrink Tube 25 Symbols 26 29 Text Size 30 Troubleshooting 31 32 Vertical Printing 33 All rights reserved Contents of...

Страница 4: ...up to pull out the cartridge Printer Set Up 1 2 3 a b c 4 5 Connect the adapter to the printer Connect the cord to the adapter then plug into the wall outlet USE ONLY ADAPTER MARKED K Sun APT0615Y1 1 6 Turn on printer 7 Feed and cut the tape to clear slack in ribbon and tape Press Shift and the Print FeedCut key Display will say Feed Cut Press Return and tape will feed and cut Note For supplies th...

Страница 5: ...printer is ready for entering text Delete All does not clear the following Files Set Values in Condition Euro Latin Symbol setting preferences Tape Size Maximum Number of Lines Tape Size Tape Inches Size Tape mm Maximum Number of Lines 204 1 6 4mm 1 206 1 4 6mm 2 209 3 8 9mm 3 212 1 2 12mm 4 218 3 4 18mm 4 The maximum character size printable on and width tape 212 and 218 sizes is the same POWER S...

Страница 6: ...wn Continue to hold key down to move cursor quickly down Shift Moves cursor to beginning of line Each time keys are pressed cursor will jump to next line up Shift Moves cursor to end of line Each time keys are pressed cursor will jump to next line end of line Shift Moves the cursor to beginning of paragraph column Each time keys are pressed the cursor jumps to beginning of previous paragraph Shift...

Страница 7: ...played in the shaded field in the right upper corner of the display Press Return The display will show a bar code image indicating that a bar code has been created Press Preview Press Print Remember to test all bar codes for scanner readability before applying to object It is recommended that you use a tape with a white background and black characters as they are easily read by bar code readers If...

Страница 8: ...om temperature However operating the printer in colder temperatures will shorten the life span of the batteries Dispose of used batteries according to your local regulation Do not store your printer for long periods of time with batteries Remove the batteries from the device to avoid possible leakage If you have stored files change batteries within four minutes or you may lose text data or setting...

Страница 9: ... to 4 numbers or letters per line See Double Figure p 28 for entering up to 8 digits 4 Enter up to 2 lines Text will automatically repeat on second section of label Flag Horizontal Example 1 Set Length 2 0 to 5 0 or OFF 2 Length is the full length of the label A line will print in half to help guide in placing label for flagging Base the length on the circumference of wire plus length of flag need...

Страница 10: ...ers agents or solvents such as benzene thinner or alcohol Print Head Clean the print head if you see a faint clear line in text or printing becomes faint Rub the print head with a cotton swab moistened with medical alcohol ethanol Clean the print head rollers and inside case to remove dirt dust or any pieces of adhesive Storing your printer Your printer is equipped with foot pads so printer can st...

Страница 11: ...or down 5 4 3 2 1 0 default 1 2 3 4 5 3 Select setting and Return Display Density has been adjusted ForPrintingDensity Defaultis0 selectiondarkensprintingwhile selectionlightensprinting 1 Arrow Down to PrnDensity Return 2 Use arrows up or down 3 2 1 0 default 1 2 3 3 Select setting and Return Printing Density has been adjusted For Auto Cut On or Off Default is On 1 Arrow Down to Auto Cut Return 2 ...

Страница 12: ...orate choices have been specified See p 19 Text Size Indicator See p 30 Euro Latin Indicator The hash mark is on when a character replaceable with an European or Latin character is entered See p 13 Caps Lock Indicator The hash mark is on when the Shift Caps Lock is pressed and caps lock is on Maximum number of characters displayed 12 6 per line If you enter characters beyond 6 use the cursor or pr...

Страница 13: ...i 2 Type o and press Euro Latin Key 3 Right arrow to ó and Press Return 4 Type n When selecting a character again character memory will occur For example above if you type o again and press Euro Latin key you will automatically be at ó on the line You will not have to arrow right to see all the choices Euro Latin characters are available in upper and lower case For Choosing Ó you would need to pre...

Страница 14: ... 1 and the first line of the label is highlighted Return 4 Screen says Execute 1 and recalls label to screen 5 Print label or change label as needed To Delete a File 1 Press Shift File Screen display says Store Arrow down to Delete Return 2 Screen display will say Delete and show label 1 and first line of label If this is the label you want to delete Return If you have more than 1 label stored use...

Страница 15: ...rough the fonts a small preview of the font is available on the right hand side of the screen Use the preview key to review before printing When using the Script PL font upper and lower case letters are recommended See p 19 Mode Space on how to set the letters closer together Font ...

Страница 16: ...able When selecting lines 1 2 and 3 you will have a choice regarding formats see p 30 3 Choose your line format Return 4 Screen displays End Return 5 Screen displays Area Label Return Create your label using the paragraph column function see p 20 Use Preview to review before printing You can create the label using the paragraph function and then add TABLE formatting Either method requires user to ...

Страница 17: ...se numbers of lines on your table When selecting lines 1 2 and 3 you will have choice regarding formats See p 30 8 Choose your line format Return 9 Screen will say End Return 10 Screen will say Area Label Return 11 Use Preview to review before printing 119 Table Frame 01 02 03 04 01 16 31 46 61 02 17 32 47 62 03 18 33 48 63 04 19 34 49 64 05 20 35 50 65 06 21 36 51 66 07 22 37 52 67 08 23 38 53 68...

Страница 18: ...line move cursor after 1 Return Label will now read Room 1 Class A Type Line 1 Room 1 Type Line 2 Class A Type Line 3 Reading To put Reading on line with Class A position cursor after A Press Esc Bs key Label will now read Room 1 Class A Reading Layout 1 Press Shift Size Style key 2 Arrow down to Layout Return 3 Arrow down to see choices Left Center Right 4 Highlight and Return 5 Arrow Down to End...

Страница 19: ...fit on set length a message will display Text Long Reduce text size or increase length Length Use Mode to adjust font style for additional effects 1 Press Shift Font Mode Key 2 Choose Decorate Return 3 Arrow Down to Select Return you can only choose one Decorate Function 4 Choose Space Return 5 Arrow Down to Select Normal or None Choose None when working with Script and CB fonts None is also effec...

Страница 20: ...ary x 214 Press Preview Print Example Two Two paragraphs of text 1 Type line one Office Return 2 Type line two Extensions 3 Press Shift and Return Column Screen will show 1 4 Type Room 1 x 101 Return 5 Type Room 2 x 10² Return 6 Type Room 3 x 10³ Do Not Return Press Preview Print Note When a text is divided into paragraphs the text size is equal regardless of setting Formatting of text may be limi...

Страница 21: ... print your label or shrink tube REMEMBER to preview first Your printer will cut the tape automatically For some tapes turning off Auto Cut is recommended See p 11 Print will tell you the length of the label and how many times the label has been printed If you continue to press Print the display will show you the number of copies printed in the Copy area Display on Screen before printing Preview A...

Страница 22: ...ess press any key except for Return Press Return Reset will be displayed briefly and printer will be reset RESTORE the DEFAULT SETTINGS TO FACTORY SETTINGS 1 Press Shift Esc Bs key Delete All is displayed Return 2 Press Shift Condition key Arrow Down to Setting Return 3 Arrow Up Screen will say All Defaults To cancel press the Esc Bs key Return 4 Screen will say All Defaults Execute Screen returns...

Страница 23: ...sible accidents caused by tripping over the cord WARNING Battery Do not use batteries with the and terminals reversed This may cause leakage overheating or explosion If liquid from battery enters your mouth rinse immediately with plenty of water and consult a doctor If liquid from battery comes in contact with your skin or cloth wash away with water This may cause damage to your skin Do not mix ne...

Страница 24: ... before removing the AC adapter from the electrical outlet Do not block or insert objects into the AC adapter socket or the tape eject slot Do not touch the print head See p 10 regarding cleaning the printhead Avoid using a tape cartridge with no remaining tape or shrink tube or pressing Print without installing a tape cartridge This may cause overheating and malfunction of the print head Before a...

Страница 25: ... a z you would enter text such as File then press Space key 2 Then press the Shift Sequence key 3 At Start enter A or a Return Press Print 4 Your display screen will say File B Press Print Continue pressing Print until the alphabet is completed Sequencing File1 File2 File3 File4 File5 File6 Sequencing Seq ShrinkTube The BEE3 EZ prints on two sizes of shrink tube 203 1 8 and 205 3 16 The BEE3 EZ pr...

Страница 26: ...ol B Press the Sym A key Symbol A Menu appears Use Up or Down Arrows to select category Press Return Use Right or Left Arrows to select symbol Press Return Symbol appears on label Symbols found under Symbol A continued on next page SymbolMenu A Sym A Symbol Menu ...

Страница 27: ...27 Symbol Menu A Symbol Menu ...

Страница 28: ...V Inserts a two byte space How Double Figure Works Double Figure puts 2 digits in one space Basic categories are 00 10 20 30 40 50 60 70 80 99 Under each of the basic categories you will find ten digits such as Basic Category 00 00 01 02 03 04 05 06 07 08 09 or Basic Category 10 10 11 12 13 14 15 16 17 18 19 and so on After selecting Double Figure use the right arrow key to select the basic catego...

Страница 29: ...29 Symbol Menu B Sym B Symbol Menu ...

Страница 30: ... choices are If your text is four lines the size is fixed Note that choices such as 2d can provide consistency in your labels For instance if making name badges you might choose 2d with a person s name being larger and title being smaller Point Text Size Chart Selecting will print characters of the following size depending on the tape width Text Size size 1a 1b 1d 1c PrintSample A A A A A P 6 S 10...

Страница 31: ... space to save a file Delete a file See p 14 Printer has error printing tape Turn printer off Disconnect adapter Reconnect adapter and turn printer on Press Print If error continues contact your point of purchase for further action You have attempted to call up or delete a file when there are no files saved on the device Press any key to return to the text enter screen See p 14 The tape cartridge ...

Страница 32: ... 5 minutes the power will power off Nothing prints Is text entered Is there a message in display See p 12 Is the tape installed correctly See p 4 Have the batteries run out See p 8 Is the top cover closed See p 4 Text does not print properly Is the tape cartridge installed correctly See p 4 Is the print head clean See p 10 Have the batteries run out See p 8 Printed label does not cut automatically...

Страница 33: ...t is OFF Arrow down to ON ON will flash Return 4 Screen will now say Layout Arrow down to End Return 5 Screen will now say Area Label Return A Hash mark will now appear at Vertical on Display Screen 6 Enter Text You can add Symbols to vertical labels For Symbols see p 26 29 Vertical ...

Страница 34: ...ing Tape 1 4 6mm 26 each 206BC Black ink Clear tape 206BW Black ink White tape 206BY Black ink Yellow tape 206WB White ink Black tape 206BG Black ink Green tape 206BB Black ink Blue tape 206BR Black ink Red tape Industrial Labeling Tape 3 8 9mm 26 each 209BC Black ink Clear tape 209BW Black ink White tape 209BY Black ink Yellow tape 209WB White ink Black tape 209BG Black ink Green tape 209BB Black...

Страница 35: ...tape 218RC Red ink Clear tape 218WC White ink Clear tape 218BW Black ink White tape 218BY Black ink Yellow tape 218RW Red ink White tape 218WB White ink Black tape 218BX Black ink Gray tape 218BB Black ink Blue tape 218BR Black ink Red tape 218BO Black ink Orange tape 218BG Black ink Green tape 218BV Black ink Violet tape 218WR White ink Red tape 218WO White ink Orange tape 218WG White ink Green t...

Страница 36: ...ber __________________________ In Service Date _________________________ For Technical Support 1 800 622 6312 Ext 214 or info ksun com K Sun Corporation 370 SMC Drive Somerset WI 54025 www ksun com MBEE3EZ 4 2014 ...

Отзывы: