background image

JV-TV5020 USER’S MANUAL


JV-TV5020 

USER’S MANUAL


8-CHANNEL QUAD SPLITTER                                  8-CHANNEL QUAD SPLITTER


Fig 5. MENU PAGE[1], [2], [3], [4], [5] 


5-3.


Automatic Camera Skip in the Auto Mode 

If  you  do  not  wish  to  view  a  particular  camera,  set  the 

DWELL  TIME  in  the  MENU(2),(3)  setup  mode  to  a  value  of 

zero. 

5-4.


Manual Mode Operation 

This  splitter  displays  only  one  camera  (full-screen),  even  if 

there are additional cameras connected to it. 

-


Press  the  QUAD  button  on  the  front  panel  of  the  splitter 

to  enter  the  AUTO  mode  from  the  QUAD  mode.  If  the 

splitter is currently in AUTO mode, proceed next step. 

-


Press the desired channel button. 

-


Press the QUAD button to return to the QUAD mode. 

5-5.    How to Program the Menus for OSD (On-Screen Display) 

There are three pages of Menus to display the time, date, and 

a camera title for each camera, etc. on the monitor. To enter 

the MENU setup mode, press the MODE/MENU button on the 

front  panel  of  the  monitor  until  the  MENU  displays  on  it  (2 

seconds). The page 1 GENERAL screen will be displayed with 

beeping  sound,  and  pressing  MODE/MENU  button  one  more 

time will show the Page 2 INDIVIDUAL screen, then the Page 

3,  Page  1,  Page  2,  so  on.  Press  the  ENTER  button  the  EXIT 

location in Menu1 to exit the MENU setup mode. 


SECTION 3 


5.    OPERATION 


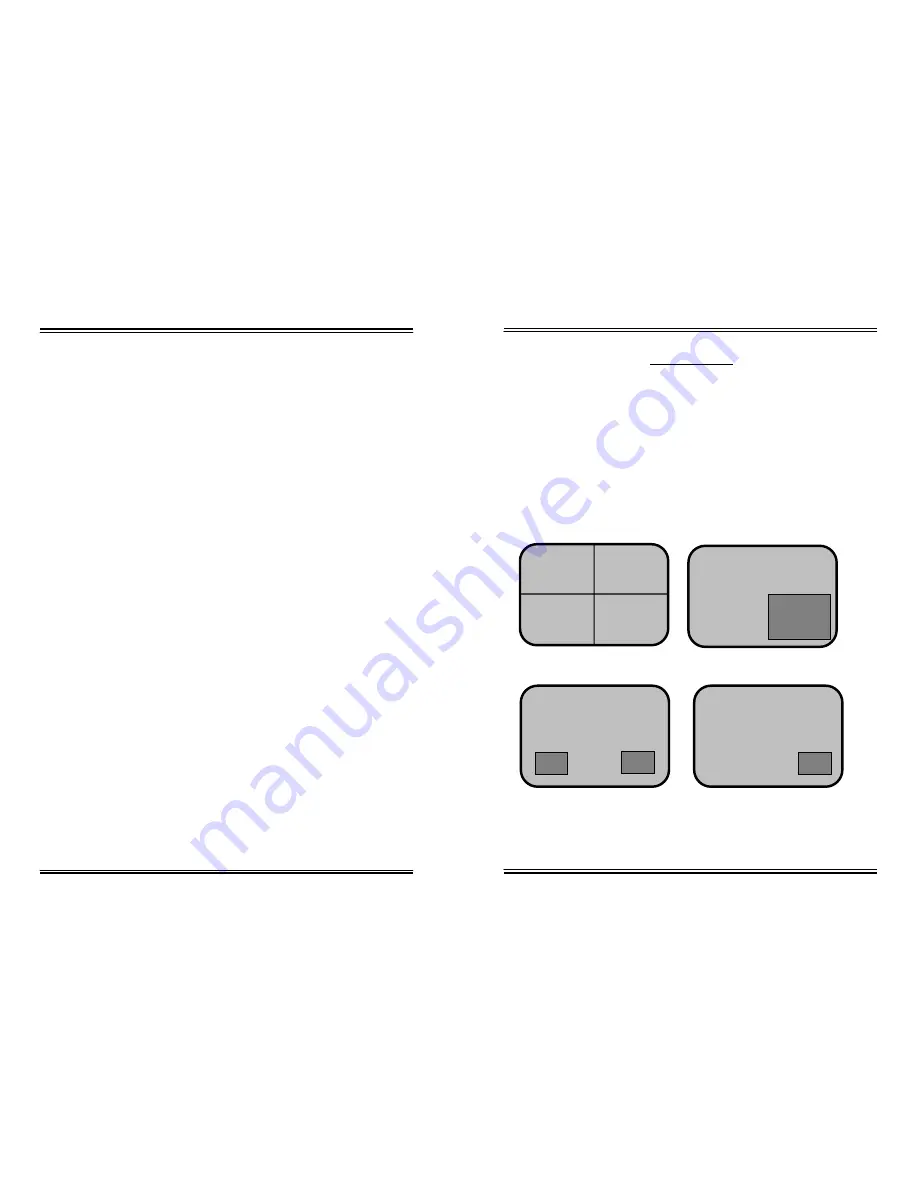
5-1    Change Display Mode 

There are 6 Different display mode styles as shown below. And they 

are selected by the MODE key or the QUAD key or the AUTO key or 

CHANNEL keys. When system is reset or power is turned on system 

is initialized to the QUAD mode. 


C 1                                    C 2 

C 3                                    C 4 

01/01/2002 00:00:00

QUAD Mode 

01/01/2002    00:00:00 

  C 1

1 Picture In Picture Mode (1PIP) 

01/01/2002 00:00:00 

    C 1

        C3

2 Picture In Picture Mode (2PIP) 

        C 2

          C 2

01/01/2002 00:00:00 

  C 1

Sequence Picture In Picture Mode 

        C 2 

PAGE A

12 

Содержание 8-Channel Quad Splitter JV-TV5020

Страница 1: ...CUSTOMER SERVICE INFORMATION JWIN New York Office 51 41 59th Pl Woodside NY 11377 USA Toll Free Number 1 866 807 JWIN E mail custservice jwin com JV TV5020 USER S MANUAL 8 CHANNEL QUAD SPLITTER...

Страница 2: ...les MPORTANT SAFETY INSTRUCTIONS This video monitor equipment is provided with a polarized alternating current line plug a plug having one blade wider than the other This plug will fit into the power...

Страница 3: ...S 2 SECTION 2 3 CONNECTIONS 3 4 INSTALLATION 5 4 1 Basic System Installation 5 4 2 Installation with a VCR or Time Lapse Recorder 6 SECTION 3 5 OPERATION 8 5 1 Change Display Mode 8 5 2 QUAD Mode Oper...

Страница 4: ...z Freeze capability can freeze a picture Program selectable border line 5 6 Recording and Playback There are two video output ports on the rear of the splitter One of them is MON port which is for ou...

Страница 5: ...SPECIAL Menu Press the MODE MENU button again the following menu screen will be displayed Fig 9 Page 4 Menu a This function is to Loading for INITIAL data N Disable INITIAL data loading Y Enable INIT...

Страница 6: ...tton shortly in Quad mode the screen moves to anther Quad mode on different page 6 If you press channel button long the screen became freeze frame Place the green color character to the DWELL TIME usi...

Страница 7: ...d display from 1 to 30 seconds When it is set to be zero OFF the corresponding camera will be skipped in the Automatic sequential switching mode Buttons on the Front View POWER button is to turn the s...

Страница 8: ...button again to stop flashing the DATE Use the and the buttons to shift the cursor to the next digit Press ENTER button at the EXIT location to exit from this mode the splitter will display the quadra...

Страница 9: ...NTER button the EXIT location to exit in this mode the splitter will display the quadrant pictures b Set the DATE Place the cursor to the date digit using the and the buttons and press the ENTER butto...

Страница 10: ...e recording process using the VCR manufacturer s instructions CAUTION Do not use staples to support the cables or wires it might be damaged All connections should be properly connected and insulated t...

Страница 11: ...e and a camera title for each camera etc on the monitor To enter the MENU setup mode press the MODE MENU button on the front panel of the monitor until the MENU displays on it 2 seconds The page 1 GEN...

Страница 12: ...Quad mode to the monitor when the power is first applied to it If the monitor is not displaying quadrant pictures press the QUAD button so that the unit returns to the QUAD mode Press the CH1 ch5 CH2...

Отзывы: