


6
BASICS
BASICS
Component names and functions
V
Caution on the volume setting:
Digital devices produce very little noise compared
with other sources. Lower the volume before
playing these digital sources to avoid damaging
the speakers by sudden increase of the output
level.
DDX7050BT
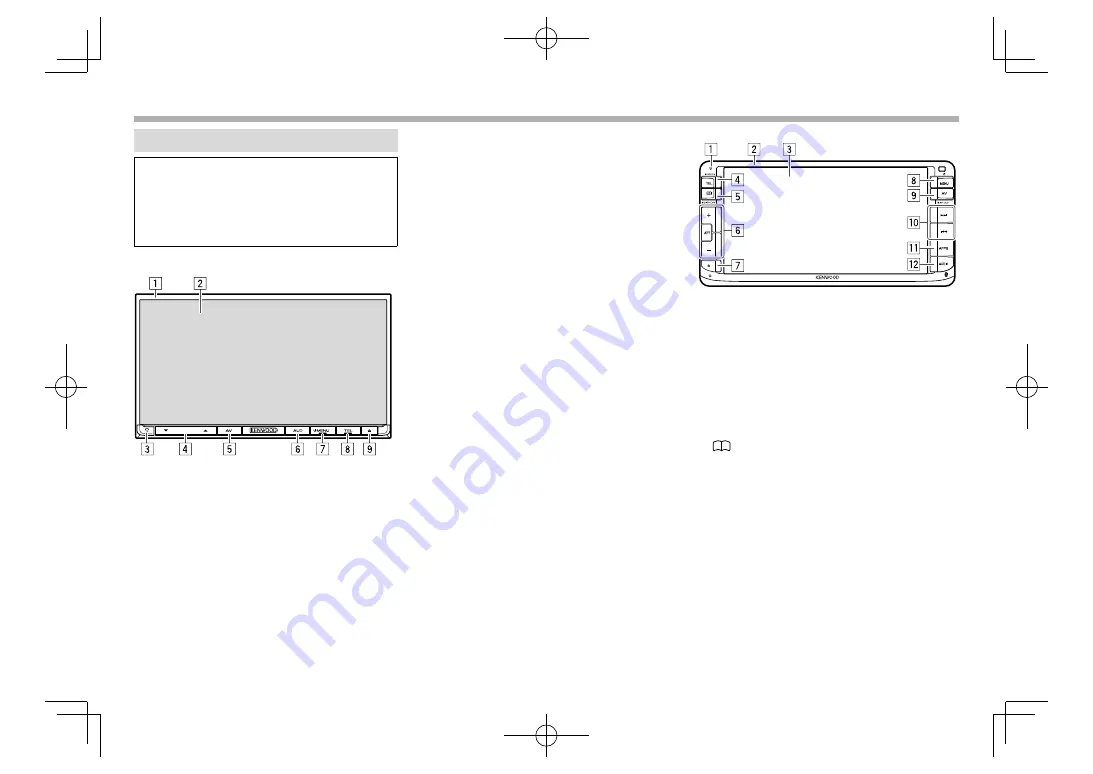
1
Monitor panel*
2
Screen (touch panel)
3
Reset button/Power indicator/Security indicator
• Resets the unit. (Page 3)
• Lights up while the unit is turned on.
• Flashes when the security function is activated.
(Page 5)
4
VOLUME
K
/
J
button
Adjusts the audio volume. (Page 8)
5
AV/AV OUT button
• Displays the current source screen. (Press)
• The function of the button when held varies
depending on the
<AV Key Long Press>
setting. (Page 50)
6
AUD/CAMERA button
• Displays the
<Equalizer>
screen. (Press)
(Page 41)
• The function of the button when held varies
depending on the
<AUD Key Long Press>
setting. (Page 50)
7
B
MENU button
• Displays the
<TOP MENU>
screen. (Press)
(Page 9)
• Turns on the power. (Press) (Page 8)
• Turns off the power. (Hold) (Page 8)
8
TEL/VOICE button
• Displays the phone control screen. (Press)
(Page 35)
• Activates the voice dialing. (Hold) (Page 36)
9
M
(Eject) button
• Ejects the disc. (Tilts the monitor panel fully.)
(Page
12)
• Opens/closes the monitor panel. (Page
12)
*
You can change the color of the buttons on the monitor panel.
(Page 45)
DDX750WBT
1
Power indicator/Security indicator
• Lights up while the unit is turned on.
• Flashes when the security function is activated.
(Page 5)
2
Monitor panel*
3
Screen (touch panel)
4
TEL/VOICE button
• Displays the phone control screen. (Press)
(Page 35)
• Activates the voice dialing. (Hold) (Page 36)
5
/ DISP OFF button
• Displays the phone book. (Press) (Page
35)
• The function of the button when held varies
depending on the
<P.BOOK Key Long Press>
setting. (Page 50)
6
/
−
button
Adjusts the audio volume. (Page 8)
ATT button
Attenuates the sound. (Page 8)
DDX̲Mid̲K.indb 6
DDX̲Mid̲K.indb 6
2015/12/04 15:49
2015/12/04 15:49


