


4
INITIAL SETTINGS
INITIAL SETTINGS
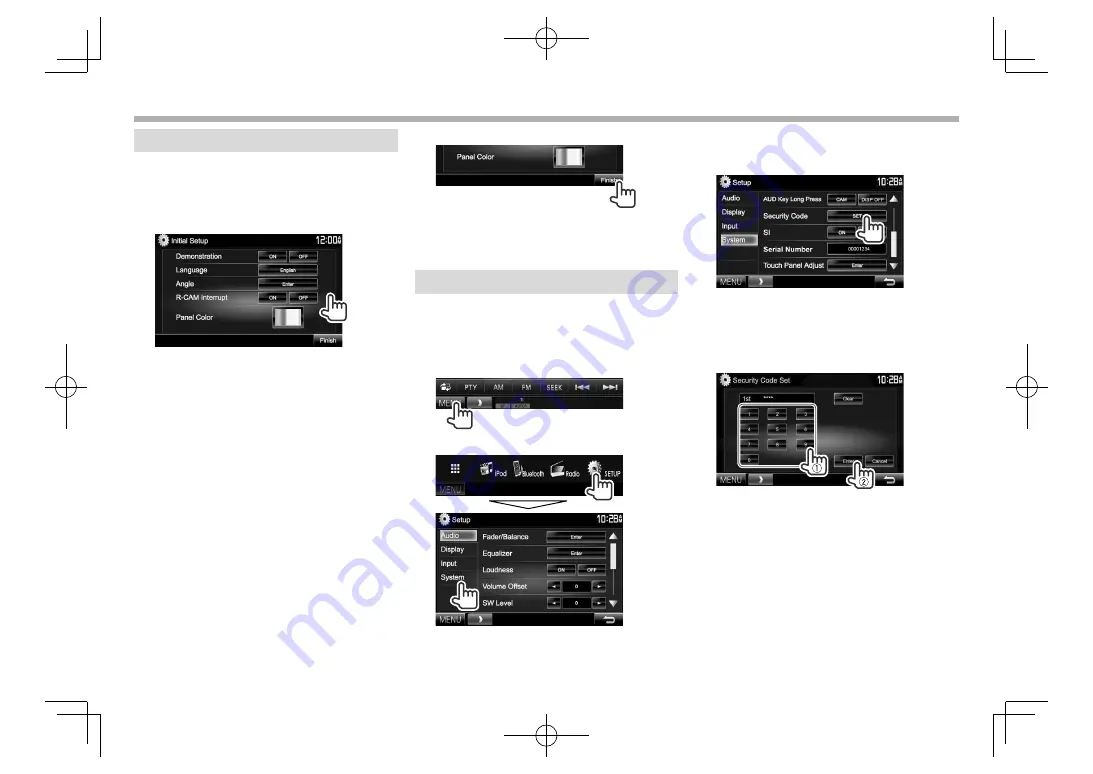
Initial setup
When you power on the unit for the first time or
reset the unit, the initial setting screen appears.
• You can also change the settings on the
<Setup>
screen. (Page
48)
1
Perform the initial settings.
<Demonstration>
(Page
49)
Activate or deactivate the
display demonstration.
<Language>
(Page
50)
Select the text language
used for on-screen
information.
• Set
<GUI Language>
to display the operation
buttons and menu items
in the selected language
(
[Local]
) or English).
<Angle>*
(Page
8)
Adjust the panel angle.
<R-CAM
Interrupt>
(Page
27)
Select
[ON]
when
connecting the rear view
camera.
<Panel Color>
(Page
45)
Select the color of the
buttons on the monitor
panel.
2
Finish the procedure.
The
<TOP MENU>
screen is displayed.
*
Only for DDX7050BT/DDX750WBT.
Setting the security function
❏
Registering the security code
You can set a security code to protect your receiver
system against theft.
1
Display the
<TOP MENU>
screen.
On the source control screen:
2
Display the
<System>
setting screen.
3
Display the
<Security Code Set>
screen.
• Press [
K
] repeatedly to change the page on
the
<System>
menu screen.
• To clear the registered security code, perform
steps
1
and
2
, then press
[CLR]
in
<Security
Code>
.
4
Enter a four-digit number (
1
), then
confirm the entry (
2
).
• Press
[Clear]
to delete the last entry.
• Press
[Cancel]
to cancel the setting.
5
Repeat step
4
to confirm your security
code.
Now, your security code is registered.
• When the unit is being reset or disconnected from
the battery, you are required to enter the security
code. Enter the correct security code, then press
[Enter]
.
DDX̲Mid̲K.indb 4
DDX̲Mid̲K.indb 4
2015/12/04 15:49
2015/12/04 15:49


