background image

6

XL-PM25BK / LVT0997-001A / J, C

C

s

k

ay

dly

r.

in

ve

HOLD

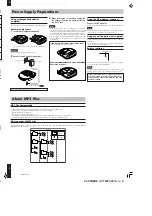
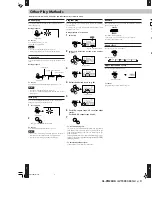
This function minimizes sound interruption caused by vibrations,
by utilizing audio data that has been stored in the memory ahead
of the following time:

For Audio CD: Up to 45 seconds worth (Anti-Shock Protection

on/off selectable)

For MP3:

Up to 120 seconds worth at 128 kbps (Anti-Shock
Protection is fixed to on.)

Normally,  “ASP” and the A.S.P. progress meters are displayed
and the Anti-Shock Protection is in effect.

When the disc is played, as the audio data gradually stored in the
memory, the A.S.P. progress meter progresses.

To cancel (Audio CD only)

Press the A.S.P./T.SEARCH button in stop mode or during playback.
“ASP OFF” appears on the display.

To activate again (Audio CD only)

Press the A.S.P./T.SEARCH button.

Notes:

• The Anti-Shock Protection can be enabled or disabled during

play, and this may cause a slight interruption in the sound be-
cause the disc’s rotational speed changes.

• Turning off the Anti-Shock Protection will save battery life

more or less.

Anti-Shock Protection

[Fully stored]

A.S.P. indicator

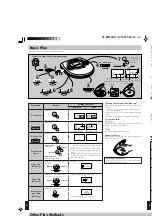
Using the Remote Control  

Preparation:

Release the remote control from the Hold mode.

HOLD

How to use the remote control

Preventing Accidental Operation (Hold mode)

The HOLD switch on the unit/remote control is prepared to pre-
vent an accidental operation by an unexpected button press.

Hold mode prevents the following:

• Powering on the unit accidentally (which can cause the batter-

ies to go dead).

• Play being cut off unexpectedly.
• Unexpected operation during play. (Set the HOLD switch to

the ON position after you start playing disc.)

To set the unit/remote control in Hold mode

• Set the HOLD switch on the unit/remote control to the ON po-

sition. The all buttons on the unit/remote control are disabled.

“HOLD” indication

When the unit is in Hold mode, “HOLD” will be displayed if a
button on the unit is pressed.

To release the Hold mode

Set the HOLD switch to OFF position.

Notes:

• Before turning on the unit, be sure that HOLD is OFF.

Otherwise, you cannot turn on the unit.

• The HOLD switch on the unit is effective for the unit only.

While, that on the remote control is effective for the remote
control only.

OFF

ON

HOLD

To start play

To stop play

To turn off the unit

Fast forward/reverse

To adjust the volume

Reverse

Forward

Skip function

Press during play.

Search function

Keep depressed during play.

When adjusting the volume using the remote control, set
the volume control on the unit to an appropriate position.

Press during off or stop mode.

Press during play.

Press during stop mode.

You can use an audio system by connecting it to the unit with a stereo connection cable (not sup-
plied).

• Connect the cable to the amplifier after turning off its power.
• Do not connect the cable to the PHONO jacks on the amplifier.
• Obtain the optional connecting cable if the amplifier comes with mini-phone jacks.
• Adjust the volume level on the amplifier.

Note:

To obtain original sound, turn HBS to OFF. Also, set the sound effect to “FLAT”. (See page 7)

Using with an audio system

Left side panel of the unit

Stereo connection cable

(not supplied)

(White)

(Red)

Amplifier

LINE OUT jack

Содержание XL-PM25

Страница 1: ...ill not occur in a particular installation If this equipment does cause harmful interference to radio or tele vision reception which can be determined by turning the equipment off and on the user is encouraged to try to cor rect the interference by one of the following measures Reorient or relocate the receiving antenna Increase the separation between the equipment and re ceiver Connect the equipm...

Страница 2: ...rminals of rechargeable batteries since this may cause short circuiting which is dangerous Do not peel off the plastic covering on the rechargeable batter ies Short circuiting may occur which is dangerous Dry cell batteries rechargeable batteries To prevent damage to the batteries and electrolyte leakage heed the following points Align the ª and polarities properly when inserting the bat teries Do...

Страница 3: ... the player Troubleshooting If the remedies indicated in the chart do not solve the problem refer to the directory of Authorized Service Centers enclosed with this unit to locate a convenient service center or consult your dealer Unit Wipe the unit with a soft cloth Remove stubborn dirt using a cloth which has been dipped in water or soapy water and wrung out and then wipe dry If you intend to use...

Страница 4: ... the unit again 3 When recharging is complete unplug the AC adaptor from the AC power outlet and the DC IN jack Notes Rechargeable batteries have a service life of approximately 300 charge discharge cycles If the operating time on one full charge becomes noticeably shorter than it used to be the batteries have reached the end of their service life and should be replaced You can recharge the batter...

Страница 5: ...in stop mode for 30 seconds the unit turns itself off automatically to save power Operation To pause play To stop play To turn off the unit Fast forward reverse Group skip MP3 only Track skip MP3 only Showing the group title MP3 only Display reference Skip function During play To skip back to the previous track quickly press 4 twice During Program play the button is used to fast for ward or back t...

Страница 6: ...ad Play being cut off unexpectedly Unexpected operation during play Set the HOLD switch to the ON position after you start playing disc To set the unit remote control in Hold mode Set the HOLD switch on the unit remote control to the ON po sition The all buttons on the unit remote control are disabled HOLD indication When the unit is in Hold mode HOLD will be displayed if a button on the unit is p...

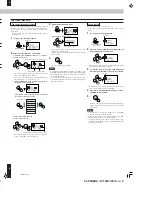
Страница 7: ...d order including the same tracks For Audio CD go to step 3 Though the display differs a little operation is the same During playback or in stop mode 1 MP3 only PROGRAM 2 MP3 only Select the desired group number e g 02 3 PROGRAM 4 Select the desired track e g 03 5 PROGRAM 6 For MP3 repeat steps 2 5 to select other tracks For Audio CD repeat steps 4 and 5 7 To confirm the program In stop mode press...

Страница 8: ...ou want is displayed on the first line 5 Playback starts from the selected track of the selected group When playback starts the Group search mode is automati cally released Notes To exit the Group search mode press 7 or A S P T SEARCH at any time to return to the normal display When you skip the above steps 3 and 4 playback starts from the first track of the group you selected in step 2 If you lea...

Отзывы: