background image

Page 10

XL-MV33BK/XL-MV55GD

LET0080-001A

BASIC OPERATIONS

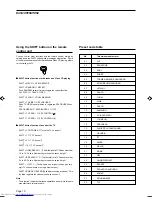
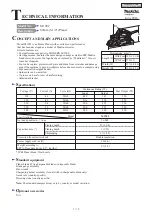
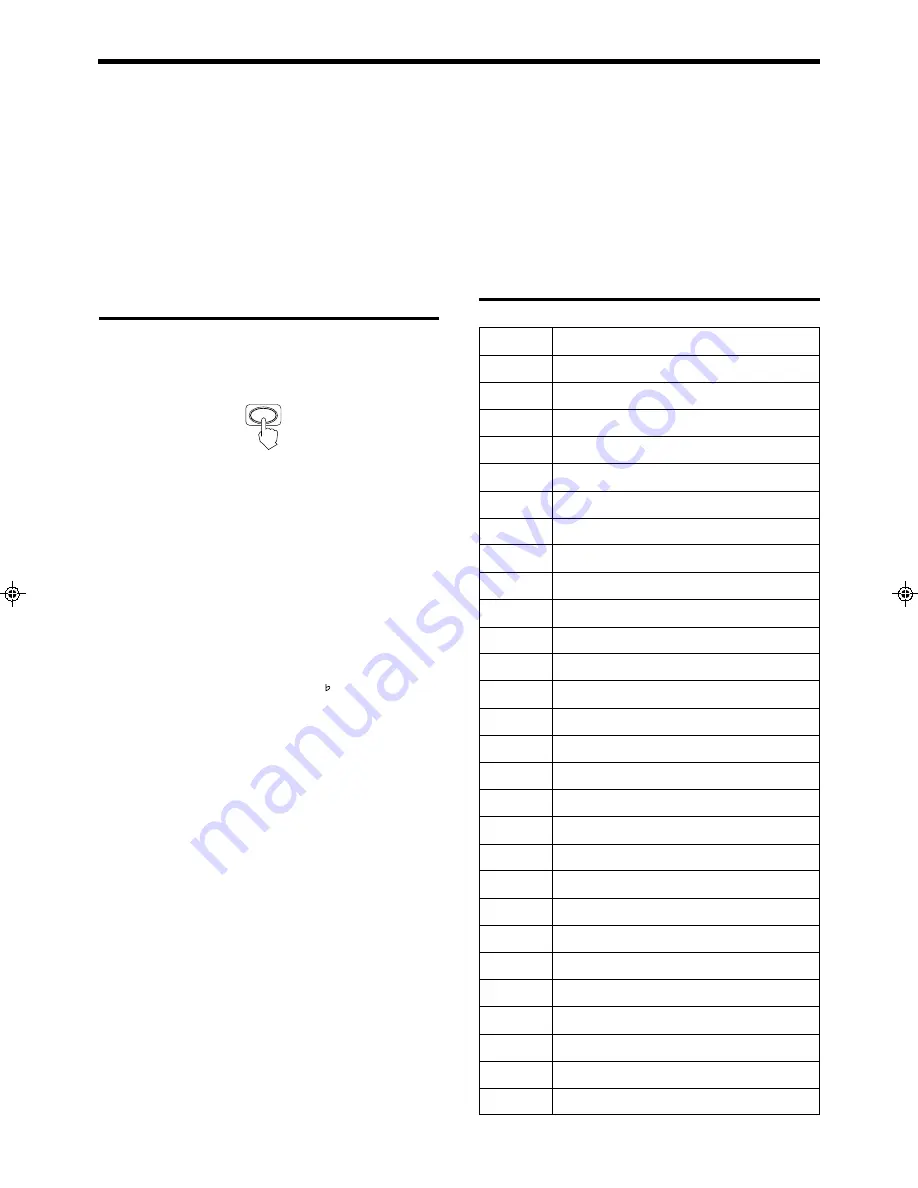
Preset code table

No.

01

02

03

04

05

06

07

08

09

10

11

12

13

14

15

16

17

18

19

20

21

22

23

24

25

26

27

28

Television manufacturer

JVC

PANASONIC

SONY

SHARP

TOSHIBA/BEIJING/CHANGHONG

MITSUBISHI/CHANGHONG

HITACHI

SANYO

FUNAI

AIWA

DAEOO

SAMSUNG

LG (GOLDSTAR)

THOMSON

FERGUSON

PHILIPS/TCL/CHANGHONG

GRUNDIG

ITT

MIVER

FINLUX

NOKIA

NEC

JINXING/PEONY1

PEONY2

PEONY3/CHANGHONG

KONKA

PEIJIN/NOBLEX

TCL

Using the SHIFT button on the remote
control unit

You can control other functions with the remote control, simply by
holding down the SHIFT button while pressing another button.  Some
of these functions are useful for Karaoke and Video CD playing, others
for controlling the TV.

7

7

7

7

7

SHIFT button functions for Karaoke and Video CD playing

SHIFT + MPX 

 VOCAL REPLACE

SHIFT + RANDOM 

 REPEAT

Push RANDOM several times to toggle the repeat function:
ALL DISC 

 1 TRACK 

 OFF

SHIFT + SLOW 

 VOCAL MASKING

SHIFT + TV/VIDEO 

 SPATIALIZER

Push TV/VIDEO several times to toggle the SPATIALIZER func-
tion:
SPATIALIZER H 

 SPATIALIZER L 

 OFF

SHIFT + TV PROG – 

 KEY CONTROL ( )

SHIFT + TV PROG + 

 KEY CONTROL (#)

7

7

7

7

7

SHIFT button functions to control the TV

SHIFT + VCD POWER 

 Turns the TV on and off

SHIFT + 1 

 TV Channel 1

SHIFT + 2 

 TV Channel 2

SHIFT + 10 

 TV Channel 0*

SHIFT + ON SCREEN 

 1 - (The first digit of a TV Channel number

10 to 19.  Push a Number key to insert the second digit.)*

SHIFT + B.SEARCH 

 2 - (The first digit of a TV Channel number

20 to 29.  Push a Number key to insert the second digit.)*

SHIFT +  +10 

 -/- - (To change a one - digit or to change a two -

digit TV channel number, using a Number key.)*

SHIFT + B.MARK 

 ENTER (Push after choosing a channel.  This

function registers the channel you have chosen.)*

Note

The asterisk * indicates that these operations do not work for some
manufacturers’ television sets.

SHIFT

XL-MV33BK/XL-MV55GD

LET0080-001A

 XL-MV33BK/55GD Body-1

97.5.27, 11:34 AM

10

Содержание XL-MV33BK

Страница 1: ...ON SCREEN PROGRAM CANCEL B MARK B SEARCH TV VIDEO SPATIALIZER TV VOL b TV VOL SHIFT STOP TV PROG TV PROG KEY CONTROL MULTI BRAND REMOTE CONTROL RM SXMV55U 1 2 3 4 5 STILL NEXT SELECT PREV RETURN Play Back Control VIDEO CD VERSION 2 0 6 7 8 9 0 1 PROGRAM BCOKMARK B SEARCH 10 DOWN POWER KEY CONTROL STANDBY NORMAL MIN MAX DIGITAL ECHO PHONES KEY CONTROL PBC OFF KARAOKE NORMAL UP XL MV33 VIDEO CD PLAY...

Страница 2: ...afety ground symbol or coloured green or green yellow The wires in the lead on this product are coloured in accordance with the following codes Blue Neutral Brown Live As these colours may not correspond with the coloured markings identifying the terminals in your plug proceed as follows The wire which is coloured blue must be connected to the terminal which is marked with the letter N or coloured...

Страница 3: ...INSIDE THE UNIT 1 CLASSIFICATION LABEL PLACED ON REAR ENCLOSURE CLASS 1 LASER PRODUCT G 2 DANGER Invisible laser radiation when open and interlock failed or defeated AVOID DIRECT EXPOSURE TO BEAM e ADVARSEL Usynlig laser stråling ved åbning når sikkerhedsafbrydere er ude af funktion Undgå udsæt telse for stråling d VARNING Osynlig laser strålning när denna del är öppnad och spärren är urkopplad Be...

Страница 4: ...d the display window of the player and press a button The operating range of the remote control is up to about seven meters in front of the player and within about 30 degrees to each side with nothing between the remote control and the player interrupting the beam path If pressing a button on the remote control does not produce any response check to make sure it is pointed correctly and try again ...

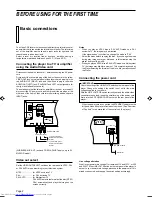
Страница 5: ...ment This symptom is caused by the Player detecting the formula of the disc not by a malfunction of the Player Connecting the power cord IMPORTANT Check the setting of the LINE VOLTS switch on the rear panel of the player Change the setting if the switch is not set for the main voltage supplied to your home With the LINE VOLTAGE switch correctly set and the audio video connectors connected insert ...

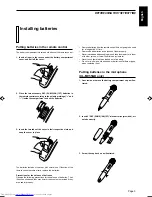
Страница 6: ...atteries last about one year with normal use If function of the remote control become erratic replace the batteries Precautions for the safe use of batteries Observe the following precautions for the safe use of batteries Their life will be shortened they may burst or their contents may leak if they are used improperly 2 Insert 2 R6P SUM 3 AA 15F size batteries provided ori ented correctly ª ª 3 S...

Страница 7: ... knobs located above Center front panel of the Player DISC1 to DISC3 trays Used to load discs To insert remove one or up to three 3 discs press the 0 OPEN CLOSE button located at the right of the tray corresponding to disc number VIDEO INTRO button R Applies to video CDs only The introductory five 5 seconds of tracksonavideoCDaredisplayedonthetelevisionscreeninorder to present the contents of the ...

Страница 8: ...tion inserting your voice in place of the disc vocals RANDOM REPEAT button Changes the disc track program to a random sequence from disc 1 through 3 respectively When pressed after you hold down the SHIFT button repeats a track or inserted discs from 1 to 3 SLOW V MASKING button Starts slow motion playback When pressed after you hold down the SHIFT button activates the voice masking function playi...

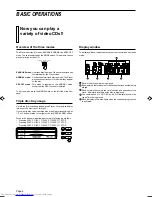
Страница 9: ...AOKE mode One track playing mode Whenever one track has completed play the Player stops NORMAL mode Continuous plural track playing mode The Player plays tracks continuously in the order they appear on the disc PBC OFF mode This mode is identical to the NORMAL mode except that the PBC function is inhibited To set the mode move the MODE switch on the left side of the front panel Triple disc tray us...

Страница 10: ...ray is closed and the disc cannot be removed from the unit CORRECT CD Tray INCORRECT Starting to play disc s Pressthe 3 3 3 3 3SELECT PLAY button ThePlayerstartstoplayfrom the disc indicated in the display window PressoneoftheDISC1through3buttonsandthePlayerplaysthe disc you pressed from the 1st track For individual track selec tion use the number keys or the 4 4 4 4 4 PREV NEXT buttons or SELECT ...

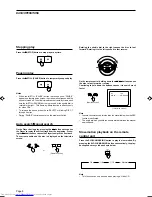
Страница 11: ...elease the pause press the 3 SELECT or blinking DISC 1 through 3 button During PAUSE the time counter on the display will blink STILL STILL Rotating the shuttle dial to the right causes the disc to fast forward Rotating it to the left causes it to fast reverse Remote control NEXT PREV Note In some circumstances this function is not available when the PBC function is activated The angle at which yo...

Страница 12: ... the code number is 09 press Number key 10 then 9 If the code number is 10 press Number key 1 then 10 If it is 20 press Number key 2 then 10 Notes Before the remote control unit leaves the factory the brand code number is set as No 01 JVC Depending on your television set s age and other factors brand code numbers may be different from those shown in the table In such a case try out other codes unt...

Страница 13: ...CE SHIFT RANDOM REPEAT Push RANDOM several times to toggle the repeat function ALL DISC 1 TRACK OFF SHIFT SLOW VOCAL MASKING SHIFT TV VIDEO SPATIALIZER Push TV VIDEO several times to toggle the SPATIALIZER func tion SPATIALIZER H SPATIALIZER L OFF SHIFT TV PROG KEY CONTROL SHIFT TV PROG KEY CONTROL 7 7 7 7 7 SHIFT button functions to control the TV SHIFT VCD POWER Turns the TV on and off SHIFT 1 T...

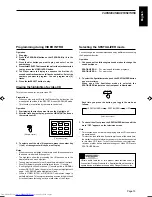
Страница 14: ...canceling the current track canceling the next track to be played To cancel the last programmed track press the CANCEL button on the remote control and the last programmed track will be canceled This can be done while a disc is playing Television screen Remote control Programming the track sequence you want Preparation It is not possible to enter programming mode during play If playing stop the pl...

Страница 15: ... is controlled by the remote control The RANDOM button is effective only in NORMAL or PBC OFF mode This function plays tracks randomly from one disc Operation 1 Stop the Player 2 Press the RANDOM REPEAT button and random playing will start Remote control 3 To cancel random playing after stopping the Player 7 7 7 7 7 STOP button press the RANDOM REPEAT button again Note Random is not effective in p...

Страница 16: ...er the track begins to play press the HIGHLIGHT button on the remote control 3 To select one of the nine 9 segments press the number key 1 to 9 of the segment which you want to play Notes Whenyouchoose ahighlightitwillstart fromfive 5 secondsbefore the shown time below each segment The highlights show the proceeding five 5 seconds up to the displayed time on each highlight The segments are each of...

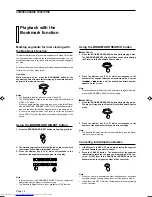
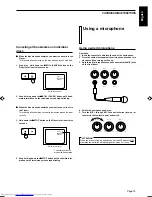
Страница 17: ... the screen with their respective numbers maximum of nine 3 Press the Number key 1 to 9 which corresponds to the number of the segment where you want to start play Note If you plan to use the BOOKMARK DIGEST function register all bookmarks with the player in the same mode The Bookmark Digest function is not available in PBC function 2 Press the Number key 1 to 9 which corresponds to the number of ...

Страница 18: ...idual discs 7 7 7 7 7 When the disc whose bookmarks you want to cancel is in the Player This cancels all bookmarks on the disc whose play you stopped 1 Stop play Hold down the 8 8 8 8 8 STILL PAUSE button on the Player for at least three seconds DISC 3 BOOKMARK CANCEL The total number of discs with bookmarks PROGRAMMED SONGS Television screen STILL DISC 1 BOOKMARK CANCEL PROGRAMMED SONGS Televisio...

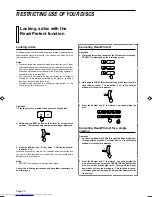
Страница 19: ...adjustment is performed with the MIC 3 knob WIRELESS MIC ANT FM feeder antenna Battery compartment cap FREQ ADJUST screw MIC SELECT switch OFF WIRED WIRE LESS Antenna cable Be sure to set the switch to OFF when you insert the antenna cable 2 Press the WIRELESS MIC button on the front panel Note The maximum operating distance of the wireless microphone is about 10m This may change depending on room...

Страница 20: ... Adjusting echo effect Turn the DIGITAL ECHO knob clockwise level up or counter clockwise level down to adjust the echo effect as desired MIN MAX DIGITAL ECHO DOWN KEY CONTROL NORMAL UP Vocal masking Preparation Use a digital audio CD with vocals in KARAOKE mode Operation 1 While holding down the SHIFT button press the SLOW V MASKING button during play or stop The player plays the music with low l...

Страница 21: ...p a video CD with the PBC function in the specified DISC tray RETURN button Returns to the menu Playing Video CDs with Playback Control function Operation 1 Verify that the Player is in NORMAL mode 2 Press the DISC 1 through 3 or3 3 3 3 3 SELECT button and then the PlayerstartsupthePBCfunction Pb isshownintheDisplay window The main menu PBC and disc track numbers are displayed on the television sc...

Страница 22: ... show the menu screen several times When Next and Prev are shown pressing NEXT or PREV can change the selection menu 4 After playback press RETURN to go back to the previous screen After playback pressing RETURN for 2 seconds or more causes it to go back to the previous menu selection Some discs may return you to the menu screen shown before playback Note When a menu is displayed for a long time a...

Страница 23: ...seconds The indication Loc in the Display window will flicker for a moment Canceling Read Protect for a single viewing Operation 1 As above hold down the PREV Previous button on the Player for at least three seconds The indication Loc in the Display window will flicker for a moment 2 Press the Number key 7 four times You can now play the disc but only until you press the OPEN CLOSE button for that...

Страница 24: ...stort the image on the screen Searching for starting point of music Fast forwarding reversing Stop pause If paused the screen changes to blue in a few minutes This is to prevent burn in of the TV screen Playing digital audio CDs BasicvideoCD playingproceduresapplytothereproductionofsound Note The display has no indicator to show disc type Playing CD Graphics digital audio CDs GRAPHIC DIGITAL AUDIO...

Страница 25: ...rol function CD Graphics Digital Audio CD Total harmonic 0 01 1kHz distortion S N ratio 90 dB Frequency 20Hz 20kHz response Input terminal Microphone 2 mV 9 1 k Output Line output 2 0 Vrms full scale terminal Image output 1 0 Vp p 75 Video composite Echoing Digital echoing Power AC 115 127 220 240V requirements adjustable with the voltage selector 50 60Hz Power XL MV33BK 18 watts consumption XL MV...

Страница 26: ...is wrong Disk is dirty Disc is scratched Disc is warped Power plug is disconnected from the power outlet Microcomputer malfunctions due to lightning or static electricity Remedy Firmly connect the plug to AC outlet Replace the batteries with new ones Use the remote control correctly Firmly connect the cable Set the TV in video mode Load a disc compatible with the player Load a disc Reload the disc...

Страница 27: ...able 10 VARIOUS UNIQUE FUNCTIONS 11 Various functions can enhance your enjoyment 11 Display of operations status 11 Programming the track sequence you want 11 Canceling a programmed track 11 Clearing a program 11 Repeating tracks 12 Randomly playing tracks 12 Playing a multiplex sound CD 12 Viewing the VIDEO INTRO of a video CD 12 Programming during VIDEO INTRO 13 Viewing the highlights of a video...

Страница 28: ...ons not applicable for Europe U S A Canada Australia and U K IMPORTANT BEFORE PLUGGING IN check that your AC power line voltage corresponds with the position of the voltage selector switch provided on the outside of this equipment If different reset the voltage selector switch to prevent damage or risk of fire electric shock ...

Отзывы: