JVC LYT1642-006A Скачать руководство пользователя страница 9

— 9 —

Master Page: Left

Connect the USB cable to copy still image 
files in a memory card to the PC.

1

To assure safety, make sure all 
units are turned off before 
making any connections.

2

Use the USB cable to connect 
the camcorder to the PC.

NOTES:

It is recommended to use the AC 
Adapter as the power supply instead 
of the battery pack.

When the USB cable is connected, 
turning on or off the camcorder or 
switching the VIDEO/MEMORY (DSC) 
mode on the camcorder causes 
malfunctions of the PC.

If you connect the camcorder to the PC 
through a USB hub, compatibility issues 
between the hub and the PC may result 
in instability in the operation of the PC. 
If this happens, connect the camcorder 
directly to the PC, not through the hub.

Do not use an extension USB cable.

1

Make sure that there is a 
memory card in the camcorder.

2

Set the camcorder’s VIDEO/
MEMORY Switch to 
“MEMORY”.

3

Set the camcorder’s Power 
Switch to “PLAY” while 
pressing down the Lock Button 
located on the switch.

4

Connect the camcorder to the 
PC with a USB cable. (

pg. 9)

On the camcorder’s LCD monitor 
[USB] appears. The memory card 
icon appears on the desktop.

Depending on the type of OS used, 
iPhoto starts if the memory card 
contains a DCIM folder.
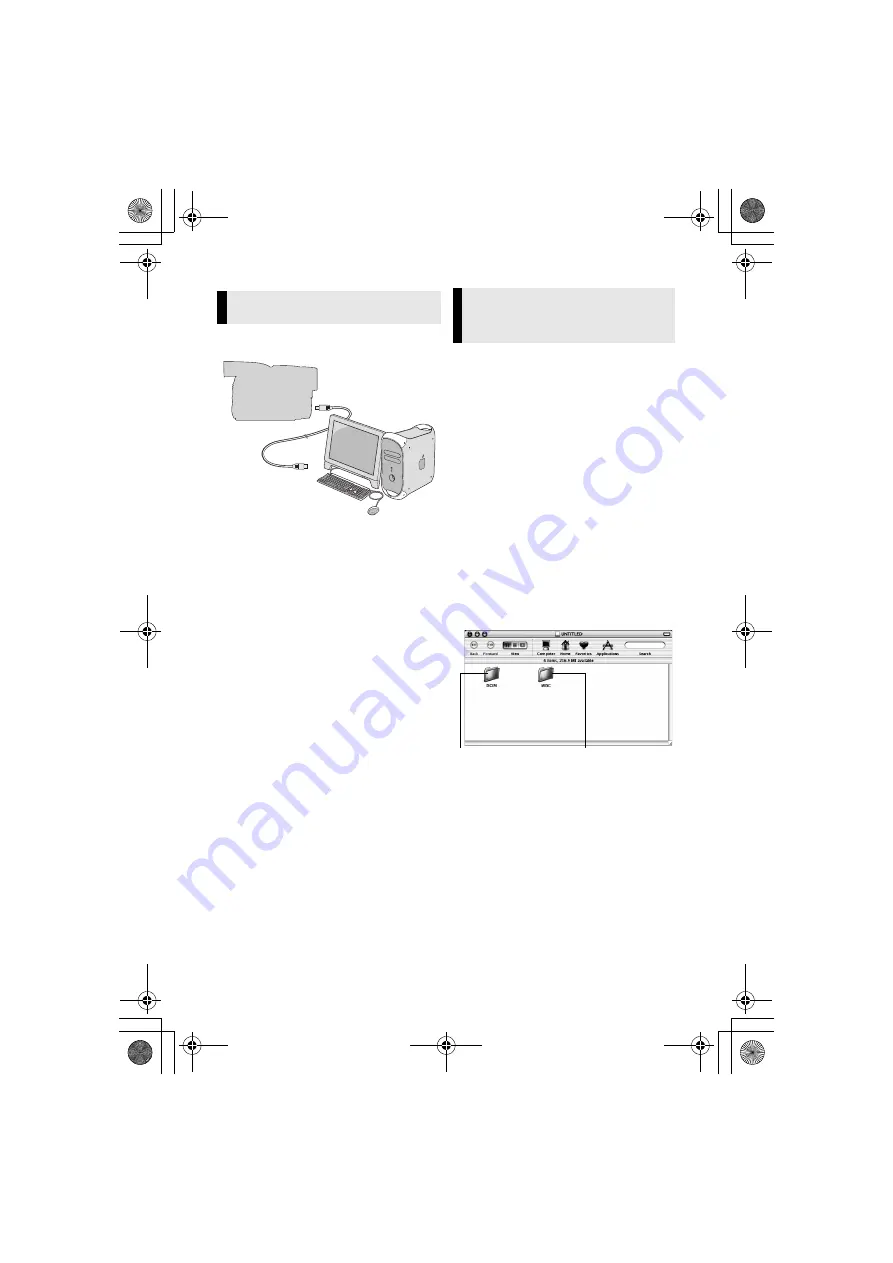
5

Double-click the memory card 
icon on the desktop.

The folders in the memory card 
appear.

Different file types are stored in 
different folders.

[DCIM]

: Contains folders with still 

images (extension “.jpg”)

[MISC]

: Contains folders with DPOF 

setting data

Connections (Macintosh)

Camcorder

To USB 
Connector

To USB

Connector

USB Cable

PC

Viewing the Contents of a 
Memory Card (Macintosh)

Still images

DPOF Setting data

CONTINUED ON NEXT PAGE

M7D1.book  Page 9  Monday, February 5, 2007  4:49 PM

Содержание LYT1642-006A

Страница 1: ... Contents of a Memory Card Windows 6 Copying Files to the PC Windows 7 Playing Back Files on the PC Windows 8 Disconnecting the USB cable Windows 8 Connections Macintosh 9 Viewing the Contents of a Memory Card Macintosh 9 Copying Files to the PC Macintosh 10 Playing Back Files on the PC Macintosh 10 Disconnecting the USB cable Macintosh 11 User s Guide Help Readme Windows 11 Contents M7D1 book Pag...

Страница 2: ...gram 4 LIMITED WARRANTY JVC warrants that any media in which the Program is embodied are free from any defects in materials and workmanship for a period of thirty 30 days from the date of Your purchasing any our products accompanying the Program JVC s entire liability and your exclusive remedy in connection with the Program shall be replacement of such defective media EXCEPT FOR THE EXPRESS WARRAN...

Страница 3: ...ve of JVC 2 If any part of this Agreement is held invalid by or in conflict with any law having jurisdiction over this Agreement the remaining provisions will remain in full force and effect 3 This Agreement shall be governed by and interpreted under the laws of Japan The Tokyo District Court has jurisdiction over all disputes which may arise with respect to the execution interpretation and perfor...

Страница 4: ...llaneous Internet Explorer 5 5 or later 䡲 Macintosh The following requirements must be satisfied to connect a camcorder to a PC Hardware iMac iBook Power Mac G4 or G5 PowerBook G3 or G4 eMac Mac Mini equipped with a USB connector OS Mac OS X 10 2 8 10 3 1 to 10 3 9 10 4 2 to 10 4 7 RAM At least 128 MB The system requirements information above is not a guarantee that the provided software will work...

Страница 5: ...ears Click Yes Then Choose Destination Location screen appears Click Next Then Select Program Folder screen appears Click Next Setup Status screen appears Wait for a moment until the installation is finished When the installation is finished Digital Photo Navigator Setup screen appears and asks you if you want to create the icon on the desktop If you need it click Yes If not click No NOTE If you p...

Страница 6: ...able 1 Make sure that there is a memory card in the camcorder 2 Set the camcorder s VIDEO MEMORY Switch to MEMORY 3 Set the camcorder s Power Switch to PLAY while pressing down the Lock Button located on the switch The camcorder turns on 4 Connect the camcorder to the PC with a USB cable 墌 pg 6 On the camcorder s LCD monitor USB appears 5 When using Windows XP The Removable Disk window appears on ...

Страница 7: ... the memory card to the PC without doing so The file extension may not appear depending on the FOLDER option setting of Windows Still image files that are stored in a memory card can be copied to the PC and played back on the PC 1 Perform the procedure in Viewing the Contents of a Memory Card Windows 墌 pg 6 The folders in the memory card appear 2 Create a new folder enter the folder name and then ...

Страница 8: ...ug or Eject Hardware icon in the status bar The Safely Remove Hardware or Unplug or Eject Hardware dialog box appears Windows XP If not wait a while then go to step 5 3 Select USB Mass Storage Device or USB Disk and then click Stop The Stop a Hardware device dialog box appears 4 Click OK Windows 2000 If a message indicating that the device can be safely removed appears click OK and then click Clos...

Страница 9: ...tension USB cable 1 Make sure that there is a memory card in the camcorder 2 Set the camcorder s VIDEO MEMORY Switch to MEMORY 3 Set the camcorder s Power Switch to PLAY while pressing down the Lock Button located on the switch 4 Connect the camcorder to the PC with a USB cable 墌 pg 9 On the camcorder s LCD monitor USB appears The memory card icon appears on the desktop Depending on the type of OS...

Страница 10: ... in a memory card can be copied to the PC and played back on the PC 1 Double click the memory card icon on the desktop The folders in the memory card appear 2 Create a new folder enter the folder name and then double click it 3 Select the folder to be copied and then drag and drop that folder in the destination folder To copy still images Copy the folder within the DCIM folder NOTE Never disconnec...

Страница 11: ...corder turns off This manual only refers to software installation and PC connection For more details of each software refer to its user s guide help Readme 䡲 Digital Photo Navigator The instruction manual is included on the CD ROM in PDF format Right click the CD ROM icon in My Computer then click Open Double click the Docs folder Open the Start pdf file and click the button of the desired languag...

Страница 12: ...Printed in Malaysia 1106YDR YG MD 2006 Victor Company of Japan Limited M7D1 SOFTWARE INSTALLATION AND USB CONNECTION GUIDE EN EN EN EN M7D1 book Page 12 Monday February 5 2007 4 49 PM ...

Отзывы: