manualshive.com logo in svg
background image

ENGLISH

1

IMPORT

ANT!

SETTINGS

TROUBLE?

USE

PREP

ARE

WIDE LCD PANEL TV

INSTRUCTIONS

LT-52GZ79

Contents

GGT0278-001A-H

First things first!

Warning ················································ 2

Getting started

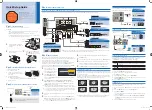
Set up and connections ······················· 3

Connecting external devices ················ 5

Remote control buttons and functions ··· 6

Operate JVC recorders and other 

devices ················································· 7

Initial settings ······································· 8

Editing channels ··································· 9

· Registering channels

Let’s try it out

Viewing teletext ·································· 10

Watching videos / DVDs ···················· 11

Try the advanced features

Useful functions ································· 12

· Take a snapshot

· View and search in multi-picture mode

· “Timer” / “Channel Guard”

Just the way you like it

Customising your TV ·························· 16

Advanced picture adjustment ············· 18

· Reduce noise / Watch a more natural  

  picture

· Set the aspect ratio, etc.

When you have trouble

Troubleshooting ································· 19

Technical information ························· 21

“CH/CC” List ······································· 23

Specifications ····································· 24

Содержание LT-52GZ79

Страница 1: ...ices 7 Initial settings 8 Editing channels 9 Registering channels Let s try it out Viewing teletext 10 Watching videos DVDs 11 Try the advanced features Useful functions 12 Take a snapshot View and search in multi picture mode Timer Channel Guard Just the way you like it Customising your TV 16 Advanced picture adjustment 18 Reduce noise Watch a more natural picture Set the aspect ratio etc When yo...

Страница 2: ... cut or damage the power cord If the AC plug is not the right shape or the power cord is not long enough use an appropriate plug adapter or extension cable Consult your retailer When attaching the TV to the wall use the optional JVC wall mounting unit Consult a qualified technician See the included manual on mounting procedures JVC assumes no responsibility for damage due to improper mounting Unplu...

Страница 3: ...on IIIumination P 17 Tidying the cables 200mm 50mm 150mm 150mm 50mm Power requirements Connect the power cord only to a 110 240V 50 60Hz AC outlet When attaching the TV to the wall use the optional JVC wall mounting unit Consult a qualified technician See the included manual on mounting procedures JVC assumes no responsibility for damage due to improper mounting 200mm 200mm mount which conforms to ...

Страница 4: ...ries Check accessories For confirming the TV works Insert the batteries WARNING Batteries shall not be exposed to excessive heat such as direct sunshine fire or the like If this symbol is shown it is only valid in the European Union AERIAL VCR DVD Player OR After all the connections have been made insert the plug into an AC outlet Set up and connections continued Connect an aerial and VCR DVD Player...

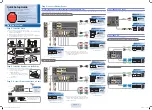
Страница 5: ...omponent signal Switch between video and component signal P 11 HDMI 1 HDMI 2 HDMI 3 Connecting HDMI devices Output Input HDMI signal P 21 HDMI Setting P 17 HDMI 2 and HDMI 3 input does not support analogue sound Use HDMI CEC What is HDMI CEC P 22 Use a High Speed HDMITM Cable High Speed HDMITM Cable are tested to carry an HD signal up to 1080p and higher OUT Video and sound signal of a TV channel ...

Страница 6: ...n Select channel page Select the desired channel number For Hyper Scan Switch between TV VCR DVD AUDIO P 7 Change the aspect ratio P 18 Mute Display on screen menu P 16 Colour buttons Volume Press and hold PR changes without changing the picture Once you stop press or button picture will change to the desired PR For Sub page in dual picture mode Select channel Select the desired channel number For...

Страница 7: ...es VCRs DVD recorders HDD recorders Home theatre system DVD players TV P 6 Code C or 3 Press and hold Press and hold The indicator lights for 3 seconds each time the remote control is operated TV DVD AUDIO VCR DVR Select Display top menu Select a chapter Rewind Playback Fast forward OK Record Stop Pause Playback etc Select Display top menu Select a chapter Rewind Playback Fast forward OK Stop Paus...

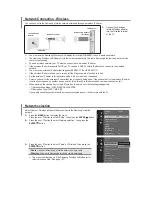
Страница 8: ...appear or if you wish to make changes later Language Teletext language and Auto Program P 17 Exit Begin Select a language Select the teletext language group Check what was registered 1select Shown only when powering on for the first time The power on the unit can also be used Edit channels in Editing channels P 9 1 2 6 2set Confirm The remote control doesn t work Confirm the mode is set to TV For the...

Страница 9: ...evious screen Exit 1 2 3 4 5 6 select select a system If the picture or sound is unnatural 1select 2next 1select 2next Edit 01 AV PR 02 03 04 05 06 07 08 09 CH CC ID CH 21 CH 22 CH 23 CH 24 CH 25 CC 03 CC 04 CC 05 move out move in select 01 AV PR 02 03 04 05 06 07 08 09 CH CC CH 21 CH 22 CH 23 CH 24 CH 25 CC 02 CC 03 CC 04 CC 05 A Edit ID 01 AV PR 02 03 04 05 06 07 08 09 CH CC CH 21 CH 22 CH 23 CH...

Страница 10: ...in two windows to sub page Viewing teletext Move up or down a page Recall your favourite page 2 View sub pages Hold the current page Display hidden information answers to quizzes etc Returns to page 100 or a previously designated page Leave the current page open while you switch to watch TV Release Useful when running a page search 1 Double the size of the displayed text Press the coloured button ...

Страница 11: ...t 2set Reset position blue Set Up Set Up Auto Program Video 3 Setting Video Edit Manual Video 1 Setting Language Video HDMI Setting On PC Position Auto Demonstration Teletext Language Video Display the menu bar and select Set Up 1 2 1select 2next Select Video 1 Setting or Video 3 Setting 1select 3 Change settings 2set 1select Video For normal video signal Component For component video signal If bo...

Страница 12: ...hannel 2watch Not available in PC mode Timer On Timer Sleep Timer MENU Features Timer On Timer PR 03 On Timer 0 0 0 0 Off Sleep Timer 1select On Timer 1select PR Channel Cancel Set the time to 0 in step 2 Remaining time You can confirm the remaining time at step 2 after repeating this process 2set 1SELECT SLEEP TIMER 2set 1select a time in minutes Choose the PR channel that you want to watch when t...

Страница 13: ...nter an ID No a secret number of your choice 2to the next column Features Timer Channel Guard Appearance Blue Back Child Lock Type A On On Auto Shutoff Favourite Setting IIIumination Eco Sensor Off Power Lamp On On On 3set 1select Eco Sensor 2select On Demo or Off For more details What is Eco Sensor P 21 01 AV PR 02 03 04 05 06 07 08 09 CH CC ID CH 21 CH 22 CH 23 CH 24 CH 25 CC 02 CC 03 CC 04 CC 0...

Страница 14: ...lect High Low Mid Off 1 PR 01 2 PR 03 4 PR 07 3 PR 05 Favourite Setting Delete a favourite channel MENU Features Favourite Setting select delete blue Useful functions continued 2 1 1 2 1 select MaxxAudio MaxxStereo MaxxVolume Balance MaxxBass Voice Enhancer Sound On On MaxxTreble Off MaxxAudio is a registered trademark of Waves Audio Ltd in the USA Japan and other countries 2 Adjustments to the fo...

Страница 15: ...preset Picture Mode to your liking Soft Standard Bright Picture Mode Contrast Bright Sharp Colour Back Light Tint White Balance Features Picture Cool Standard select select adjust Back Light Backlight brightness Darker Brighter Contrast Contrast Lower Higher Bright Brightness Darker Brighter Sharp Sharpness Softer Sharper Colour Colour Lighter Deeper Tint Tint for NTSC Reddish Greenish To return t...

Страница 16: ...t Contrast Cool Picture Items Customising your TV Picture Selected menu s title Picture Sound Features Set Up Select a menu 2next 1select 2 Select an item select 3 Picture Mode Standard Adjust Configure 2set 1adjust select 4 The menu disappears after one minute of inactivity To the previous screen Exit RM C1856 1 ...

Страница 17: ...splays a blue screen and mute the sound when the signal is weak or absent P 13 Child Lock Disables the front control buttons of the TV Auto Shutoff Set the power to turn off if no signal is received and no operation is performed for about 15 minutes P 13 Favourite Setting Clear favourite channel settings P 14 Illumination Lights illumination lamp P 3 while the TV is on Off Soft Bright Power Lamp L...

Страница 18: ...or 1080i 1125i or 1080p 1125p signal is received the signal will be displayed as Full or Full Native In PC mode Regular or Full can be selected Or Advanced picture adjustment By default the TV automatically adjusts itself for the best picture To the previous screen Exit The menu disappears after one minute of inactivity Display the menu bar Finish 1 Picture Select Picture 2 2next 1select 2next Pic...

Страница 19: ...rference from signals reflected off mountains or buildings Adjust the direction of your aerial or change to a good quality directional aerial Patterns stripes or noise Is the aerial receiving interference from high voltage power lines or wireless transmitters Consult your retailer Are connected devices too close to the TV Insert the minimum distance between the aerial and the cause of interference ...

Страница 20: ... Back to Off 13 Blue screen appears on the screen 17 17 9 Adjust the MaxxBass and MaxxTreble If receiving a poor signal in Stereo t u switch to Mono Adjust the channel reception using Edit Manual Poor sound If the top of the image is distorted check the video signal quality itself If movement appears unnatural when receiving a signal from a DVD player etc with 625p progressive scanning change the ...

Страница 21: ...1024 x 768 XGA Vertical frequency Hz 60 0 60 0 You can adjust this TV so that the screen automatically adjusts to the optimum contrast of light and dark according to the brightness of your room This function reduces eye strain and the power consumption of this TV Set Eco Sensor Eco Sensor P 13 Make sure not to block the Eco Sensor on front of the TV P 3 Using Demo in Eco Sensor You can display the...

Страница 22: ... LCD 50 or 60 frames per second 1 With the full HD LCD display and Full Native you can enjoy full native HD resolution of 1920 x 1080 It exposes flaws in the video that were hidden when veiwing on Full What is Full Native Full Full Native The illustrations are emphasized to make clear differences between Full and Full Native Depending on the video noise or dark bar may appear on the edge of the scr...

Страница 23: ... S 7 CC 08 S 8 CC 09 S 9 CC 10 S 10 CC 11 S 11 CC 12 S 12 CC 13 S 13 CC 14 A S 14 CC 15 B S 15 CC 16 C S 16 CC 17 D S 17 CC 18 E S 18 CC 19 F S 19 CC 20 G S 20 CC 21 H S 21 CC 22 I S 22 CC 23 J S 23 CC 24 K S 24 CC 25 L S 25 CC 26 M S 26 CC 27 N S 27 CC 28 O S 28 CC 29 P S 29 CC 30 Q S 30 CC 31 R S 31 CC 32 S S 32 CC 33 T S 33 CC 34 U S 34 CC 35 V S 35 CC 36 W S 36 CC 37 W 1 S 37 CC 38 W 2 S 38 CH...

Страница 24: ...5 5 x 345 7 1217 4 x 778 5 x 134 9 Weights without stand 40 kg 34 kg Accessories Remote control unit RM C1856 x 1 AAA R03 dry cell battery x 2 Matching box x 1 Conversion Plug x 1 Terminals Connectors Terminal name Terminal type Signal type IN Signal type OUT Input terminals VIDEO 1 RCA connectors x 6 S VIDEO connector x 1 Composite video S video Analogue component 576i 625i 480i 525i Progressive ...

Отзывы: