background image

EN

 4

Important safety information

WARNINGS

TO REDUCE THE RISK OF BURNS, ELECTRIC SHOCK, FIRE OR INJURY TO PERSONS, PLEASE 

CAREFULLY READ ALL SAFETY INSTRUCTIONS. THE SEPARATE OPERATING MANUAL MAY CONTAIN 

ADDITIONAL SAFETY INSTRUCTIONS.
THIS APPLIANCE IS INTENDED FOR DOMESTIC / HOUSEHOLD USE ONLY AND SHOULD NOT BE 

USED FOR ANY OTHER PURPOSE OR IN ANY OTHER APLICATION, SUCH AS NON DOMESTIC USE 

OR IN A COMMERCIAL ENVIRONMENT.
TO PREVENT ELECTRIC SHOCK, DO NOT REMOVE ANY COVER.

WARNING


To prevent fire, never place any type of candle or open 

flame on the top or near the TV set.

No naked flame sources such as lighted candles should be placed on the apparatus.

Pull the mains plug out of the wall socket and disconnect the external aerial (if any) during thunderstorms.

If anything goes wrong, don’t try and fix it yourself, get a qualified service agent to carry out any repairs or 

maintenance.

Save these instructions for future reference.

We have designed and made this product to meet European safety standards, but as with any electronic 

equipment you must take care.

Here is some good advice to help you stay safe and get the best results...

Install or locate this product only in accordance with the installation instructions found in the instruction book 

supplied separately.

Use this product only for its intended purpose as described in the operating instructions supplied separately.

Children and the infirm must be closely supervised by a competent person. If the product includes small parts, do 

not let children play with it.

Examine the product thoroughly: if it is damaged in any way notify the retail store where you purchased it.

For products supplied with a mains adapter or a detachable mains cord, if the adapter or its leads get damaged, it 

must be replaced with an adapter of the same type and rating.

To save power, disconnect from the mains when you are not using the product unless the function of the product 

requires a continuous power supply.

If the power switch does not disconnect the product from the mains supply, the mains plug shall be the main 

disconnect device and shall be operable at all times.

Avoid harsh conditions such as wet or damp places, rain, high humidity, strong vibration, extremely high or low 

temperatures, strong sunlight and places that are very dusty.

DO NOT install or use this product if you have spilt liquids in it, if it is damaged in any way, if it has been dropped 

or if it does not work normally. Disconnect from the mains and seek expert advice.

DO NOT leave the product unattended while it is operating unless it is designed to do so.

DO NOT store this product outdoors or expose to rain or moisture.

DO NOT use this product near water, for example near a kitchen sink, in a bathroom or near a swimming pool 

unless specified in the operating instructions. 

DO NOT remove outer panels or covers from the product. Repairs must only be undertaken by a qualified service 

person.

DO NOT place the product or mains lead near a hot surface such as a gas or electric cooker or fire.

DO NOT operate the product when room humidity is excessive.

Power supply

Make sure the voltage marked on the rating plate on the rear of the product matches the supply in your area. An 

incorrect supply voltage is dangerous and may result in a fire or damage to the product.

The manufacturer accepts no responsibility for any damage or injury resulting from connecting to any voltage 

other than that specified on the rating plate located on the back of the product. See the instruction book for exact 

voltage range.

Mains plug and mains lead

We have fitted this equipment with a standard mains plug. If you cut off the mains plug or fit a different type, 

destroy the old plug, as it is dangerous to insert it into a live power outlet.

If a fuse is fitted to the plug, remove the fuse before throwing the plug away.

Carefully follow the wiring instructions supplied with a new plug.

Never use a fused mains plug without the fuse cover.

If the mains lead becomes damaged, it must be replaced by the manufacturer, its service agent or similarly 

qualified person with an approved mains lead of the same type and rating to avoid a hazard.

Make sure the mains lead cannot be walked on crushed, chafed or cut and that it is routed in such a way as to 

reduce the risk of a tripping hazard.

Do not let the mains lead hang over edge of a table or counter or come into contact with hot surfaces.

Do not immerse the mains lead or mains plug in water or any other liquid.

The socket-outlet must be installed near the equipment and easily accessible.

J3MW0401A_EN.indd   4

J3MW0401A_EN.indd   4

10/26/12   3:47:49 PM

10/26/12   3:47:49 PM

Содержание LT-29DG43J

Страница 1: ...INSTRUCTIONS LED TV LT 29DG43J J3MW0401A_EN indd 1 J3MW0401A_EN indd 1 10 26 12 3 47 45 PM 10 26 12 3 47 45 PM ...

Страница 2: ...Union This apparatus is in conformance with the valid European directives and standards regarding electromagnetic compatibility and electrical safety European representative of the manufacturer is ORION ELECTRIC POLAND SP ZO O OSTASZEWO 57 87 148 LYSOMICE POLAND GREEN YELLOW Earth ifthereisearthcable FUSE BROWN Live BLUE Neutral MAINS AC OPERATION The wires in the mains lead are coloured in accord...

Страница 3: ... such technology outside of this product is prohibited without a license from Microsoft THIS PRODUCT IS LICENSED UNDER THE MPEG 4 VISUAL PATENT PORTFOLIO LICENSE FOR THE PERSONAL AND NON COMMERCIAL USE OF A CONSUMER FOR i ENCODING VIDEO IN COMPLIANCE WITH THE MPEG 4 VISUAL STANDARD MPEG 4 VIDEO AND OR ii DECODING MPEG 4 VIDEO THAT WAS ENCODED BY A CONSUMER ENGAGED IN A PERSONAL AND NON COMMERCIAL ...

Страница 4: ...ly high or low temperatures strong sunlight and places that are very dusty DO NOT install or use this product if you have spilt liquids in it if it is damaged in any way if it has been dropped or if it does not work normally Disconnect from the mains and seek expert advice DO NOT leave the product unattended while it is operating unless it is designed to do so DO NOT store this product outdoors or...

Страница 5: ...ioration and corrosive leakage invalidating the guarantee To protect the environment use local recycling facilities for disposal Never throw batteries on a fire danger of explosion Wall or stand mounting Products that may be mounted on a stand or wall must be securely attached in accordance with the installation instructions Never fit non approved stands or legs For wall mounting always ensure the...

Страница 6: ...e direction Make sure the locating pegs project through the locating holes 3 Carefully hold the base plate in position and secure it with screws 4x16mm x4 included NOTE To detach the base plate perform these steps in reverse order Dismantling the base For wall mounting the base must be dismantled To do this remove screws J see page 10 from the back Take off the base entirely Fit a VESA 100mm wall ...

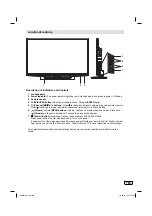
Страница 7: ...MENU buttons Volume In Menu To display the menu screen Press hold Volume the same time about 1 second the menu will be appear 7 Power button Preparation Connect power cable to AC220 240V 50Hz Press power button to enter standby mode or turn on the power If you want to cut the mains power supply please power off with your remote unit first Wait for the red light before you cut the line Failure to d...

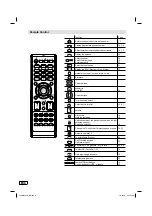
Страница 8: ...rsor buttons Turn the sound on off Select picture format 14 21 Volume Still picture Hold the text page 14 15 Switches between the present channel and the last selected channel Sub page selection 15 Change the TV channel or Teletext page up or down 14 15 Select to operate TV To enter Media Browser 24 Call Play Mode screen Call recording list 25 Recording TV programme EPG record 22 23 Teletext ON Te...

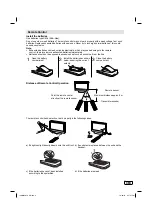
Страница 9: ...ch as sunshine fire or the like 1 Open the battery compartment 2 Install the batteries as shown below ensuring the correct polarity 3 Close the battery compartment The remote control handset will not work properly in the following cases a If bright sunlight directly beams onto the unit front b If an obstacle is placed between the unit and the handset Z Z Z Z Z Z c If the batteries have not been in...

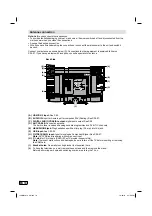
Страница 10: ... COAXIAL output digital audio output See P 26 D ANT CABLE Connect an antenna The built in tuner receives all analogue cable programmes and DVB T C channels E HEADPHONE jack Plug headphones with a mini plug 3 5 mm into this jack F USB input See P 22 25 G Y VIDEO Pb Pr input Input for analogue Component Signal See P 26 27 Note AV CVBS input is sharing with component input H C I slot for CA module CA...

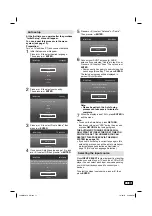
Страница 11: ... if you selected Cable at step 5 now Press or to select Scan Then press or ENTER Some country has query to search mode You can change this setting Then press ENTER The tuning s progress will be displayed in percent for confirmation Initial Setup Channel Scan First please connect antenna Start channel scan now If you skip this step the channel scan could be performed in Menu Scan Skip Scan Note Ple...

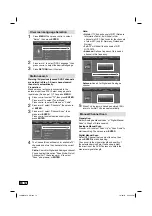
Страница 12: ... You can select this option Scan Mode Quick Advance Full then press or to select Scan and press or ENTER Note Quick If TV find a channel of NIT1 Network Information Table it will find all other channels in NIT1 Don t scan for the channels of other NIT only for Germany Finland and Norway Full TV will find all the channels of NIT1 NIT2 NIT3 Advance Define a frequency Only search channel in this freq...

Страница 13: ... desired option then press or ENTER Channel Scan Channels Picture Audio TV Setup Lock Analogue Manual Scan Digital Manual Scan Channel Skip Channel Sort Description about the each setting option Channel Skip Press or to select the channel that you want to skip then press ENTER The mark will appear Channel Sort Press or to select the channel that you want to move then press ENTER The mark will appe...

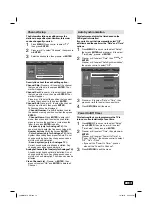
Страница 14: ...icture press FREEZE again Note During still picture mode Aspect Ratio feature is not available If you press PICTURE SIZE still picture mode will be canceled During the playback of a movie file in MEDIA mode still picture function is not available Note During TV or external input mode if there is no signal reception the TV will change to standby after approx 15 minutes Some functions are activated ...

Страница 15: ... shown in the top left of screen Select your page with or Enlargement In order to enlarge the display press Either the upper or lower half of the screen is enlarged Each time you press you switch between the display of the upper or lower half of the screen or the full picture Answering Quiz Questions Some pages contain quiz questions with concealed answers Press in order to show the answers Stereo...

Страница 16: ...p to 4 TV channels on one transmission frequency This is possible through compression in accordance with the MPEG standard which is similar to digital data storage on a DVD The data rate of DVB T is just a lot lower at present the max video bit rate is approx 4Mbps and the max audio bit rate is at 256kbps Visible interference e g blocky picture can result at extremely low data rates despite there ...

Страница 17: ...2 11 08 54 30 04 2012 0 00 1 00 1 3 1 ANTENA 3 2 ANTENA NEOX 3 ANTENA NOVA 4 FRATV1 5 MNO 6 PQR TV ON 0 00 1 00 Mon 30 Apr TP ENTRETENIMIENTO Programa que DIRECTOR TV ON UPA DANCE SHOW 6 EN ANTENA 2 ANTENA NEOX LOS LADRONES VAN A LA OFICINA R 1 Service list Lists all the services that are currently available As you scroll through the service list by pressing P 2 Events list List the events in a gr...

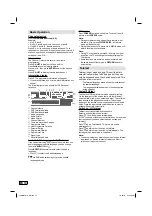
Страница 18: ...o signals from TV broadcast or AV input On Off Equalizer Select the most suitable sound mode according to your watching contents Off Rock Pop Live Dance Techno Classic Soft Stable Sound This will automatically adjust volume so each channel and input has the same average volume level On Off Sound Type You can select your preferred audio with the Type You can set audio output Normal Visually Impaire...

Страница 19: ...age Subtitle Type Select the subtitle type Normal Hearing Impaired Teletext Digital Teletext Language First preferred Videotext language can be set here which is used in case that the currently viewed DVB channel has more than one Videotext Languages If the channel does not have the Videotext language set in Digital Teletext Language the Videotext language is displayed with first receiving languag...

Страница 20: ...ection between the picture format and the resolution received For example the Super Cinemascope format can be received in all resolutions even in the HD resolution1080ix1920 For HDTV reception too an HDTV set may display black bars at the top and bottom 4 3 picture 1 1 on 16 9 screen 4 3 picture zoomed on 16 9 screen Picture size and resolution Best picture quality is achieved when the input signa...

Страница 21: ...ton to set the required picture size for private channels The picture s size does not follow the WSS properly or the size switches unexpectedly with a faulty input from antenna or channel this is not the TV s fault Countermeasure Select a fixed size for those channels manually with the PICTURE SIZE key Do not set the AUTO position Picture format Other formats Press PICTURE SIZE until the desired s...

Страница 22: ...quirements use devices that have their own power supply sources Do not connect this product to a non specified device It may cause damage to the device and TV When recording or setting up a timed recording please check to see if your USB memory or HDD has sufficient available memory If the available memory is insufficient your recording or timed recording may not be executed or may be cut off whil...

Страница 23: ...ew Katy P Start date Start time Stop time Schedule type Repeat type 2 Press to select desired option then press number buttons 0 9 to set date and time Channel number Press or to select channel number and it will show the channel information below Start date Set the start date of record reminder Start time Set the start time of record reminder Stop time Set the stop time of record Schedule type Se...

Страница 24: ...ile Selection Photo C 01 01 text acc Jpeg m4a wma Sort Media Type Thumbnail Size Copy Paste Delete Playback screen Music AAA wma 00 00 30 00 03 55 3 13 Title AAA Artist DDD Album N A Genre N A Year 2xxx Duration 00 03 55 Next BBB 19 1 Press to select the desired media type Photo Music Video or Text at Media Selection and press ENTER File selection window will appear 2 Select folder or file with an...

Страница 25: ...arious playback operation with appropriate Operation menu Select the option by ENTER Pause Play Pause Play the contents Repeat Select the repeat mode Shuffle On Off Play orderly or disorderly Rotate Rotate the picture Duration Display the time for slideshow Zoom If possible enlarge small pictures Effect Select the desired effect option to slideshow Show Info Display the information about the curre...

Страница 26: ...he video signal so it is necessary to connect the external speaker units to output the audio signals Select the HDMI input mode see P 11 Note Please notice the operating manual for the HDMI device to be set up This unit cannot support PC signal from HDMI input Video camera example AV output AV cable not supplied Green Blue Red Yellow White Red Mini pin cable supplied TV Back view TV Side view 2 Co...

Страница 27: ...a SCART player AV cable not supplied To SCART player Mini pin cable supplied Red Blue Green Yellow White Red 4 Connecting to a DVD player or other AV device with Component Video outputs If your DVD player or other device has Component Video output jacks use a suitable set of leads RCA Phono to connect these to the Component Video inputs on this TV via supplied Mini pin cable as shown it can greatl...

Страница 28: ...ical specifications are exceeded While viewing a DVB digital channel there is sound but no picture Some channel offers audio content only It is normal Blocky image or image stops intermittently Check all antenna connections Move the antenna away from areas of possible interference Try using an antenna booster 10 Some digital channels cannot be viewed Contact the service provider to subscribe A cra...

Страница 29: ...ear 1 56 kWh year Poer consumption in standby mode 0 29 W Power consumption in recording standby mode 2 7 9 W Power consumption in recording mode 2 8 9 W Screen resolution 1366 pixel horizontal x 768 pixel vertical Weight 4 7 kg Dimensions 67 W x43 H x17 D cm Surrounding temperature Operation 5 C 40 C Storage 20 C 60 C Operating Humidity Less than 80 RH ACCESSORIES 2 batteries AAA R03 UM 4 Remote ...

Страница 30: ...he University of California All rights reserved Standard C Library Portions of this software are CYGPKG_LIBC_STDIO Copyright 1990 The Regents of the University of California CYGPKG_LIBC_STDLIB Copyright 1990 1992 1993 The Regents of the University of California CYGPKG_LIBC_STRING Copyright 1988 Regents of the University of California CYGPKG_LIBC_TIME Copyright 1999 Kungliga Tekniska Hogskolan Roya...

Страница 31: ...J3MW0401ASH12 11 P 1012STH OR OR J3MW0401A_EN indd 32 J3MW0401A_EN indd 32 10 26 12 3 48 23 PM 10 26 12 3 48 23 PM ...

Отзывы: